yourself carpet cleaning 2

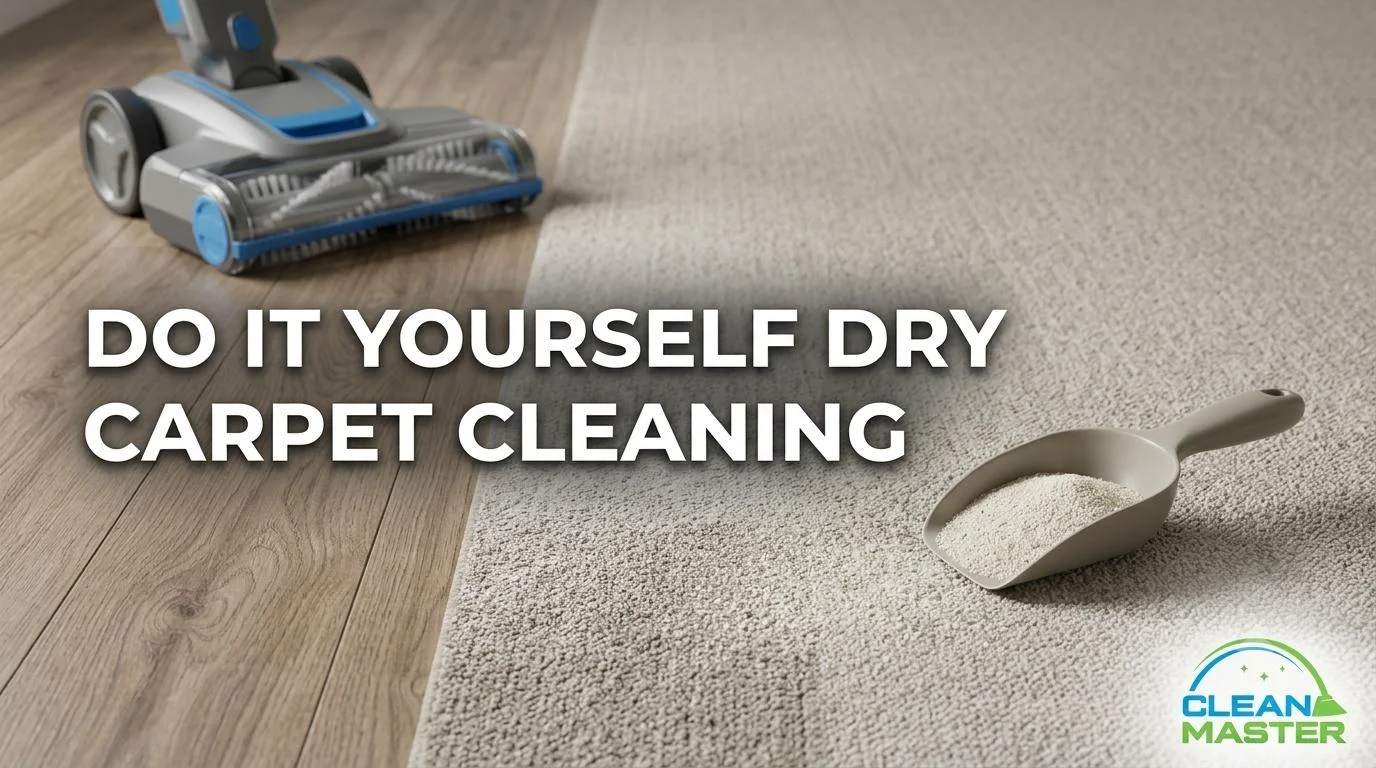
Do It Yourself Dry Carpet Cleaning

Dry carpet cleaning is exactly what it sounds like, cleaning carpet without introducing meaningful moisture, which means no drying time and no waiting before the room is back in use. For the right situations, it’s a genuinely practical maintenance approach that produces real results without the setup and drying time of wet cleaning methods. At Clean Master Carpet Cleaning, we serve the entire DFW area with professional wet cleaning, but we’re also practical about what homeowners can accomplish between professional visits. Here’s the honest guide to DIY dry carpet cleaning: what methods work, how to use them correctly, and where their limits are. When Dry Carpet Cleaning Makes Sense Dry cleaning is appropriate for: It’s not appropriate for liquid stains, pet urine, embedded soil, or as a replacement for periodic deep extraction cleaning. Dry methods work at the surface, which is both their advantage (no moisture) and their limit (no depth). Method 1: Dry Carpet Cleaning Powder Best for surface soil removal and mild deodorizing on synthetic carpet. Commercial dry carpet cleaning powders, brands like HOST, Capture, and similar products, contain absorbent compounds (often corn cob or cellulose-based) impregnated with cleaning agents and sometimes a mild solvent. The powder absorbs surface soil and oils when worked into the fiber, then gets vacuumed away along with the material it absorbed. How to use it: Limitation to know: dry cleaning powder used repeatedly without periodic hot water extraction causes residue to accumulate in the carpet pile over time. The powder is designed to be fully vacuumed out, but no vacuum removes 100% of what was applied. Over months and years, this residue builds in the base of the fiber and becomes a soil attractor. Professional extraction every 12 to 18 months removes what the vacuum can’t. Read our guide on getting rid of carpet cleaner residue if buildup is already an issue. Method 2: Baking Soda for Deodorizing Best for odor absorption and general freshening without any cleaning agent. Baking soda is the simplest and most accessible dry carpet treatment, not a cleaner in the soil-removal sense, but an effective odor absorber that works on general mustiness, light food smells, and surface-level pet odor between professional treatments. How to use it: Baking soda is safe for all carpet types including natural fibers. It doesn’t clean, it deodorizes. For pet urine odor specifically, it temporarily improves surface smell but doesn’t address uric acid crystals in the fiber and backing. Enzyme cleaner is required for that. Method 3: Dry Foam Method Best for light surface cleaning with slightly more cleaning power than powder. Dry foam carpet cleaning uses a foaming shampoo applied to carpet, worked into the fiber, and vacuumed away once dry. It bridges dry powder and wet extraction, there’s minimal moisture introduced, but slightly more cleaning action than dry powder alone. How to use it: Dry foam leaves slightly less residue than powder when used correctly, but carries the same residue accumulation risk with repeated use. As with powder, periodic professional extraction removes what the vacuum can’t. A Note on Encapsulation Cleaning Encapsulation is a professional semi-dry method worth understanding as context for the DIY methods above. Professional encapsulation applies a polymer solution that crystallizes around soil particles as it dries, encapsulating them so they can be vacuumed away without water extraction. Encapsulation is faster and lower-moisture than hot water extraction and works well as a maintenance clean in commercial settings where downtime matters. As a professional method, it reaches the fiber more effectively than DIY dry powder and leaves a polymer residue that continues to release soil on subsequent vacuuming passes. DIY encapsulation products exist but require specific application equipment to work as intended. This is a professional service area rather than a practical DIY approach for most homeowners, but knowing it exists is useful when discussing cleaning options with professional services. At a Glance: Dry Cleaning Methods Compared Method Cleans Soil? Deodorizes? Drying Time Residue Risk Best Use Dry cleaning powder Surface level Mild None Moderate with repeated use Surface soil maintenance Baking soda No Yes None None Odor freshening only Dry foam Surface level Mild 30 to 60 min Low to moderate Light surface cleaning Encapsulation (professional) Good surface clean Yes Minimal Low Professional maintenance clean The Limits of Dry Cleaning and When to Call Clean Master Dry cleaning methods work at and near the carpet surface. They don’t reach the embedded soil in the carpet fiber base and backing that accumulates with months of foot traffic, and they can’t address: Dry cleaning used consistently between professional visits extends the life and appearance of professional cleans, it’s maintenance that makes the deep clean more effective when it comes. It doesn’t replace the deep clean. Read our guide on how often you should get your carpet cleaned to stay on the right schedule. Clean Master Carpet Cleaning provides professional hot water extraction across the entire DFW area. For carpet that’s past what dry methods can maintain, we’re the next step. Contact Clean Master Carpet Cleaning today to schedule your DFW professional carpet clean and keep the baking soda and powder for between visits. ‍
Read more
get rid of air duct 2

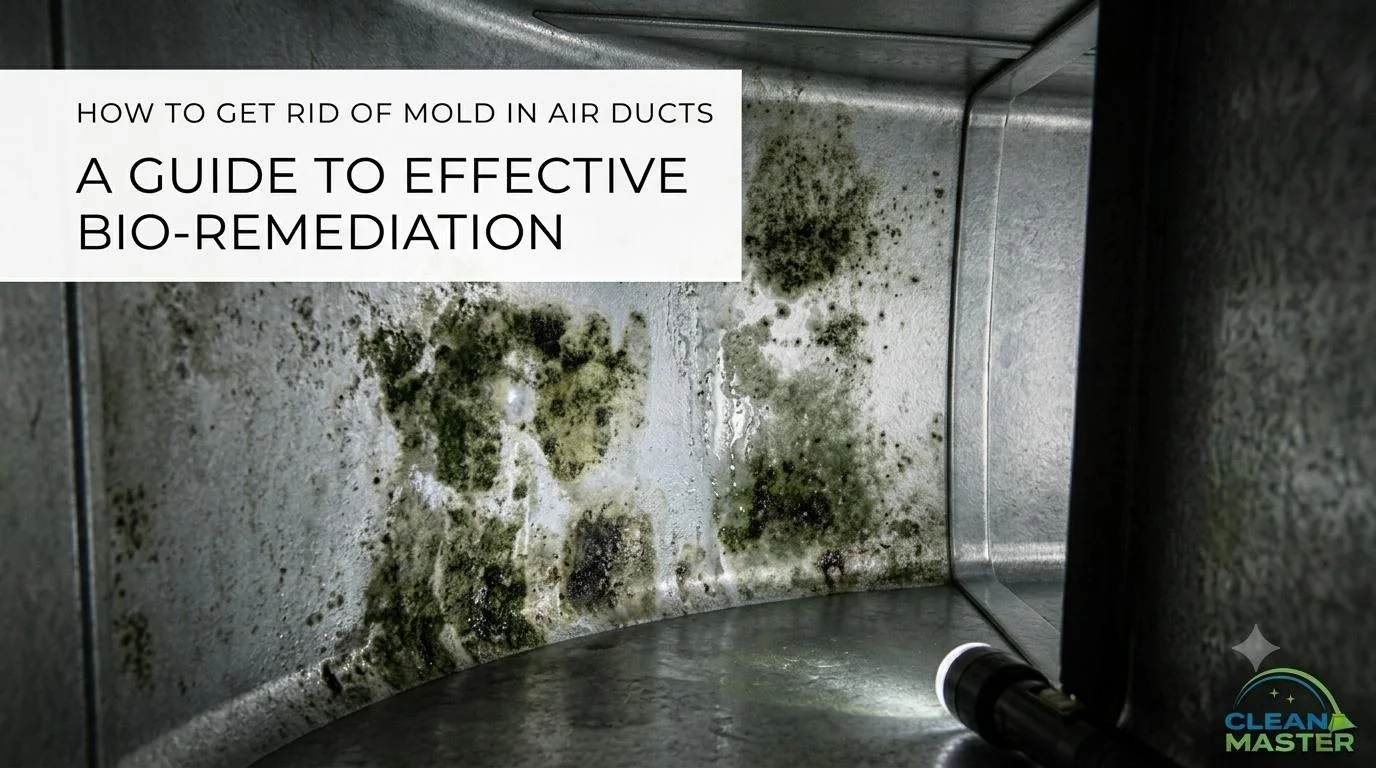
How To Get Rid Of Mold In Air Ducts

Mold in air ducts is one of the more serious indoor air quality problems a homeowner can face, and one of the most commonly mishandled. The instinct to scrub visible mold with a cleaning solution is understandable, but in a duct system that distributes air throughout the entire home, disturbing mold without properly containing and removing it can spread spores to every room simultaneously. At Clean Master Carpet Cleaning, we serve the entire DFW area and we’ve assessed duct systems with mold ranging from minor register surface growth to established growth in main trunk lines, the result of DFW’s warm, humid conditions interacting with condensation in poorly maintained HVAC systems. Here’s the honest guide to what you can address yourself, what requires professional remediation, and how to prevent recurrence after the problem is resolved. The Health Risk: Why Duct Mold Is Taken Seriously Before getting into identification and treatment, it’s worth being clear about why mold in ductwork is a more significant health concern than mold in a contained area like a bathroom corner. When mold grows in a duct system, every time the HVAC runs, it distributes mold spores and the mycotoxins some mold species produce throughout the entire home via the air supply. Residents are breathing continuously circulated air that contains whatever is growing in the ductwork. Exposure is ongoing and whole-home rather than localized. Health effects associated with mold exposure vary by individual sensitivity and mold species, but commonly include: DFW’s warm climate and the humidity that accompanies summer storms and high dew points creates particularly favorable conditions for mold in HVAC systems. Condensation on cooling coils and ductwork surfaces, combined with accumulated organic debris in the ducts, provides the moisture and food source mold needs to establish itself. Identifying Mold in Air Ducts vs. Dust and Debris Not every dark mark in ductwork is mold. Before deciding on a course of action, it’s worth understanding what you’re actually looking at. Signs that suggest mold rather than dust or debris: If you’re uncertain whether what you’re seeing is mold, a surface mold test kit available at hardware stores can provide basic confirmation. For identification of specific mold species, relevant when the species determines the remediation approach, professional sampling and lab analysis is the appropriate method. The DIY Limit: Where It’s Appropriate and Where It Isn’t This is the most important distinction in this guide. Attempting to clean duct mold beyond the appropriate DIY scope is one of the most common mistakes we see, and it often makes the situation worse rather than better by distributing spores before appropriate containment is in place. What DIY Can Appropriately Address Surface mold on registers and grilles, visible mold limited to the register surface and the immediately accessible duct opening (the first inch or two inside the duct), is within DIY scope when: DIY process for register-level surface mold: What Requires Professional Remediation Any of the following situations is beyond DIY scope and warrants contacting a professional: We’ve encountered DFW homes where well-intentioned DIY duct mold cleaning, spraying bleach into duct openings, running the HVAC after surface cleaning without addressing the filter, distributed spores more broadly than the original growth had done. The duct system is connected: what enters one opening travels throughout. How Professional Mold Remediation in Ducts Works For situations beyond DIY scope, professional duct mold remediation follows a structured process that addresses containment, removal, and the source of the moisture that allowed growth to establish. 1. Assessment and Testing A professional remediator assesses the extent of growth, identifies the mold species where relevant, locates the moisture source that created conditions for growth (condensation issue, duct leak, previous water event), and determines the remediation scope before any cleaning begins. 2. Containment Before cleaning begins, affected duct sections are isolated to prevent spore distribution during the remediation process. The HVAC system remains off throughout remediation. 3. Physical Removal with HEPA-Filtered Extraction Mold in ductwork is physically removed using HEPA-filtered vacuum equipment that captures spores rather than redistributing them. For accessible metal ductwork, antimicrobial solutions appropriate for the surface material are applied and contact time is maintained before extraction. 4. Antimicrobial Treatment EPA-registered antimicrobial agents are applied to affected duct surfaces after physical removal to inhibit recurrence. The specific product and application method depend on duct material, metal ductwork is treated differently from flex duct. 5. Source Remediation The moisture source that enabled mold growth is addressed, whether that’s a condensation issue at the air handler, a duct leak drawing in humid unconditioned air, or insufficient insulation causing surface condensation. Without addressing the source, mold recurrence is likely regardless of how thoroughly the existing growth was removed. 6. Post-Remediation Verification Air testing or surface sampling after remediation confirms that spore counts have returned to normal levels before the HVAC system is returned to operation. Clean Master’s air duct cleaning service addresses duct contamination including mold at the register and accessible duct level. For extensive mold remediation requiring containment protocols and full system access, we coordinate with licensed mold remediation contractors in the DFW area and can help clients understand what their specific situation requires. Prevention: How to Stop Mold From Returning Once mold has been addressed, the priority is eliminating the conditions that allowed it to develop. In DFW specifically, humidity management is the central variable. Filter Maintenance A clogged HVAC filter reduces airflow and increases the time air spends in the duct system, both of which increase condensation risk. Replace filters on schedule (every 60 to 90 days minimum) and upgrade to MERV 8 or higher to capture more organic debris that serves as mold food. Read our expert tips guide on air duct cleaning for a full filter maintenance schedule. Condensate Drain Maintenance The air handler’s condensate drain removes moisture extracted from the air during cooling. A clogged condensate drain allows water to accumulate in the drain pan and potentially overflow into the duct system. Check and clear the condensate drain annually, it’s typically accessible and cleanable with
Read more
carpet cleaning reduce alegies 2 (1)

How Does Carpet Cleaning Reduce Allergies

If you or someone in your household deals with allergies or asthma, the floor beneath your feet may be contributing more to the problem than anything else in the room. Carpet is one of the most effective allergen traps in a home, which is both a disadvantage and an opportunity. The same fiber structure that captures allergens from the air also holds them in place, away from the breathing zone, until they’re either disturbed by foot traffic or removed by cleaning. At Clean Master Carpet Cleaning, we serve the entire DFW area and we’ve seen the connection between carpet cleaning and allergy improvement consistently across client homes, particularly in a market like DFW where pollen seasons are aggressive and homes run HVAC systems for most of the year. Here’s the complete picture of what’s in your carpet, how it affects your indoor air quality, and what cleaning approaches actually reduce allergen load effectively. Why Carpet Is Both the Problem and the Solution The instinct in allergy households is sometimes to remove carpet entirely and switch to hard flooring. The reasoning makes sense on the surface, carpet holds allergens, hard floors don’t. But research has shown a more nuanced picture: carpet actually acts as a reservoir that keeps allergens out of the air, while hard floors allow the same allergens to be continuously redistributed by foot traffic and air movement. The critical variable isn’t whether you have carpet, it’s whether the carpet is cleaned frequently and thoroughly enough to remove what it’s accumulated. A well-maintained, regularly cleaned carpet in an allergy household is a more controlled allergen environment than a hard floor that redistributes the same allergens every time someone walks across it. The problem is when carpet cleaning falls behind. At that point, the reservoir is full, and every step on the carpet, every draft, every vacuum pass disturbs and re-aerosolizes what’s been accumulating for months. What’s Actually in Your Carpet: By Allergen Type Dust Mites and Their Debris Dust mites are microscopic arachnids that live in soft furnishings, mattresses, upholstery, and carpet, feeding on dead skin cells. They thrive in the warm, humid conditions that DFW’s climate provides for much of the year. The allergen isn’t the mite itself but its fecal matter and body fragments, particles small enough to become airborne when carpet is disturbed and remain suspended in breathing-zone air for extended periods. A single gram of carpet dust can contain thousands of mite allergen particles. This is the most pervasive indoor allergen in most homes and the one most consistently linked to year-round allergy and asthma symptoms. Pet Dander Pet dander, the microscopic skin flakes shed by cats, dogs, and other animals, is one of the most potent and clinically significant indoor allergens. It’s extremely lightweight, which means it remains airborne far longer than heavier particles and penetrates deep into carpet fiber where it’s protected from surface disturbance. In DFW homes with pets, carpet dander load can be substantial, particularly in areas where pets rest, play, or frequently pass through. Even homes without current pets can retain dander from previous animal occupants for months after the pet has left, embedded in carpet fiber and padding. Pollen: Particularly Relevant in DFW North Texas has one of the more aggressive pollen seasons in the country, tree pollen in spring, grass pollen through summer, and ragweed and weed pollen through fall. DFW homes run HVAC systems through most of this period, which means pollen tracked in on shoes and clothing, or entering through briefly opened doors and windows, gets distributed throughout the home and settles into carpet fiber. DFW allergy sufferers who notice their symptoms are as bad indoors as outdoors are often experiencing this pollen accumulation in carpet, particularly in entryways, hallways, and high-traffic areas where tracking is heaviest. The carpet near entry points becomes a concentrated pollen deposit that’s disturbed every time someone walks through. Mold Spores Mold spores settle into carpet from air circulation and grow in carpet fiber when moisture conditions support it, over-wetted carpet, high indoor humidity sustained over time, or spills that weren’t fully dried. DFW’s summer humidity creates conditions where carpet moisture management matters more than in drier climates. Mold spores in carpet are an allergen source when disturbed into the air, and active mold growth in carpet backing or padding creates a continuous spore source that affects air quality throughout the room. This is the allergen category most directly addressed by proper carpet drying technique after cleaning. Read our guide on whether carpet cleaning can cause mold to understand how moisture management affects mold risk. Which Cleaning Methods Actually Reduce Allergens Hot Water Extraction: The Most Effective Method for Allergen Removal Professional hot water extraction, the method used by Clean Master, is the most effective cleaning approach for allergen reduction because it physically removes what it reaches rather than redistributing or killing it in place. The mechanism: heated water and cleaning solution are injected into the carpet under pressure, loosening allergen particles from the fiber, and immediately extracted with powerful suction into the recovery tank. The allergens are physically removed from the carpet and the home. This is why professional hot water extraction is recommended by the Asthma and Allergy Foundation of America as the preferred carpet cleaning method for allergy households. The extraction mechanism removes dust mite debris, pet dander, pollen, and mold spores in a way that surface-level cleaning cannot. For DFW allergy households: professional hot water extraction every 6 to 12 months is the baseline, with more frequent cleaning in homes with pets or multiple allergy sufferers. Read our guide on how often you should get your carpet cleaned for a schedule matched to your household situation. Steam Cleaning: Effective for Killing, Less Effective for Removing Steam cleaning kills dust mites on contact through heat, temperatures above 130°F are lethal to mites, and steam cleaners operate well above that threshold. This is a genuine benefit for dust mite allergen reduction. The limitation is extraction. Steam loosens and
Read more
Why Carpet Odors Get Stronger After Cleaning 2

Why Carpet Odors Get Stronger After Cleaning & How to Fix It

You cleaned the carpet to make things fresher, and now it smells worse than before. It’s one of the more frustrating post-cleaning experiences, and it’s more common than most homeowners expect. The reassuring part: in most cases, a worsened smell after carpet cleaning has a specific, identifiable cause, and a specific fix. At Clean Master Carpet Cleaning, we’ve walked DFW clients through this diagnosis regularly. The smell that’s bothering you is telling you something about what happened during the clean or what was already in the carpet. Here’s how to identify which situation you’re in and what to do about it. How to Diagnose Your Post-Clean Smell Before jumping to a fix, narrow down which smell you’re dealing with. The character of the smell is the most reliable indicator of the cause: Smell Character Most Likely Cause Strong urine or ammonia smell Pet urine reactivated by cleaning heat and moisture Musty, mildew, or damp smell Over-wetting, moisture in backing or padding Chemical, soapy, or synthetic smell Cleaning solution residue left in fiber Each cause has a different fix. Matching the fix to the cause is what resolves the problem, generic deodorizing sprays address none of them. Cause 1: Pet Urine Reactivated by Heat and Moisture Pet urine contains uric acid crystals that bond to carpet fiber and backing. In their dry state, these crystals produce minimal odor. When heat and moisture from cleaning contact them, the crystals reactivate and volatilize, releasing the smell more strongly than before the clean. Steam cleaning and hot water extraction both trigger this reaction, which is why so many clients describe the smell surging during cleaning and remaining elevated afterward. The Fix Enzyme cleaner applied to every affected area with adequate dwell time. Enzyme cleaners break down uric acid crystals at the molecular level, the only approach that eliminates the odor source rather than temporarily suppressing it. Apply generously, cover with plastic wrap to prevent evaporation, allow 20 to 30 minutes minimum, then blot and extract with clean water. Once the crystals are broken down, the smell doesn’t return. Read our full guide on how to use enzyme cleaner on carpet for the right technique. How Long Before It Becomes a Concern Pet urine smell that intensifies during cleaning and then gradually fades over 24 to 48 hours as the carpet dries is within the range of reactivation that enzyme treatment resolves. Pet urine smell that doesn’t fade after 48 hours of drying, or that returns after seeming to improve, indicates the contamination is deeper in the backing or padding and requires professional enzyme treatment with commercial extraction. Cause 2: Over-Wetting Causing Mildew Smell in Backing or Padding The smell is musty or damp-basement-like, not chemical, not urine-specific. It may not have been present immediately after cleaning but appeared or worsened in the 24 to 72 hours following. This is the signature of over-wetting: too much moisture was introduced during cleaning, didn’t extract fully, and has now created conditions in the carpet backing or padding where mildew or mold is beginning to develop. Consumer carpet cleaning machines, which have lower extraction power than professional equipment, are the most common cause, but any cleaning method that leaves the carpet significantly wet for an extended period in warm, humid conditions can produce this result. Read our guide on whether carpet cleaning can cause mold to understand how this develops. The Fix Active drying, immediately and aggressively: If the smell has been present for less than 48 hours and the carpet is still damp, active drying may resolve it entirely. If the smell is present on a carpet that already feels dry at the surface, indicating moisture is retained in the padding beneath the fiber, professional assessment is warranted. See our guide on how to dry carpet after cleaning for the most effective drying approach. How Long Before It Becomes a Concern Musty smell that fades progressively as the carpet dries is normal over-wetting recovery. Musty smell that appears after the carpet surface has dried, or that worsens rather than improves over 48 to 72 hours, indicates mildew established in the backing or padding, which doesn’t resolve with drying alone. Cause 3: Cleaning Solution Residue Creating a Chemical Smell The smell is synthetic, soapy, or chemical, not organic. It may be noticeable when walking across the carpet or when the room is warm. Cleaning solution that wasn’t fully extracted during the clean has dried in the carpet fiber. The chemical compounds in the solution, surfactants, fragrances, pH adjusters, off-gas as they dry and as the carpet is disturbed by foot traffic. This is distinct from the eucalyptus or citrus scent of a specific solution, which typically fades within a few hours. The problematic residue smell persists well beyond the expected scent fade time. The Fix A warm water rinse pass. Fill the carpet cleaner’s tank with plain warm water, no solution, and run slow extraction passes over the affected area. The warm water re-dissolves the dried residue and the extraction pass pulls it out. Follow with fans and active drying. For significant residue buildup, two rinse passes may be needed. Read our complete guide on getting rid of carpet cleaner residue for step-by-step instructions. After rinsing and drying, if the carpet feels soft and the smell has cleared, the residue is resolved. If the carpet still feels slightly tacky after drying, a sign residue remains, a second rinse pass followed by professional extraction will clear what the consumer machine can’t fully remove. How Long Before It Becomes a Concern A mild chemical or solution smell that fades within 6 to 12 hours as the carpet dries is normal, it’s the solution’s fragrance component clearing as moisture evaporates. A chemical smell that persists beyond 24 hours after the carpet is fully dry indicates residue in the fiber that needs the rinse treatment above. When to Call Clean Master Three specific situations warrant professional attention rather than continued DIY fixes: Clean Master serves the entire DFW area with carpet
Read more
tile and grout steam cleaner 2

How to Use a Tile and Grout Steam Cleaner

Steam cleaning tile and grout produces noticeably better results than mopping, but only when the technique matches what steam actually does and what each tile and grout type can handle. Most homeowners who are disappointed with their steam cleaning results aren’t using the wrong machine. They’re using the right machine the wrong way. At Clean Master Carpet Cleaning, tile and grout cleaning is one of our core DFW services. We know what professional-grade cleaning achieves on tile, and we know where steam cleaning sits on that spectrum as a maintenance tool. Here are the pro tips that close the gap between average steam cleaning results and genuinely good ones. Pro Tip 1: Prepare the Surface Before the Steam Touches It This is the step that most homeowners skip and professionals never do. Steam is not a substitute for physical debris removal, it’s a heat and moisture tool that works on what remains after loose material is gone. Before steaming any tile and grout surface: The surface you steam should be clear of loose debris and visibly pre-treated where needed. Steam does the remaining work, it doesn’t replace the preparation. Pro Tip 2: Use the Right Attachment for Grout Lines, Not the Floor Head This is where most homeowners lose significant cleaning effectiveness without knowing it. The wide floor head distributes steam efficiently across open tile surface, but it’s the wrong tool for grout lines specifically. Grout lines are narrow, recessed, and porous, they need concentrated, directed steam to penetrate effectively rather than diffused steam from a wide head that glides past them. The correct attachments for grout line cleaning: The floor head, fitted with a microfiber pad, is appropriate for the open tile surface between grout lines: even steam distribution, the microfiber collects loosened soil, and the wider coverage is efficient for the flat tile face. The professional approach: use the detail or jet attachment for grout lines first, working in sections, then follow with the floor head on the tile surface to collect what the grout work has loosened and distributed. Pro Tip 3: Speed, Pressure, and the Wipe Step That Makes or Breaks It These three technique elements determine whether a steam cleaning pass produces a clean result or just a hot, briefly disturbed one. Speed: Much Slower Than Feels Productive The dwell time steam has in contact with the surface determines how much of the contamination it loosens. Moving the steam head at a comfortable walking pace, the natural instinct, gives the steam approximately half a second of contact time per point on the grout. That’s not enough. Professional technique on grout lines: move the attachment at approximately one inch per second. Count it if you need to, it feels almost stationary at first. On open tile surface with the floor head: two to three seconds per foot of coverage. The steam needs time to penetrate the grout pore and act on the soil beneath the surface layer. Speed is the single most common reason homeowners don’t get the results they expect. Pressure and Angle on Grout Lines When using the jet nozzle on grout lines, hold the attachment 1 to 2 inches above the grout surface and angle it slightly, approximately 30 to 45 degrees from vertical, in the direction of travel. This angle directs the steam pressure into the grout pore rather than bouncing it off the surface, and it pushes loosened contamination out of the grout line ahead of the nozzle rather than back into it. For the floor head on tile surface, maintain consistent contact with the microfiber pad flat against the tile. Don’t tilt the head, which reduces the contact area and leaves uneven steam coverage. The Wipe Step: Non-Negotiable Steam loosens soil. It does not remove it. Without a follow-up wipe or collection step, loosened contamination redeposits in the grout line and on the tile surface as the steam evaporates, leaving the surface looking only marginally better than before steaming. After each section of grout cleaning: This is the step that separates steam cleaning results that impress from results that disappoint. The machine does the loosening; the cloth does the removing. Pro Tip 4: Match Your Approach to the Tile Type Steam is not a one-size-fits-all tool across tile types, the appropriate technique and the risks involved differ by material. Tile Type Steam Appropriate? Key Technique Note Ceramic (glazed) Yes Standard technique, move continuously and wipe after each pass Porcelain (polished) Yes Keep head moving, stationary steam can leave water marks on high-gloss finish Porcelain (textured/matte) Yes Use brush attachment on texture, flat pad misses recessed surface variation Natural stone (marble, travertine) Caution Check manufacturer guidance first, heat and moisture can open stone pores and cause staining Handmade or decorative tile Test first Older glazes and handmade surfaces can be sensitive to thermal shock Unsealed grout Yes Allow longer drying time, unsealed grout retains moisture longer Sealed grout Yes (limit frequency) Excessive steam frequency degrades sealant over time Natural stone deserves specific attention. Marble, travertine, limestone, and similar materials are pH-sensitive and porous in ways that ceramic and porcelain are not. Steam heat opens the pores of natural stone, which without appropriate sealing allows moisture and any dissolved contaminants to penetrate. The heat can also cause subtle color changes in certain stone types. Before steaming any natural stone tile, check the manufacturer’s care guidance and test in a hidden area. When in doubt, Clean Master’s professional tile cleaning service uses chemistry and technique specifically matched to stone type rather than applying steam uniformly. Common Mistakes That Undermine Steam Cleaning Results Moving Too Fast Over Grout Lines Already covered in the technique section, but worth naming explicitly because it’s the most consistent mistake across every tile cleaning context. Steam on grout at walking pace produces surface-level results. Steam at one inch per second reaches the pore. Not Wiping After Steaming The second most common mistake. Steam loosens, cloth removes. Skip the cloth and the loosened soil dries back into the grout
Read more
Portable vs Upright Carpet Cleaners 2

Portable vs Upright Carpet Cleaners: What You Should Know

You have a portable spot cleaner and an upright full-size carpet cleaner, and one of them is out of solution. The other has solution left. It’s tempting to assume that carpet cleaning solution is carpet cleaning solution, but portable and upright machines use meaningfully different formulations, and putting the wrong one in the wrong machine causes problems that range from poor cleaning results to machine damage. At Clean Master Carpet Cleaning, we work with professional equipment every day and understand the engineering decisions that make different machines work the way they do. Here’s the clear answer on portable vs. upright solution compatibility, and how to make sure you’re using the right product in your specific machine. Why Portable and Upright Machines Aren’t the Same System Portable carpet cleaners, compact handheld or countertop units like the Bissell Little Green, Hoover Spotless, or similar, and full-size upright carpet cleaners are designed around different operating parameters. The most significant difference for solution compatibility is how each machine delivers solution to the carpet surface. Portable machines typically use a pressurized spray system that delivers a concentrated fine mist to a small, targeted area. Because the cleaning area is small and the dwell time before extraction is short, portable solutions are formulated at a higher concentration, more cleaning chemistry per unit volume, to compensate for the limited contact time and smaller water volume involved. Upright machines work differently. They distribute solution through a wider spray bar or nozzle across a full cleaning path, use more total water volume per pass, and typically have a longer contact time between solution and carpet before extraction. Upright solutions are formulated at lower concentration because the greater water volume and wider distribution dilutes the solution to the working strength automatically. This concentration difference is the core incompatibility. Using a concentrated portable solution in an upright machine without adjusting for the different dilution ratio means putting a significantly stronger solution into a system designed for a weaker one. What Happens When You Use the Wrong Solution Excessive Foaming This is the most immediate and most visible consequence. Portable solutions formulated for small-area concentrated use produce significantly more foam when distributed through an upright machine’s higher-volume spray system. The foam: The reverse scenario, upright solution in a portable machine, typically produces underwhelming cleaning results because the lower-concentration formula isn’t strong enough for the small-area, short-contact-time application the portable machine is designed for. Read our guide on getting rid of carpet cleaner residue if you’re already dealing with this problem. Machine Damage and Warranty Issues Beyond the immediate performance problems, using non-recommended solutions in either machine type creates longer-term risks. Foam accumulation in an upright machine’s internal pathways, pump, spray bar, and recovery tank connections, can cause blockages and seal damage over time. The foam that seems like a cosmetic problem in the recovery tank is the same foam moving through the machine’s internal components with every cleaning pass. Warranty implications are equally significant. Bissell, Hoover, Rug Doctor, and virtually every other carpet cleaner manufacturer specify in their warranty documentation that only manufacturer-recommended or approved solutions should be used. Using a solution designed for a different machine type, even a solution from the same brand, falls outside this approval in most cases. If the machine malfunctions after using an incompatible solution, the warranty claim is at risk. Performance That Doesn’t Match Expectations Even in cases where the solution mismatch doesn’t cause immediate foam overflow or machine issues, the cleaning result will likely disappoint. A portable formula in an upright machine at full upright water volume is either over-concentrated, causing residue, or gets diluted to below effective strength by the higher water volume. Neither outcome is the cleaning performance the solution was designed to deliver. An upright formula in a portable machine is under-strength for the application and produces noticeably weaker cleaning on the spot being treated. How to Identify the Correct Solution for Your Machine The right solution for any carpet cleaner is the one the manufacturer recommends, not the one that’s available, the cheapest, or the most familiar. Check the machine’s manual first. Every carpet cleaner comes with documentation that specifies compatible solution types and in many cases lists specific products by name or product code. If you no longer have the manual, the manufacturer’s website typically has the same information available as a downloadable PDF. Look for machine-specific branding on solution packaging. Bissell solutions, for example, are labeled for specific machine lines. These aren’t just marketing distinctions, they reflect genuine formulation differences for different machine operating parameters. When in doubt, contact the manufacturer. Most major carpet cleaner brands have customer service lines or chat support that can confirm solution compatibility for your specific model number. A two-minute call or chat prevents a problem that’s difficult to fix after the fact. Do Generic Carpet Cleaning Solutions Work in Either Machine Type? This is the question that comes up most often, and the answer is: sometimes, with caution. Some third-party and generic carpet cleaning solutions are formulated for “universal” use across both portable and upright machines. These typically achieve this by using a moderate concentration with low-foaming surfactants designed to perform adequately across different dilution ratios and machine types. For generic solutions to be appropriate in your machine: Generic solutions that meet these criteria can work reasonably well. Generic solutions that don’t specify machine type, don’t specify low-foaming, or list concentration recommendations incompatible with your machine should be avoided, the risk of the problems described above is real regardless of the solution’s brand or price point. At a Glance: Portable vs. Upright Solution Compatibility Portable Solution in Upright Upright Solution in Portable Machine-Specific Solution Foaming risk High Low Designed for machine, minimal Cleaning performance Over-concentrated or residue Under-strength Optimized for machine Machine damage risk Moderate, pathway buildup Low None when used as directed Warranty implications At risk Potentially at risk Protected Recommended? No No Yes Frequently Asked Questions Can I dilute a portable solution to use it in an upright? Theoretically
Read more
can you use a carpet cleaner to soak up water use this title 2

Can You Use A Carpet Cleaner To Soak Up Water

Carpet cleaners are designed primarily for deep cleaning fibers, not for heavy water extraction. They use a combination of water, cleaning solution, agitation, and suction to lift dirt from carpets. While the suction component can remove some moisture, it is limited compared to dedicated water extraction equipment.  Using a carpet cleaner to soak up water may work for small spills, but it is not intended for flooding or significant water buildup. Knowing how these machines function helps prevent misuse and potential carpet damage. The Difference Between Cleaning and Water Extraction Cleaning focuses on loosening and removing soil embedded in carpet fibers, while water extraction removes excess moisture from the carpet and padding. Carpet cleaners provide moderate suction designed to recover cleaning solution, not large volumes of water.  Extractors and wet vacuums are built with stronger motors and airflow to pull water from deep layers. Using a standard carpet cleaner for water soaking may leave moisture trapped underneath, increasing the risk of mold and odors over time. Situations Where a Carpet Cleaner May Be Used There are limited situations where using a carpet cleaner to soak up water can be acceptable. Small spills, light leaks, or damp areas caused by over-wetting during cleaning can sometimes be managed.  The key factor is the amount of water involved. If moisture is minimal and confined to the surface fibers, a carpet cleaner’s suction may help reduce dampness effectively without long-term issues. Small Water Spills and Minor Accidents For minor incidents, such as a tipped water bowl or a small appliance drip, a carpet cleaner can assist in moisture removal. These situations typically involve surface-level wetness rather than soaked padding.  Running the cleaner in suction-only mode, if available, helps pull out excess moisture. However, drying fans should still be used afterward to ensure the carpet dries completely and evenly. Risks of Using a Carpet Cleaner for Excess Water Using a carpet cleaner to soak up large amounts of water carries several risks. These machines are not built to handle standing water or saturated carpets. Overloading the system can damage internal components and reduce suction performance.  More importantly, insufficient water removal can lead to mold growth beneath the carpet surface. Understanding these risks helps homeowners avoid costly repairs and health concerns. Potential Damage to Carpet and Padding When carpets become heavily soaked, water penetrates the padding and subfloor. Carpet cleaners lack the power to extract moisture from these deeper layers. Trapped water can cause padding breakdown, adhesive failure, and lingering odors. In severe cases, carpets may need to be lifted for proper drying. Relying solely on a carpet cleaner may give a false sense of dryness while hidden moisture remains. Better Alternatives for Water Removal For significant water intrusion, using the right equipment is essential. Wet/dry vacuums and professional water extractors are designed specifically for moisture removal. These tools offer stronger suction and larger recovery tanks, making them safer and more effective. Choosing the correct method protects both the carpet and the underlying structure. Recommended Tools for Effective Water Soaking The following options are better suited for water removal: Using these tools together ensures thorough drying and reduces the risk of long-term damage. Manufacturer Guidelines and Safety Considerations Most carpet cleaner manufacturers advise against using their machines for water extraction purposes. Operating outside recommended use can void warranties and shorten the machine’s lifespan. Safety is also a concern, as electrical components may be exposed to excessive moisture. Reading manufacturer instructions helps users avoid improper usage and unnecessary repairs. Why Manufacturer Instructions Matter Manufacturer guidelines are based on the machine’s design limitations. Carpet cleaners are calibrated for controlled water use during cleaning cycles. When used to soak up water, motors may overheat and filters can clog. Following instructions ensures optimal performance and protects users from electrical hazards or equipment failure. When Professional Help Is the Best Option In cases of flooding, burst pipes, or heavy leaks, professional water damage restoration is often necessary. Professionals use industrial-grade extractors and moisture detection tools to ensure complete drying. Attempting to handle severe water damage with household equipment can worsen the situation and increase repair costs. Signs You Should Call a Professional Professional help is recommended if: These signs indicate deeper moisture issues that require specialized equipment. FAQ’s: Q 1.Can you use a carpet cleaner to soak up water after a spill? A carpet cleaner can help with small spills, but it is not ideal for soaking up large amounts of water. Its suction is limited and may leave moisture behind, especially in carpet padding. Proper drying methods should always follow to prevent damage. Q 2.Is it safe to use a carpet cleaner on wet carpets? Using a carpet cleaner on slightly damp carpets can be safe if done correctly. However, using it on heavily wet carpets is not recommended. Excess moisture can damage the machine and increase the risk of mold growth if water is not fully extracted. Q 3.What is better than a carpet cleaner for water removal? Wet/dry vacuums and professional water extractors are better options for water removal. They provide stronger suction and are designed to handle large volumes of water without damaging the equipment or carpet materials. Q 4.Can using a carpet cleaner cause mold growth? Yes, if a carpet cleaner fails to remove enough moisture, trapped water can lead to mold growth. This is especially common when padding remains wet. Proper drying with fans and dehumidifiers is essential to prevent this issue. Final Thoughts: Using a carpet cleaner to soak up water is only suitable for minor moisture issues. These machines are designed for cleaning, not water extraction, and relying on them for heavy water removal can cause hidden damage. For larger spills or flooding, proper tools or professional services provide safer, more effective results. Understanding equipment limitations helps protect carpets, prevent mold, and avoid unnecessary repair costs. ‍
Read more
science behind carpet steam clean 2

Science Behind Carpet Steam Cleaning

Understanding how a steam cleaner actually works changes how you use it, and changes what you expect from it. Most homeowners operate steam cleaners based on a general sense that heat and moisture clean things, without a clear picture of the specific mechanism. That gap is why so many people either underuse the machine (going too fast, wrong attachment) or overestimate what it can do (expecting deep extraction results from a surface-level tool). At Clean Master Carpet Cleaning, we talk about steam cleaning with DFW clients regularly, both as a maintenance tool and in contrast to the professional hot water extraction we use. Here’s how a steam cleaner actually works, and what that means practically for getting the best results on carpet. First: The Name Confusion Worth Clearing Up Before getting into mechanics, the terminology issue that causes the most confusion: “steam cleaning” is used as a catch-all term for two completely different machines. True steam cleaners heat water past boiling point, typically to 200°F to 250°F, and release it as pressurized vapor through an attachment head. This is what this post is about. Hot water extractors, including rental machines like Rug Doctor, consumer machines like Bissell Big Green, and professional truck-mounted systems, inject hot liquid water and cleaning solution into carpet and extract it with suction. These are commonly called “steam cleaners” in everyday language but use hot water, not steam. They’re a different machine with a different mechanism and different results. If you’re not sure which one you have: a true steam cleaner produces visible vapor at the head and has no recovery tank for dirty water. A hot water extractor has both a clean water tank and a separate dirty water recovery tank. How a True Steam Cleaner Works: Step by Step 1. Water Is Heated to Produce Pressurized Steam The machine’s water tank, filled with distilled water, feeds into a heating element inside the unit. The boiler heats the water past 212°F, converting it to steam and building pressure within the sealed system. Most consumer steam cleaners reach operating temperature in 30 seconds to 3 minutes depending on the unit. The pressure is what gives steam cleaning its cleaning action, not just heat, and not just moisture, but pressurized vapor that penetrates surface material and physically loosens what’s bonded to it. 2. Steam Is Released Through an Attachment Head When the trigger is activated, pressurized steam releases through whatever attachment is connected to the steam nozzle. The attachment determines: For carpet specifically, a floor head with a microfiber cover pad is the appropriate attachment. It distributes steam evenly across the pile and captures the loosened debris and soil in the same pass rather than leaving it on the surface to redeposit. 3. Heat and Vapor Do the Cleaning Work When pressurized steam contacts carpet fiber, two things happen simultaneously. Heat loosens bonds between soil and fiber. Most carpet soiling, oils, dried food residue, surface dirt, is held to fiber by molecular adhesion that weakens under heat. Above approximately 150°F to 180°F, these bonds become less stable and the soil becomes more mobile, easier to lift from the fiber surface. Vapor penetrates and expands in fiber. The moisture component of steam penetrates the fiber and briefly expands as it contacts the slightly cooler surface, physically disrupting the soil layer and forcing it toward the surface where it can be removed. Heat kills bacteria and dust mites. Steam temperatures above 212°F kill most household bacteria and dust mite populations on contact. This sanitizing effect is one of the genuine advantages steam cleaning has over chemical-free alternatives and over cold water extraction. 4. The Follow-Up Step That Most People Skip Here’s the critical mechanical gap that determines whether a steam cleaning pass produces a clean surface or just a hot, slightly disturbed one: steam doesn’t extract. When steam loosens soil from carpet fiber, that soil is now mobile, but it’s still in the carpet. Without a simultaneous extraction mechanism (suction), the loosened material either: This is why the microfiber pad on the floor attachment matters so much on carpet. The steam does the loosening; something physical has to collect what was loosened. Without that step, the surface is sanitized (bacteria killed) but the loosened soil particles remain. What this means practically: use a carpet floor head with a clean microfiber cover pad always, replace or rotate the pad when it becomes visibly soiled since a dirty pad redistributes rather than collects, and work in slow, overlapping passes to maximize both steam contact time and pad collection. How Attachments Change What the Machine Does Attachment What It Does on Carpet Best For Wide floor head (no pad) Distributes steam broadly, no collection Pre-treatment before follow-up extraction Wide floor head (microfiber pad) Distributes steam and collects loosened soil Standard carpet maintenance cleaning Brush attachment Agitates pile mechanically while steaming Stubborn surface soiling, textured carpet Narrow nozzle Concentrated high-pressure steam to a point Spot treatment, stained areas, grout lines For general carpet maintenance, the floor head with a microfiber pad is the correct choice in virtually every case. The brush attachment adds value on particularly soiled areas or on low-pile carpet where the brush can reach the base of the pile effectively. The narrow nozzle belongs on specific stain spots, not across broad areas where the concentrated pressure makes slow, even coverage impractical. What Steam Cleaning Can and Can’t Do, Based on How It Works Understanding the mechanism clarifies the capability ceiling. It can: It can’t: The mechanism explains the limitation directly: a steam cleaner has no recovery path for what it loosens. What’s cleaned at the fiber surface is collected by the pad or stays in the carpet. What’s deeper than the pad can reach stays deeper than the clean goes. Read our guide on whether steam cleaning removes stains for a stain-by-stain breakdown of where these limits apply. Frequently Asked Questions Does a steam cleaner need cleaning solution to work? No, and most manufacturers specify distilled water only in
Read more
Can You Use A Carpet Cleaner On An Area Rug 2

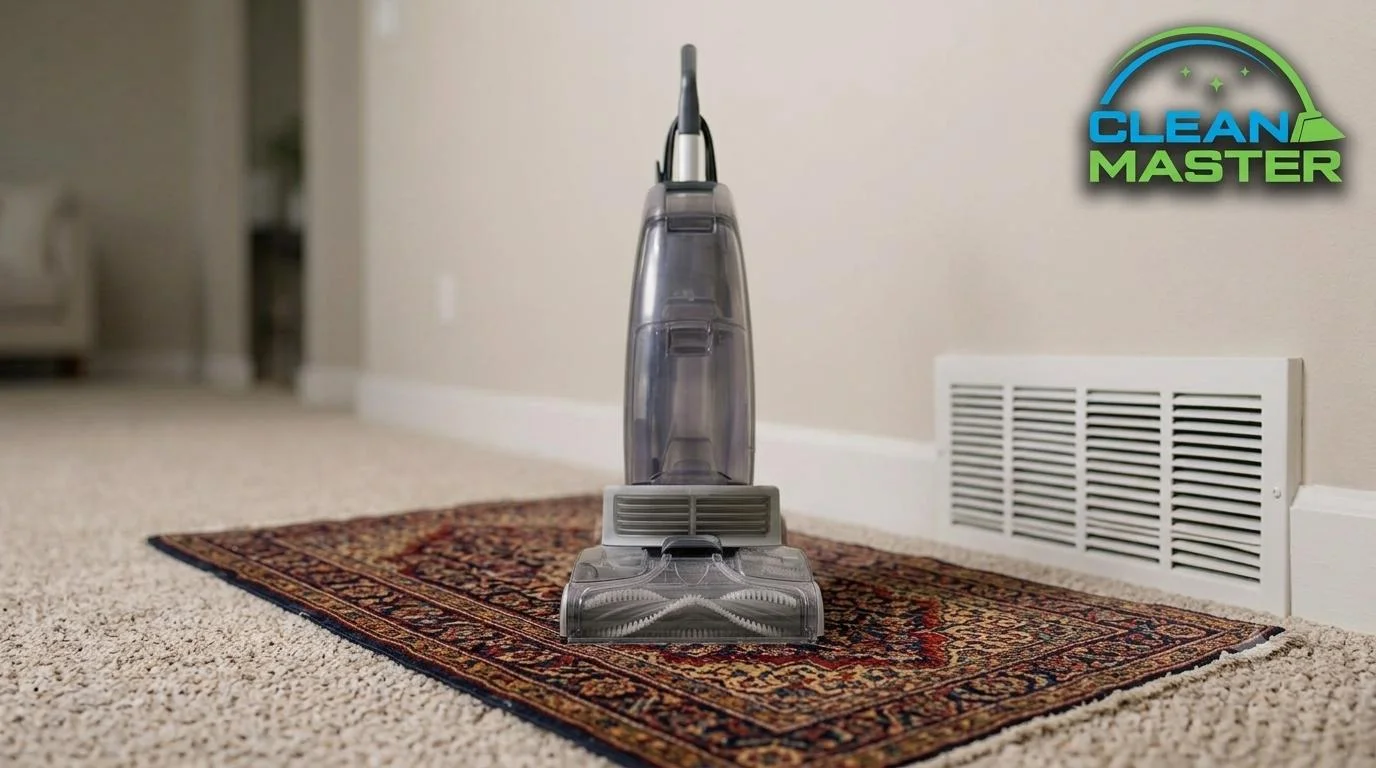
Can You Use A Carpet Cleaner On An Area Rug

Area rugs are one of those items where the “it’s just fabric, the carpet cleaner should work” logic seems reasonable, and sometimes it is. For the right rug type, a carpet cleaner produces a genuinely good result. For the wrong one, it causes damage that’s expensive or impossible to reverse. At Clean Master Carpet Cleaning, we’ve cleaned area rugs across DFW homes and we’ve been called in to assess rugs that were damaged by carpet cleaners that weren’t appropriate for the material. The outcome is almost entirely determined by what the rug is made of, not how carefully the machine is operated. Here’s the rug-by-rug breakdown. Synthetic Area Rugs: Generally Safe With the Right Technique Synthetic area rugs, woven or tufted from polyester, nylon, or olefin, are the most carpet-cleaner-compatible rug type. The fiber chemistry is similar to residential carpet, the colors are typically solution-dyed or fiber-dyed with good colorfast stability, and the construction handles moisture reasonably well. For synthetic area rugs, a carpet cleaner works when these conditions are met: The backing is the vulnerability on even synthetic rugs. Latex-backed area rugs, the most common construction, can delaminate if the backing gets too wet too often. The glue bond that holds the tufted fibers to the backing weakens with repeated moisture exposure. One careful clean typically doesn’t cause issues; repeated over-wetting progressively damages the backing until fibers begin to release. Wool and Natural Fiber Rugs: Proceed With Serious Caution Wool and natural fiber rugs require a fundamentally different approach than synthetic rugs, and a standard carpet cleaner is almost never the right tool for them. Shrinkage is the primary risk. Wool fibers are covered in microscopic scales that interlock when exposed to heat and agitation, the same process that causes a wool sweater to shrink in the wash. Hot water extraction on a wool rug can cause the fibers to felt and shrink, permanently distorting the rug’s dimensions and pile texture. This can be visible as overall size reduction, pile distortion in cleaned sections, or irregular surface texture that doesn’t resolve as the rug dries. Color bleeding is the second risk. Many wool rugs, particularly hand-dyed or traditionally colored rugs, use natural or reactive dyes that aren’t fully stable under moisture and cleaning chemistry exposure. Water alone can cause dye migration; carpet cleaning solution accelerates it. Bleeding typically shows as color transfer from darker areas into adjacent lighter ones, creating permanent staining that wasn’t there before the clean. If you have a wool rug and want to clean it at home, spot-cleaning with cold water and a pH-neutral, wool-safe cleaner applied to a cloth is the appropriate approach. For a full clean, professional rug cleaning using cold water methods and wool-appropriate chemistry is the right call. Hand-Knotted, Persian, and Oriental Rugs: Do Not Use a Carpet Cleaner This is the category where carpet cleaner use causes the most significant and most expensive damage, and where we’ve seen the clearest pattern of irreversible outcomes from DFW clients who tried it. Hand-knotted rugs are constructed differently from machine-made rugs. Each knot is individually tied to the warp and weft foundation during manufacture, creating a structure that is both intricate and sensitive to the mechanical pressure and sustained moisture of carpet cleaning equipment. The risks on hand-knotted rugs are compounding: Hand-knotted rugs, regardless of age, origin, or apparent condition, should be cleaned professionally by a specialist in rug cleaning. The cleaning method, chemistry, and drying approach all need to be matched to the specific rug construction and dye type. A carpet cleaner, used however carefully, cannot replicate that level of assessment and control. At a Glance: Carpet Cleaner Safety by Rug Type Rug Type Carpet Cleaner Safe? Primary Risk Recommended Approach Synthetic (polyester, nylon, olefin) With proper technique Backing delamination from over-wetting Elevate rug, test colorfastness, extract thoroughly Wool High risk Shrinkage, color bleeding Spot-clean only; professional for full clean Natural fiber (cotton, silk) High risk Color bleeding, fiber distortion Professional cleaning recommended Hand-knotted (Persian, Oriental) No Dye bleeding, foundation damage, pile distortion Specialist rug cleaning only The Over-Wetting Problem All Rug Types Share Regardless of rug material, every area rug shares one vulnerability that carpet floor cleaning doesn’t: the backing. When you clean carpet installed on a floor, moisture that penetrates the fiber has the subfloor beneath it, and extraction pulls the majority back up through the fiber. When you clean an area rug flat on a hard surface, moisture that penetrates through the fiber reaches the backing and pools beneath it with nowhere to go. Trapped moisture in rug backing creates mold and mildew conditions faster than almost any other home textile scenario, the backing is in contact with a flat, non-porous surface that prevents drying from below, and the top of the rug dries first, sealing the moisture inside. A rug that smells fine when you clean it can develop a musty smell within 48 hours if backing moisture wasn’t fully managed. Read our guide on whether carpet cleaning can cause mold to understand how quickly trapped moisture becomes a serious problem. The non-negotiable technique for any rug cleaned with a carpet cleaner: elevate the rug during and after cleaning so water can escape beneath it, and dry both sides actively with fans until the rug is completely dry through its full thickness, not just at the surface. Frequently Asked Questions Can I clean a machine-made wool-blend rug with a carpet cleaner? Wool-blend rugs, typically 20 to 30% wool with synthetic fiber, are more tolerant than pure wool but still carry shrinkage and color risk. Test colorfastness in a hidden corner first, use cold water rather than hot, and use a wool-safe cleaning solution rather than standard carpet cleaner. Extract thoroughly and dry flat with good airflow. If the rug has significant value or sentimental importance, professional cleaning is still the safer choice. My area rug has rubber backing. Does that change anything? Rubber-backed rugs are particularly vulnerable to backing damage from repeated moisture exposure. Rubber backing can
Read more
tips for air duct cleaner 2

Tips For Air Duct Cleaning

Air duct maintenance is one of those home systems that operates invisibly until something goes noticeably wrong, and by the time it’s obvious, the problem has usually been building for longer than anyone realized. The good news is that consistent habits between professional cleanings make a meaningful difference, and knowing what to look for means problems get caught early rather than late. At Clean Master Carpet Cleaning, air duct cleaning is one of our core DFW services. We’ve seen what proper maintenance habits do for a home’s air quality over time, and we’ve seen what happens when those habits slip. Here are the expert tips that actually move the needle. Tip 1: Filter Maintenance Is the Highest-Impact Thing You Can Do Nothing in DIY duct maintenance produces more measurable air quality benefit than keeping HVAC filters on schedule. The filter is the first and primary defense against dust, pollen, pet dander, and particulates entering the duct system. When it’s clogged, everything that should be captured passes through into the ductwork instead. Recommended replacement schedule by filter type: Filter Type Replace Every Standard 1-inch fiberglass 30 days Standard 1-inch pleated 60 to 90 days High-efficiency pleated (MERV 8 to 11) 90 days Thick media filter (4 to 5 inch) 6 to 12 months In DFW homes with pets or allergy sufferers, replace at the shorter end of each range. A filter that looks grey and compressed is already overdue, and the duct contamination that occurred while it was underperforming can’t be undone without professional cleaning. One practical tip we share with every DFW client: photograph the filter replacement date on your phone when you install a new one. It takes five seconds and eliminates the guesswork about when it was last changed. Tip 2: Clean Registers and Grilles Every 3 to 6 Months Registers, the grilles covering your supply and return vents, are the most accessible part of your duct system and the most frequently neglected. In DFW homes with AC running from May through September, registers accumulate dust, pet hair, and debris at a rate that visibly affects airflow within months. The cleaning process is straightforward: This takes about 20 minutes per room and is the single most effective DIY step for maintaining airflow and reducing what circulates through the system. We’ve seen DFW clients notice improved airflow within days of a thorough register cleaning that was years overdue. For a full step-by-step DIY approach, read our guide on how to do household air duct cleaning. Tip 3: Know the Signs of Contamination Before They Become Serious Catching duct contamination early means a straightforward professional cleaning. Missing the signs means more involved remediation when the problem has progressed. Watch for: Any of these warrants a professional assessment. In DFW’s climate, where the HVAC runs for much of the year, a contamination issue distributes through the home continuously until it’s addressed. Tip 4: What to Look For When Hiring a Professional Duct Cleaner Not all duct cleaning services are equivalent, and in the DFW market, the range between legitimate professional cleaning and ineffective or outright fraudulent service is wide. A legitimate professional duct cleaning company should: At Clean Master, every air duct cleaning appointment includes a pre-clean inspection, full system cleaning, and a post-clean walkthrough with the homeowner so results are visible and verifiable. Tip 5: Red Flags of Duct Cleaning Scams in DFW The duct cleaning industry has a well-documented scam pattern that DFW homeowners should know. The typical approach: a company advertises whole-home duct cleaning for an unusually low price, often $49 to $99 for the entire house. A technician arrives and performs a minimal cleaning, then claims to have found serious contamination requiring expensive additional treatment. Additional charges are presented, sometimes thousands of dollars, for services that may be unnecessary, ineffective, or entirely fabricated. Red flags to watch for: Red Flag What It Signals Whole-home duct cleaning advertised under $100 Bait-and-switch pricing, upsells to follow Per-vent pricing that wasn’t quoted upfront Total cost will be significantly higher than implied Technician finds “mold” without lab confirmation Unverifiable claim used to justify expensive add-ons Pressure to decide on additional services immediately Sales tactic, not genuine assessment No inspection before starting work Service quality not being verified Legitimate professional duct cleaning for a standard DFW home costs $300 to $600 for a complete service. Prices significantly below this range almost always involve compromised service quality or the bait-and-switch pattern above. Tip 6: Prep Your Home Before a Professional Duct Cleaning Appointment A few simple steps before the technician arrives improve both the efficiency and the result of a professional duct clean: The Bottom Line: Maintenance Habits Protect the Investment Professional duct cleaning is most valuable when it builds on good maintenance habits rather than compensating for years of neglect. Consistent filter replacement, regular register cleaning, and knowing the contamination signs to watch for keep the system performing well between professional visits, and mean the professional cleaning is a tune-up rather than a recovery effort. Clean Master Carpet Cleaning provides professional air duct cleaning across the entire DFW area alongside carpet cleaning, upholstery cleaning, and tile and grout cleaning. We inspect before we clean, price transparently, and document results so you can see exactly what the service accomplished. Contact Clean Master Carpet Cleaning today to schedule your DFW air duct cleaning and bring us a well-maintained system to work with. ‍
Read more