Vacuuming Before Carpet Cleaning

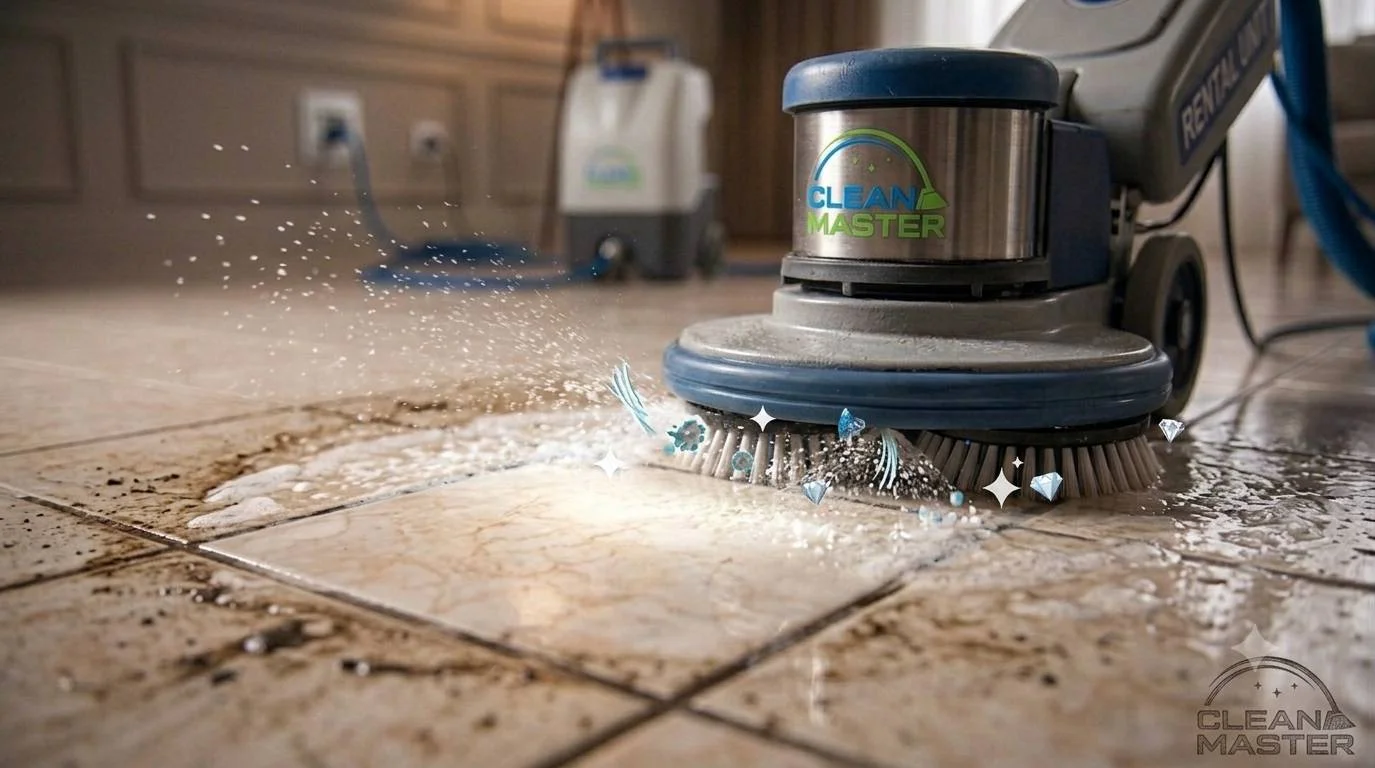
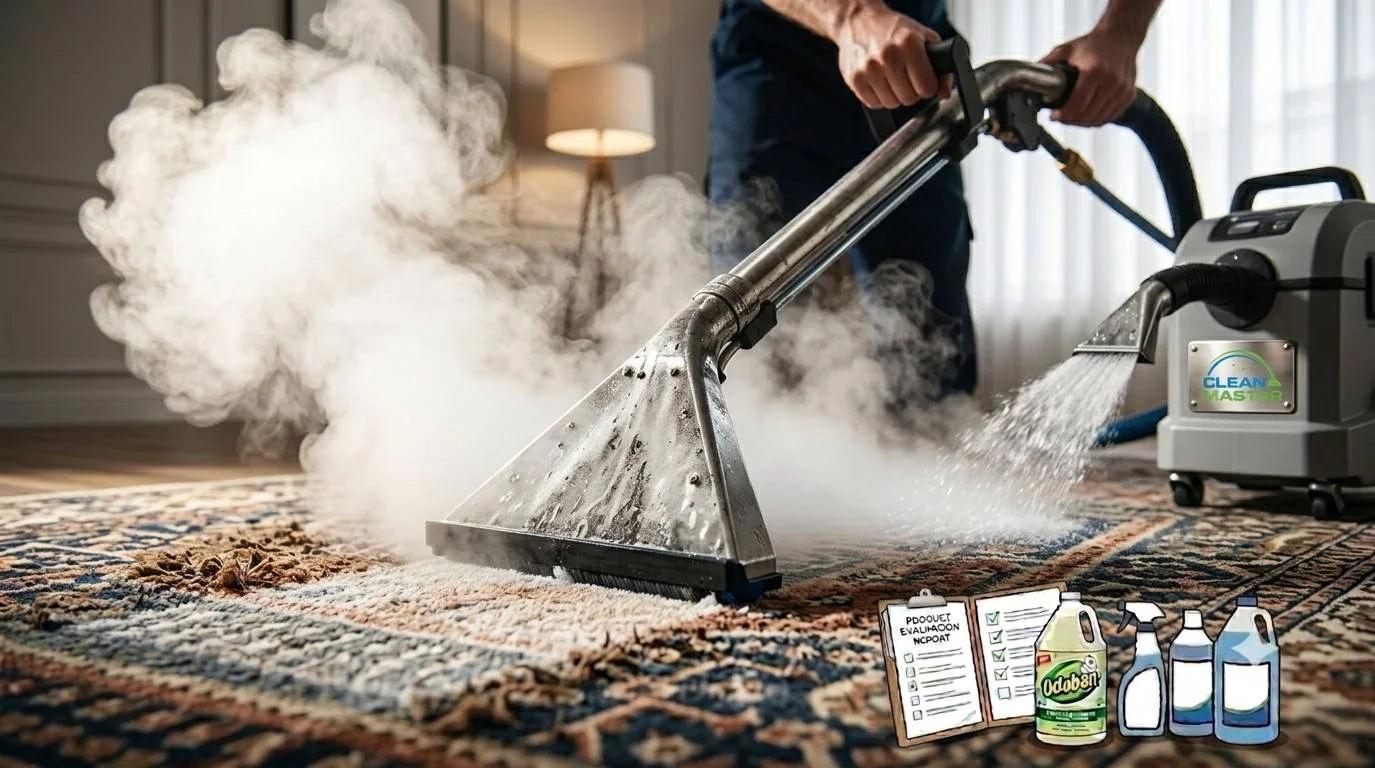
Of all the steps that determine how well a carpet clean turns out, vacuuming beforehand is the most consistently skipped and the most consistently consequential. It’s not a courtesy prep step or a nice-to-have, it’s the foundation the entire cleaning process builds on, and the difference in results between a vacuumed carpet and an unvacuumed one going into a clean is visible every time. At Clean Master Carpet Cleaning, we vacuum-assess every carpet before we start and we see the before-and-after difference across DFW homes regularly. Here’s exactly why pre-vacuuming matters, what happens when it’s skipped, and how to do it in a way that actually prepares the carpet for the best possible clean. Why Vacuuming Before Carpet Cleaning Is Non-Negotiable Dry Debris Turns to Muddy Residue When Wet This is the central reason, and understanding it changes how you think about the sequence. Carpet holds a significant volume of dry material: dust, crumbs, soil particles, pet dander, hair fragments, and general debris that has settled into the pile over days or weeks. In its dry state, this material sits loosely in the fiber and is precisely what a vacuum is designed to remove. When a carpet cleaner introduces water and solution without vacuuming first, that dry debris becomes wet debris. Dust becomes a paste. Dry soil particles suspend in the cleaning solution. Fine debris mixes with the moisture and is pressed deeper into the fiber during cleaning passes rather than being lifted and extracted. The cleaning machine is now working against a combination of the original embedded soil plus the surface debris it’s just wetted and distributed, instead of working on the embedded soil alone. The result is a cleaning solution that exhausts its effectiveness faster, an extraction pass that carries muddy suspended material rather than just cleaning solution and embedded soil, and a carpet that often takes longer to dry because the solution is carrying a heavier load of debris. We’ve cleaned carpets that clients vacuumed thoroughly beforehand and carpets where vacuuming was skipped entirely. On otherwise identical jobs, the pre-vacuumed carpet consistently produces cleaner extraction water earlier in the clean and a better final result. The machine is doing the job it’s designed for rather than compensating for the preparation step that was skipped. Pet Hair Clogs Carpet Cleaner Machines For homes with cats, dogs, or other pets, skipping the pre-vacuum introduces a specific mechanical risk on top of the cleaning performance issue: pet hair in the machine. Pet hair is the most machine-unfriendly debris that ends up in carpet. When it’s dry and loose, a vacuum handles it effectively. When it’s wetted by a carpet cleaner and then pulled through the machine’s extraction path, it tangles around components, accumulates in the recovery tank intake, reduces suction power progressively through the clean, and in some cases causes blockages that require the machine to be stopped and cleared. This isn’t a minor inconvenience. A blocked carpet cleaner in the middle of a job extends the cleaning time, reduces the quality of extraction in the later sections of the clean, and in consumer machines can cause enough suction loss that the final passes aren’t extracting effectively. The machine is doing maintenance work on itself rather than cleaning carpet. For pet households particularly, pre-vacuuming isn’t optional, it’s protective maintenance for the equipment as much as it is preparation for the carpet. Vacuuming Extends the Life of Cleaning Solution Effectiveness Carpet cleaning solution has a working capacity. Each pass through the carpet, the solution is absorbing and suspending soil until it becomes saturated and loses effectiveness, which is why multiple passes with clean solution produce better results than one large application. When surface debris is present, the solution begins absorbing it immediately, before it has the opportunity to penetrate the fiber and address the embedded soil that’s the actual target of the clean. The solution’s capacity is being spent on material a vacuum could have removed in two minutes. Pre-vacuuming clears that surface layer so the cleaning solution can direct its full capacity toward embedded soil in the fiber, the material the machine needs chemistry to loosen. The solution works harder where it matters rather than being absorbed by debris it wasn’t needed for. What Happens When You Skip the Pre-Vacuum The consequences of skipping aren’t always dramatic, which is part of why the step gets skipped. The carpet gets cleaned, it looks better than it did, and the connection between missing the vacuum step and a suboptimal result isn’t obvious. What’s actually happening: For professional cleaning, these effects are partially compensated by the power of commercial equipment. For DIY cleaning with a consumer machine, where performance headroom is already limited, skipping the pre-vacuum has a proportionally larger negative impact on results. Read our guide on getting rid of carpet cleaner residue if residue is already an issue. How to Vacuum Before Carpet Cleaning: The Right Way Pre-cleaning vacuuming is different from maintenance vacuuming. The goal isn’t a quick single pass, it’s removing as much loose material as possible from the full depth of the carpet pile before any moisture touches it. Vacuum Slowly and in Multiple Directions Speed is the enemy of effective vacuuming. A vacuum moved at walking pace across a carpet picks up surface material and misses what’s settled deeper in the pile. Pre-cleaning vacuuming should be slow, approximately half your normal walking pace, to allow the suction to work through the full pile height. After the first pass in your normal direction, make a second pass perpendicular to the first. Cross-directional vacuuming lifts fibers from multiple angles, dislodging material that a single-direction pass leaves behind. For carpet that hasn’t been thoroughly vacuumed recently, a third diagonal pass further improves material removal. This thorough approach takes longer than a standard maintenance vacuum. Budget 20 to 30 minutes per room for pre-cleaning vacuuming in a well-maintained home, and longer for carpet with significant pet hair or heavy soiling. Use the Right Attachment for Edges and Corners The floor
Read more
leminate floors

Using Carpet Cleaners on Laminate Floors: What You Need to Know

Laminate flooring looks durable. It handles foot traffic, resists surface scratches, and in a lot of homes it looks nearly identical to hardwood. That apparent toughness is what leads homeowners to assume it can handle a carpet cleaner pass, a reasonable-seeming shortcut when the machine is already out and the floor needs attention. It can’t. At Clean Master Carpet Cleaning, we serve the entire DFW area and we’ve seen the result of carpet cleaners on laminate in multiple forms, swollen seams, bubbling surfaces, and plank damage that required full section replacement. The surface toughness of laminate is real. Its moisture tolerance is not. Here’s the complete picture. Why Laminate Is Uniquely Vulnerable to Moisture To understand why a carpet cleaner is so damaging to laminate, you need to understand what laminate actually is beneath the surface. Laminate flooring is a layered composite product: The HDF core is the critical vulnerability. High-density fiberboard is made from compressed wood fibers bonded with resin, and despite the compression, it remains essentially wood-based material that absorbs moisture readily when exposed to it. When moisture reaches the HDF core, the fibers expand, causing the visible swelling, bubbling, and seam separation that characterizes laminate water damage. The wear layer and decorative layer protect the core from brief, surface-level moisture exposure, a spill wiped up promptly, a damp mop used quickly. What they cannot do is protect the core from sustained water exposure or moisture introduced at the seam lines between planks, where the core is directly exposed at the click-lock joint. A carpet cleaner introduces water in volumes far beyond what laminate’s surface protection can handle, and it introduces it in a sustained, pressurized way that drives moisture directly into seam lines throughout every pass. The Risks in Detail Swelling and Bubbling From Moisture Infiltration at Seams This is the most common and most visible damage outcome, and it begins at the seam lines between planks, not at the surface. When a carpet cleaner sprays solution across a laminate floor, the water doesn’t just sit on the wear layer. It immediately flows to the lowest point, the seam lines between planks, where it contacts the raw HDF core at the click-lock joint. The core absorbs that moisture within minutes. As the HDF swells: This damage is rapid. We’ve seen DFW clients with visible seam swelling within hours of a carpet cleaner pass on laminate. And critically, it’s irreversible. Swollen HDF doesn’t return to its original dimension once dried. The only resolution is replacement of the affected planks. Surface Finish Damage From Alkaline Carpet Cleaner Chemistry Laminate’s wear layer is chemically resistant to most household cleaners, but carpet cleaning solutions are formulated at an alkaline pH specifically to break down the acidic compounds in carpet soils. That alkaline chemistry isn’t neutral on laminate’s wear layer. Repeated exposure to alkaline carpet cleaning solution dulls the wear layer’s reflectivity, creates a hazy or cloudy appearance on the surface, and in some cases causes the decorative layer beneath the wear layer to shift color slightly, affecting the visual warmth of the floor. On laminate with a high-gloss finish, this dullness is particularly obvious. The surface chemistry damage compounds with the moisture damage, both happen simultaneously when a carpet cleaner is used on laminate. Irreversible Core Damage Requiring Full Plank Replacement The HDF core that gives laminate its structural integrity is the same material that makes moisture damage permanent. Unlike solid hardwood, which can sometimes be sanded and refinished after moisture damage, laminate has no recovery option. The decorative layer is a photograph, not real wood, and the compressed fiber core doesn’t return to its pre-swollen state. Damaged laminate planks must be replaced. In homes where the laminate runs continuously across multiple rooms, a common installation approach that creates a seamless look, replacing a section in one area may require pulling up significantly more floor to reach and replace the damaged planks, depending on the installation direction and how far moisture has traveled beneath adjacent planks. We’ve worked with DFW clients who used a carpet cleaner on laminate in a single room and ended up needing multiple adjacent sections replaced because moisture had traveled under the floor further than the visible surface damage suggested. Voiding Manufacturer Warranty Every major laminate flooring manufacturer, Pergo, Shaw, Armstrong, Mohawk, Quick-Step, and others, explicitly excludes water damage from warranty coverage when it results from inappropriate cleaning methods. Using a carpet cleaner on laminate falls squarely into this exclusion. Manufacturer warranties for laminate typically cover defects in the product, not damage caused by cleaning methods that contradict their care guidelines. Those guidelines uniformly specify minimal moisture, manufacturer-approved cleaners, and avoidance of steam mops and wet cleaning equipment. A carpet cleaner used on laminate doesn’t just risk the floor, it eliminates the warranty protection that covers it. At a Glance: What Carpet Cleaners Do to Laminate Risk Cause Reversible? Seam swelling and bubbling Moisture infiltration at click-lock joints No, plank replacement required Surface finish dullness Alkaline chemistry on wear layer Partially, professional buffing may help minor cases Core HDF damage Water absorption causing fiber expansion No, permanent structural change Warranty void Use of non-approved cleaning method No, warranty exclusion applies retroactively What to Use on Laminate Instead Dry Microfiber Mop for Daily Maintenance This is the laminate-safe daily cleaning standard, and the one every laminate manufacturer recommends as the primary maintenance tool. A dry or barely-dry microfiber mop picks up dust, pet hair, and surface debris without introducing any moisture to the floor. For laminate specifically, dry mopping is more than just habit, it’s the cleaning approach that keeps moisture exposure at absolute minimum over the long term. The less moisture laminate encounters cumulatively, the longer the core maintains its structural integrity and the longer the floor looks and performs the way it should. Microfiber attracts and holds debris electrostatically, it doesn’t push it around the way a traditional broom or dust mop does. For daily laminate maintenance, a quality microfiber flat mop is the tool
Read more
Can You Use A Carpet Cleaner On Tile Floors 2

Can You Use A Carpet Cleaner On Tile Floors

The carpet cleaner is already out, the tile needs cleaning, and it’s tempting to run the machine across both surfaces in the same session. It seems efficient. It probably won’t cause obvious immediate damage. And that’s exactly what makes this a problem worth addressing, because the consequences of using a carpet cleaner on tile are real, they’re progressive, and they’re visible before most homeowners connect the cause. At Clean Master Carpet Cleaning, tile and grout cleaning is one of our core DFW services. Here’s the straightforward answer to whether a carpet cleaner belongs on your tile floors, by tile type, by risk, and with the alternatives that actually do the job right. Why Carpet Cleaners Aren’t Designed for Tile Carpet cleaning machines, whether consumer hot water extractors, rental machines, or professional truck-mounts, are engineered around one surface: carpet fiber. Everything about the chemistry, the water volume, the spray pattern, and the head design is optimized for penetrating and extracting from dense fiber. Tile is the opposite surface. It’s hard, non-porous at the face, and requires cleaning chemistry that stays at the surface rather than penetrating it. The two surface types need fundamentally different approaches, and the mismatch between carpet cleaning equipment and tile surfaces creates three specific problems that compound over time. The Risks: By What They Do to Your Tile Residue Buildup on the Tile Surface Carpet cleaning solutions are formulated with surfactants designed to penetrate fiber and rinse out during extraction. On carpet, the extraction pass pulls the solution and the soil it’s carrying back out of the fiber. On tile, there’s no fiber to hold the solution during the cleaning pass, and the extraction head on a carpet cleaner isn’t designed to make flush contact with a hard, flat surface. The result is carpet cleaning solution that’s applied to the tile surface, incompletely extracted, and left to dry in place. As it dries, the surfactant compounds concentrate and leave a film on the tile that: Over-Wetting Grout and Moisture Infiltration Grout is porous. A carpet cleaner’s spray pattern introduces water volume calibrated for carpet fiber, more moisture than tile grout can safely absorb and release in normal drying conditions. When carpet cleaner solution is applied to tile and grout at carpet-cleaning water volumes: Slippery Tile Surface from Soap Residue This is the risk with immediate safety implications. Carpet cleaning surfactant residue on tile creates a low-friction surface, particularly on smooth ceramic, polished porcelain, and glazed tile in wet environments like bathrooms and kitchens. The slippery effect is most pronounced when the tile is wet, after showering, after mopping, or when any liquid contacts the residue-coated surface. It’s not always dramatic enough to cause an obvious slip, but it reduces traction meaningfully in exactly the environments where bathroom and kitchen tile needs to perform safely underfoot. This risk is separate from the cleaning performance issue, it’s a safety concern that applies regardless of how clean the tile looks after a carpet cleaner pass. How Each Tile Type Responds Tile Type Primary Risk Secondary Risk Overall Verdict Ceramic (glazed) Residue dulling the glaze Surfactant buildup in grout Not recommended Porcelain (polished) Residue visible on reflective surface Slip hazard when wet Not recommended Porcelain (textured/matte) Residue trapped in surface texture Grout over-wetting Not recommended Natural stone (marble, travertine) Alkaline carpet cleaner solution etches surface Moisture infiltration through pores Strongly avoid Grout lines (any tile) Surfactant absorbed into pores Moisture over-saturation Not recommended A Note on Natural Stone Natural stone tile, marble, travertine, limestone, slate, deserves specific mention because the risk isn’t just residue and moisture. It’s chemistry. Most carpet cleaning solutions run at an alkaline pH to break down the acidic compounds in carpet soils. Marble and travertine are calcium carbonate-based, they react with alkaline chemistry in a process called etching, which dissolves the surface of the stone and creates dull, rough patches that can’t be buffed out without professional stone restoration. A single carpet cleaner pass on marble tile can cause visible etching. Repeated applications progressively damage the surface in ways that become increasingly expensive to address. Natural stone tile and carpet cleaning solution are categorically incompatible. If your home has natural stone tile, the conversation about what cleaning product touches it starts and ends with pH-neutral, stone-safe chemistry. What to Use on Tile Floors Instead Purpose-Made Tile and Grout Cleaner With a Microfiber Mop For regular maintenance of ceramic and porcelain tile, a pH-appropriate tile cleaner applied with a microfiber mop is the correct everyday tool. The tile cleaner is formulated for hard surface chemistry, not carpet fiber chemistry, and rinses cleanly from the tile surface without leaving the residue that carpet cleaning solution deposits. Application technique matters on tile: spray the cleaner onto the mop pad rather than directly onto the floor to prevent pooling in grout lines, work in sections, and use a dry mop or dry microfiber pass to collect the lifted soil before it redeposits as the cleaning solution evaporates. For natural stone, pH-neutral stone cleaner is non-negotiable, no acidic or alkaline products regardless of how mild they seem. Steam Mop for Tile Sanitizing A steam mop is one of the safest and most effective tools for tile maintenance, it sanitizes through heat rather than chemistry, leaves no residue, and works on ceramic and porcelain without concern for chemical incompatibility. The steam loosens surface grime and dried residue effectively, and the microfiber pad on most steam mop heads collects the loosened material in the same pass. For natural stone, check the manufacturer’s guidance before steam mopping, some stone types are sensitive to the heat and moisture combination, and the specific stone and its sealing status affect whether steam mopping is appropriate. Steam mopping maintains tile between professional deep cleans but doesn’t replace the pressure and extraction that removes embedded grout contamination. Read our guide on whether steam cleaning is safe for tile and grout for a full breakdown by tile type. Rental Tile Cleaning Equipment For homeowners who want a DIY deep clean
Read more
How Long Does Carpet Take To Dry After Steam Cleaning 2 (1)

How Much Does Carpet Cleaning Cost Per Square Foot

Per square foot is the most useful way to understand carpet cleaning pricing, it scales with your actual home, makes quotes comparable across companies, and gives you a realistic number to work with before anyone arrives at your door. At Clean Master Carpet Cleaning, we serve the entire DFW area and quote carpet cleaning jobs every day. Here’s the transparent 2026 pricing picture for DFW homeowners, what the per square foot rate actually is, what affects it, and what the total looks like for real-world home sizes. The 2026 DFW Baseline: What Professional Carpet Cleaning Costs Per Square Foot Professional carpet cleaning in the DFW market in 2026 runs in a well-defined range for hot water extraction, the method used by Clean Master and most professional carpet cleaning companies: Service Level Per Square Foot Rate Notes Standard professional clean $0.20 to $0.35 Most residential synthetic carpet Premium and high-pile carpet $0.30 to $0.45 Plush, saxony, or wool carpet requiring extra care Heavy soil and deep clean $0.35 to $0.50 Carpet with significant embedded soil or pet contamination For a typical DFW home, those per-square-foot rates translate to: Home Size (Carpeted Area) Standard Clean Heavy Soil 500 sq ft (2 to 3 rooms) $100 to $175 $175 to $250 800 sq ft (3 to 4 rooms) $160 to $280 $280 to $400 1,200 sq ft (whole home) $240 to $420 $420 to $600 These are the ranges DFW homeowners actually pay in 2026 for professional hot water extraction, not the introductory rates that bait-and-switch pricing models advertise and inflate with add-ons at the door. How Room Count Affects Your Effective Per Square Foot Rate Most professional carpet cleaning companies, Clean Master included, price by measured square footage rather than per room. This matters because room-based pricing, common in discount advertising, can obscure what you’re actually paying per square foot. A company advertising “$25 per room” sounds cheap until you realize they’re measuring the room minus furniture, counting a 250 sq ft living room as a “room” alongside a 100 sq ft bedroom at the same flat rate. Per square foot pricing is transparent, the number applies to every square foot cleaned, measured consistently. The room count effect on effective rate: larger total square footage jobs carry a slightly better effective per-square-foot rate in most professional pricing because setup, travel, and fixed appointment costs are spread over more area. A 1,200 sq ft whole-home clean typically runs at a better effective rate per square foot than a single 200 sq ft bedroom cleaned in a separate appointment. This is why booking a whole-home clean rather than room-by-room appointments over time almost always represents better value per square foot. Minimum Job Fees: The Floor on Small Jobs Per square foot pricing has a floor, the minimum job fee that covers the fixed costs of any appointment regardless of size. In the DFW market in 2026, professional carpet cleaning minimums typically run $95 to $150. This means: If you’re considering cleaning a single small room, it’s worth either expanding the scope to additional rooms in the same appointment to get more value from the minimum, or understanding that the minimum fee applies regardless. Add-On Pricing That Affects Your Total Add-on services are priced on top of the base per-square-foot rate and are worth understanding before accepting or declining at booking: Add-On Service Typical DFW Price (2026) Worth It? Carpet protector (Scotchgard equivalent) $0.10 to $0.20/sq ft Yes for high-traffic areas and homes with kids or pets Pet odor and enzyme treatment $40 to $80 per affected area Essential for pet urine, not optional for odor resolution Deodorizer treatment $25 to $50 per room Useful for general freshening, not a substitute for enzyme treatment Stair cleaning $3 to $5 per step Standard add-on, stairs are labor-intensive per sq ft Carpet protector is the add-on we most consistently recommend for DFW families, applied immediately after cleaning, it repels liquid spills before they penetrate and slows resoiling significantly, extending the effective life of each clean. DIY Rental vs. Professional: Cost Per Square Foot Compared For homeowners weighing DIY rental against professional cleaning, the per-square-foot cost comparison is more instructive than comparing headline prices: Method Total Cost (800 sq ft home) Effective Per Sq Ft DIY rental (machine and solution) $85 to $130 $0.11 to $0.16/sq ft Professional (Clean Master) $160 to $280 $0.20 to $0.35/sq ft The DIY per-square-foot rate is lower, but that comparison excludes: For lightly soiled carpet in small areas, DIY makes financial sense. For whole-home cleans, heavy soiling, or pet contamination, the per-square-foot premium for professional cleaning reflects meaningfully better results and a fraction of the time investment. Read our full guide on how much renting a carpet cleaner costs for a complete cost breakdown. What Clean Master Charges in DFW in 2026 Clean Master Carpet Cleaning prices within the DFW professional market ranges above. Our standard residential carpet cleaning rate is $0.22 to $0.35 per square foot depending on carpet type and soil level, with a minimum job fee of $110 and add-ons priced transparently at booking, no door surprises. We serve the entire DFW area including Dallas, Fort Worth, Plano, Irving, Arlington, Frisco, McKinney, Garland, and surrounding communities, with the same pricing structure applied consistently across all locations. Frequently Asked Questions Why do some companies advertise carpet cleaning for $0.10 per square foot or less? Ultra-low advertised rates almost always involve one of two situations: the rate applies only to the most basic clean under ideal conditions, with add-ons required to address anything real (pet odor, heavy soil, protector) added at the door; or the rate reflects consumer-grade portable equipment rather than professional truck-mounted systems. The effective price after add-ons typically lands in the same range as transparent professional pricing, sometimes higher. Is per room or per square foot pricing better for the homeowner? Per square foot is more transparent and almost always fairer. Per-room pricing can work in the homeowner’s favor in large rooms but disadvantages you in small
Read more
How Long Does Carpet Take To Dry After Steam Cleaning 2 (1)

Steam Cleaning Carpets: What Works, What Doesn’t

Steam cleaners can clean carpet, and for the right jobs, they do it well. But there’s a persistent confusion in how “steam cleaning” gets used as a term, and that confusion leads to homeowners either expecting too much from a consumer steam cleaner or dismissing a genuinely useful tool because it didn’t perform like professional equipment it was never designed to replicate. At Clean Master Carpet Cleaning, we serve the entire DFW area and talk to clients about steam cleaning regularly. Here’s the clear, honest answer to what a steam cleaner actually does on carpet, and where its limits are. The Terminology Confusion Worth Clearing Up First When most people say “steam cleaning carpet,” they mean one of two completely different things, and the distinction matters enormously for expectations. Consumer steam cleaners heat water to produce pressurized vapor, genuine steam, that’s applied to the carpet surface. The heat loosens and sanitizes, but the machine has no extraction mechanism, it doesn’t pull anything back out of the carpet. Hot water extraction, what professional carpet cleaners including Clean Master use, and what rental machines like Rug Doctor replicate at a consumer level, injects hot water and cleaning solution into carpet under pressure and immediately extracts it with powerful suction. Despite being commonly called “steam cleaning” by homeowners and even some companies, this process uses hot water, not steam. It’s a fundamentally different method. The reason this matters: when someone says “steam cleaning didn’t work on my carpet,” they’re often describing hot water extraction that underperformed. When someone says “steam cleaning worked great,” they may be describing either method. Getting clear on which machine you’re using, vapor steam cleaner or hot water extractor, is the first step to accurate expectations. What Steam Cleaners Are Genuinely Effective at on Carpet Within their actual capability, steam cleaners do several things well on carpet. Surface sanitizing. Steam temperatures above 212°F kill bacteria, dust mites, and mold spores on contact. For households with allergy sufferers or pets, this is a real benefit that hot water extraction doesn’t necessarily replicate without specific antimicrobial chemistry. Freshening and light deodorizing. The heat disrupts volatile compounds responsible for surface odor, general mustiness, light foot traffic smell, mild pet odor at the fiber surface. Steam-cleaned carpet smells noticeably fresher, particularly in the hours immediately after cleaning. Read our guide on whether steam cleaning carpet removes odor for a full odor-by-odor breakdown. Surface soil and light stain removal. For recent spills, light soiling, and surface-level grime, steam vapor loosens material from the fiber effectively. Combined with a clean microfiber pad on the steam head and thorough post-steam wiping, steam cleaning removes surface-level contamination well. Fast drying. Steam introduces far less moisture than hot water extraction, which means drying times of 1 to 3 hours rather than 6 to 24. For homeowners who need rooms back in use quickly or who clean frequently, this is a meaningful practical advantage. Read our guide on how long carpet takes to dry after steam cleaning for a full breakdown. We’ve seen DFW clients maintain genuinely good-looking, fresh carpet through consistent steam cleaning between annual professional cleans, particularly in lower-traffic rooms and areas without pets or significant soiling. The tool is doing real work in the right application. What Steam Cleaners Can’t Do on Carpet The limitations are equally real and worth understanding before relying on steam for jobs it’s not built for. No extraction. This is the central limitation. Steam loosens surface contamination and kills surface bacteria, but without suction, what’s loosened either evaporates partially, gets wiped away if the steam head has a microfiber attachment, or redeposits in the carpet as the vapor cools. Deep-embedded soil in the carpet backing isn’t being removed, it’s being disturbed and potentially redistributed. Can’t reach deep contamination. Pet urine crystals in the backing, grease embedded in the pile, or years of compacted soil in high-traffic areas are beyond what steam vapor penetrates and addresses meaningfully. These require the pressure and extraction power of hot water extraction, professional or consumer, to reach and remove. Read our guide on whether steam cleaning removes stains to understand which stain types respond to steam and which don’t. Not a substitute for periodic deep cleaning. Steam cleaning is maintenance. It keeps carpet between professional deep cleans looking and smelling better. It doesn’t replace the deep extraction that removes what’s accumulated below the surface over time. Carpet maintained only by steam cleaning will look clean at the surface while building up embedded contamination that eventually becomes visible as dullness, matting, and odor that steam can’t address. Read our guide on how often you should get your carpet cleaned to stay on the right schedule. Which Carpet Types Are Appropriate for Steam Cleaning Carpet Type Steam Cleaner Appropriate? Notes Synthetic (nylon, polyester, olefin) Yes Most common residential carpet, handles steam well Wool and natural fiber Caution Heat and moisture can damage natural fibers, check manufacturer guidance Berber and loop pile Yes Use gliding attachment rather than scrubbing to avoid snagging High-pile and shag With care Slow passes, steam needs time to reach fiber base through longer pile Delicate or antique rugs No Professional assessment recommended before any cleaning method Steam Cleaner vs. Hot Water Extractor: The Quick Comparison Consumer Steam Cleaner Hot Water Extractor (Professional) Cleaning mechanism Vapor heat Pressurized hot water and suction Extracts soil? No Yes Deep cleaning capability Surface level Deep into fiber and backing Drying time 1 to 3 hours 6 to 12 hours (professional) Best for Maintenance and sanitizing Deep cleaning and stain removal Replaces professional cleaning? No Still benefits from professional periodically The Bottom Line: A Maintenance Tool, Not a Deep Cleaner A steam cleaner can clean carpet, effectively, for the jobs it’s designed for. Surface sanitizing, light deodorizing, fresh maintenance between professional cleans: these are real outcomes that DFW homeowners get from regular steam cleaning. What a steam cleaner isn’t is a hot water extractor. It doesn’t pull contamination out of the carpet. It doesn’t reach deep embedded soil.
Read more
Can Carpet Cleaners Remove Cat Urine Smel 2

Can Professional Carpet Cleaners Remove Cat Urine Smell & Stains?

Cat urine in carpet is one of the most persistent odor problems a homeowner can face, and one of the most commonly mishandled. Standard carpet cleaning doesn’t fully eliminate it. DIY treatments often make it worse before it gets better. And the smell has a way of returning even when it seemed like the problem was solved. Professional carpet cleaning does remove cat urine odor, but only when the treatment is matched to what cat urine actually does to carpet, and how deep it actually goes. At Clean Master Carpet Cleaning, we’ve resolved cat urine odor in DFW homes that clients had been struggling with for months, using an approach built on understanding the chemistry and the contamination depth. Here’s what you need to know. Why Cat Urine Is Harder to Remove Than Dog Urine This isn’t a myth, cat urine genuinely presents a more difficult odor removal challenge than dog urine, for specific chemical reasons. Cat urine contains a higher concentration of uric acid than dog urine, along with felinine, a sulfur-containing compound unique to cats that contributes significantly to the characteristic pungent smell. These compounds are more chemically stable than those in dog urine, which means they don’t break down as readily over time or with standard cleaning chemistry. Cat urine also tends to be deposited in the same location repeatedly, cats return to spots they’ve used before because they can detect residual odor that humans can’t. This layering effect concentrates contamination in specific areas over time, driving it progressively deeper into the carpet system with each incident. The combination of more complex chemistry, greater concentration, and repeated deposition in the same spots is what makes cat urine the most challenging urine odor a carpet cleaner encounters. The Core Problem: Uric Acid Crystals Understanding why standard cleaning fails starts with understanding uric acid crystals, the specific compound responsible for the odor that returns after a clean. When cat urine dries, the liquid evaporates but the uric acid remains in the carpet as microscopic crystals bonded to the fiber, backing, and padding. These crystals are not water-soluble, mopping, steam cleaning, and standard carpet cleaning solution don’t dissolve them. At best, they move them around or temporarily suppress the odor while the crystals remain intact. Moisture reactivates uric acid crystals. Heat reactivates them more aggressively. This is why cat urine odor returns after cleaning, particularly after steam cleaning or hot water extraction applied without enzyme pre-treatment. The cleaning process adds moisture and heat, the crystals are reactivated, and the odor surges temporarily before settling back to its baseline level, reduced but not eliminated. The only chemistry that breaks down uric acid crystals is enzyme-based treatment, specifically protease and urease enzymes that dissolve the crystal structure at a molecular level, converting the uric acid into compounds that can be fully extracted and don’t produce odor. Read our guide on how to use enzyme cleaner on carpet for more on how this process works. How Deep Cat Urine Actually Goes This is the contamination depth picture that most homeowners underestimate, and why surface-level treatment consistently fails to produce lasting results. A typical cat urine incident, a single accident on carpet, follows this penetration path: Standard carpet cleaning reaches layers 1 and 2 effectively. Professional hot water extraction with enzyme pre-treatment reaches layers 2 and 3. Layer 4, subfloor contamination, typically requires padding replacement and direct subfloor treatment before re-laying carpet. For a single, recent cat urine incident caught early, professional treatment can resolve contamination through layers 1 to 3 completely. For repeated incidents in the same location over months or years, padding replacement is frequently necessary for complete odor elimination. Why DIY Treatment Often Makes Things Worse The most common DIY approaches to cat urine, vinegar and water, baking soda, steam cleaning, or general-purpose odor sprays, share a common limitation: they address the surface without breaking down the uric acid crystals beneath it. Worse, some approaches actively complicate professional treatment. Steam cleaning without enzyme pre-treatment heats the uric acid crystals, temporarily intensifying the odor and potentially heat-setting the stain into the fiber, making it harder to lift later. Vinegar neutralizes the ammonia odor component temporarily but doesn’t touch uric acid crystals. The vinegar smell fades, the cat urine smell returns. Odor-masking sprays layer fragrance over the odor source without eliminating it. As the fragrance fades, the underlying odor returns, sometimes with the masking agent having interacted with the urine compounds to create a combined smell worse than either alone. Over-application of water spreads the urine contamination laterally into a larger area while diluting it slightly, creating a wider zone of contamination than the original incident. We’ve worked with DFW clients who had applied multiple DIY treatments to the same spot over several weeks before calling Clean Master. In most cases the contamination zone was larger than the original incident, and the layered treatments had created additional chemistry that needed to be considered in the professional approach. It’s not a disaster, but it does make the job more complex and sometimes extends the number of treatments needed. Clean Master’s Professional Approach to Cat Urine Step 1: UV Light Inspection to Map All Affected Areas Cat urine fluoresces under ultraviolet light, which makes UV inspection an essential first step before any treatment begins. UV inspection reveals: Treating only visible stains while missing adjacent UV-revealed contamination is one of the most common reasons cat urine odor persists after a clean. We map every affected area before treating any of them. Step 2: Enzyme Pre-Treatment with Full Dwell Time With the contamination map established, we apply professional-grade enzyme treatment to every identified area, applied generously enough to saturate to the depth the urine reached. This is not a light surface application. The enzyme solution needs to contact the uric acid crystals throughout the full contamination depth to break them down completely. Dwell time is non-negotiable. The enzymatic process takes time, the bacteria in the solution need to produce enzymes, and the enzymes need time to
Read more
How To Fluff Carpet After Cleaning 2

Steam Cleaning Tile and Grout: What You Need to Know

Steam cleaning tile and grout is something a lot of DFW homeowners try, and for the most part, it’s a reasonable maintenance approach. For ceramic and porcelain tile, steam is safe and effective at surface cleaning and sanitizing. For grout, the picture is more nuanced: steam does something useful, but understanding what it doesn’t do is just as important as knowing what it does. At Clean Master Carpet Cleaning, tile and grout cleaning is one of our core DFW services. Here’s a straightforward breakdown of where steam works, where it falls short, and what the limitations mean for your floor maintenance. Ceramic and Porcelain Tile: Steam Is Safe For the tile types found in the majority of DFW homes, ceramic and porcelain, steam cleaning is safe when used correctly. Both materials are dense, fired at high temperatures during manufacture, and resistant to the heat and moisture that steam introduces. Steam’s benefits on ceramic and porcelain tile are real: The technique considerations that matter most on ceramic and porcelain: We’ve seen DFW clients with ceramic kitchen tile and porcelain bathroom floors get genuinely good results from regular steam cleaning between professional appointments, notably cleaner tile surface and noticeably reduced soap scum and surface grime buildup. Grout Lines: Steam Helps, But Doesn’t Extract This is the most important distinction to understand about steam cleaning grout, and the one that creates the most unrealistic expectations. Steam heat loosens contamination in grout lines, the heat penetrates the porous grout surface, softens embedded oils and soil, and brings it to a more removable state. That part is real and useful. The limitation is what comes next: steam doesn’t extract what it loosens. Without a simultaneous suction or wiping step, loosened grout contamination either evaporates partially, redeposits in the grout line as the steam cools, or spreads to surrounding tile where it’s collected by the follow-up wipe. The grout looks improved because the surface layer is cleaner, but the deeply embedded discoloration that has accumulated in the pores over months or years isn’t being extracted. It’s being agitated. The practical implication: steam cleaning maintains grout that’s already in reasonable condition and prevents surface buildup from worsening. It doesn’t restore heavily discolored or stained grout to clean, that requires the pressure and extraction of professional cleaning. Sealed vs. Unsealed Grout: Different Responses Whether your grout has been sealed significantly affects how steam cleaning interacts with it. Sealed grout has a protective barrier that reduces moisture absorption. Steam on sealed grout primarily cleans the surface of the sealant and the grout line above it, the steam doesn’t penetrate meaningfully into the grout itself. This is actually beneficial: sealed grout stays cleaner longer, and steam maintenance keeps the sealed surface clean without much risk to the underlying material. Unsealed grout is porous and absorbs moisture readily. Steam penetrates more deeply into unsealed grout, which is more effective at reaching embedded contamination, but also means moisture enters the grout structure and needs to dry fully afterward. In DFW’s humid summers, drying time for steam-cleaned unsealed grout in bathrooms or enclosed areas is worth factoring in. The Risks Worth Knowing Thermal Shock on Certain Tile Types Ceramic and porcelain handle steam heat well. Certain other tile types, particularly those with decorative glazing, hand-painted tiles, or older vintage tile, can be more vulnerable to rapid temperature change from concentrated steam contact. If you have decorative, vintage, or specialty tile, test steam in a hidden area before treating the full surface and keep the steam head moving continuously rather than dwelling in one spot. Natural stone tile, marble, travertine, slate, deserves particular caution. The heat and moisture from steam can open the pores of natural stone, and without proper sealing, moisture infiltration can cause staining or surface changes. Natural stone tile is a case where professional cleaning with appropriate chemistry is a safer choice than DIY steam. Repeated Steam Use Can Degrade Grout Sealant Grout sealant, the protective coating applied after professional cleaning, is not designed for sustained, repeated high-temperature steam exposure. Over time, frequent steam cleaning of sealed grout can degrade the sealant layer, reducing its effectiveness and requiring reapplication sooner than the normal 1 to 2-year interval. For sealed grout, steam cleaning every few weeks is more aggressive than the sealant is designed to handle. Monthly or less-frequent steam maintenance is more appropriate for sealed grout, and the professional re-sealing interval should be adjusted if heavy steam use has been the pattern. Steam Loosens But Doesn’t Extract Already covered above, but worth restating as a limitation in its own right: if the floor isn’t wiped thoroughly immediately after steaming, loosened contamination redeposits. The follow-up wipe is not optional, it’s the step that determines whether the steam pass produced a clean result or just moved dirt around. At a Glance: Steam Cleaning Safety by Tile and Grout Type Surface Steam Safe? Notes Ceramic tile Yes Safe, move continuously and wipe after each pass Porcelain tile Yes Safe, same technique as ceramic Natural stone (marble, travertine) Caution Risk of moisture infiltration, professional cleaning preferred Decorative and vintage tile Test first Thermal shock risk on older glazed surfaces Sealed grout Yes (with limits) Don’t steam too frequently, degrades sealant over time Unsealed grout Yes Allow full drying time after steam When to Call Clean Master Instead Steam cleaning is a solid tile and grout maintenance tool, for surfaces and frequency levels that match what it’s designed for. When grout has significantly darkened, hasn’t been professionally cleaned in over a year, or needs to be sealed after cleaning, steam maintenance won’t get you there. Clean Master’s professional tile and grout cleaning uses high-pressure hot water extraction that reaches deep into grout pores, removes embedded contamination that steam loosens but can’t extract, and restores grout to a condition that steam cleaning can then maintain effectively. We also apply professional-grade grout sealer after cleaning, protecting the result and extending the interval before the next professional clean. We serve the entire DFW area with tile and grout
Read more
How To Fluff Carpet After Cleaning 2

How To Fluff Carpet After Cleaning: A Complete Homeowner’s Guide

Freshly cleaned carpet that looks flat and matted instead of full and soft is one of the more frustrating post-cleaning outcomes, particularly when the clean itself went well. The good news is that in most cases, flat carpet after cleaning is temporary and fixable with the right technique applied at the right time. At Clean Master Carpet Cleaning, pile restoration is something we address with DFW clients regularly. Here’s why carpet goes flat after cleaning, and the methods that genuinely restore it. Why Carpet Goes Flat After Cleaning Understanding what caused the flattening tells you which restoration method to use. Over-wetting during cleaning is the most common cause of post-clean pile flatness. Excess moisture in the carpet fiber makes it pliable and compression-prone, fibers that would normally spring back under foot pressure stay down when wet. If the carpet was over-wetted during cleaning, common with DIY machines that have lower extraction power, the pile may lie flat as it dries rather than recovering naturally. Foot traffic on wet carpet compounds this. Every step on damp carpet presses fibers in the direction of the footfall and holds them there as they dry. The resulting directional matting is visible as traffic paths once the carpet is fully dry, darker-looking strips where fibers are compressed compared to surrounding untouched pile. Read our guide on when you can walk on carpet after cleaning to avoid this. Furniture indentations from pieces returned too early are a different category, concentrated compression under heavy furniture legs on damp carpet creates circular or rectangular depressions that can set as the fiber dries. These are stubborn but in most cases recoverable. Read our guide on how long after carpet cleaning you can put furniture back to prevent this from happening. Method 1: Carpet Rake or Grooming Brush Best for general post-clean pile restoration across large areas. A carpet rake, a long-handled tool with plastic or metal tines designed specifically for carpet grooming, is the most effective general-purpose pile restoration tool available, and one of the most underused by homeowners. How to use it: We’ve seen clients transform dull, flat post-clean carpet into genuinely fresh-looking pile with a single thorough raking session. The difference on plush and saxony carpet styles in particular is dramatic, these high-pile styles benefit most from grooming because their longer fibers show directional compression most clearly. A carpet rake costs $15 to $30 and is worth having for any home with soft-pile carpet. A stiff-bristle upholstery brush works similarly on smaller areas. Method 2: Damp Towel and Hair Dryer Best for stubborn flat areas that didn’t respond to raking. For sections where the pile has dried fully in a compressed position and raking alone isn’t lifting it, introducing controlled moisture and heat reactivates the fiber’s memory and allows it to be reshaped. How to use it: The heat resets the fiber, the same principle as using a clothes steamer on a wrinkled fabric. Once cooled in the restored position, the pile holds better than it did immediately after cleaning. Method 3: Ice Cube Trick for Furniture Indentations Best for circular or rectangular compression marks from furniture legs. This method consistently surprises clients with how well it works on furniture dents, and it requires nothing more than ice from the freezer. How to use it: The ice method works because slow, even moisture release is gentler on carpet fibers than direct wetting, the gradual absorption gives fibers time to rehydrate fully before being lifted, rather than being manipulated while water is still actively flowing through them. We’ve recommended this method to DFW clients after furniture was returned to damp carpet before it was fully dry, and the success rate on standard synthetic carpet is high. Natural fiber carpets and older carpet with weakened fiber memory may not respond as completely, but the method rarely makes things worse. Method 4: Vacuuming in Multiple Directions Best for light post-clean pile lift and finishing after other methods. Vacuuming is the simplest pile-lifting tool, and the direction matters more than most homeowners realize. Standard vacuuming in one direction compresses the pile consistently in that direction, which is fine for maintenance but doesn’t lift flat carpet effectively. For post-clean pile restoration: This cross-directional vacuuming lifts fibers from multiple angles, separates compressed strands, and leaves the pile looking fuller and more even than single-direction vacuuming produces. It’s not a replacement for raking on significantly flat carpet, but it’s an effective finishing step after any of the methods above. At a Glance: Which Method for Which Problem Cause of Flat Carpet Best Method Time Required General post-clean flatness across whole room Carpet rake and multi-direction vacuum 30 to 60 minutes Directional matting from foot traffic on wet carpet Carpet rake against the mat direction 20 to 45 minutes Furniture indentations from legs Ice cube method, finger lift, and rake 3 to 6 hours (ice melt time) Stubborn compressed sections after drying Damp towel, hair dryer, and rake 15 to 30 minutes per section When Carpet Won’t Fully Recover Most post-clean pile flatness is temporary and responds well to the methods above. The cases where full recovery isn’t achievable: In these cases, pile restoration methods improve appearance but may not fully restore the original height and texture. A professional assessment from Clean Master can confirm whether the issue is temporary post-clean compression or more permanent fiber wear, and what realistic expectations should be. Frequently Asked Questions How long after cleaning should I wait before trying to fluff the carpet? Always wait until the carpet is fully dry, confirmed by the hand-test with no coolness or dampness when you press your palm firmly into the pile. Attempting to rake or restore pile while the carpet is still damp risks re-compressing wet fibers in the direction of the tool. For professional hot water extraction, that’s typically 6 to 12 hours with good ventilation and air movers running. Does raking damage carpet? No, a carpet rake used correctly is gentle on fibers and beneficial for pile height
Read more
rent tile and grout 2

Can You Rent A Tile and Grout Cleaner

Maintaining clean tile and grout can be a challenging task, especially when dirt and stains get embedded in the porous surfaces. While professional cleaning services are an option, many homeowners prefer the DIY route to save money and time. This leads to the common question: Can you rent a tile and grout cleaner? The short answer is yes! Renting a tile and grout cleaner is a practical, cost-effective solution for deep cleaning without investing in expensive equipment. In this article, we’ll explore everything you need to know about renting these cleaners—from where to rent, the benefits, costs involved, and tips to achieve the best results. What Is a Tile and Grout Cleaner? Before diving into rentals, it helps to understand what a tile and grout cleaner is. These machines are specially designed to clean tiled floors and the grout lines between them. They use a combination of high-pressure water, brushes, and suction to remove dirt, grime, and stains that regular mopping or scrubbing can’t tackle effectively. Some cleaners are handheld, suitable for small areas, while others are large, walk-behind units for extensive floor cleaning. They can use either steam or water with cleaning solutions depending on the model. Where Can You Rent a Tile and Grout Cleaner? Tile and grout cleaner rentals are widely available, especially in urban and suburban areas. Some common places to rent these machines include: Benefits of Renting a Tile and Grout Cleaner Cost-Effective Solution Purchasing a tile and grout cleaner can cost several hundred to over a thousand dollars, depending on the brand and features. Renting allows you to access professional-grade machines at a fraction of the cost. Access to Professional Equipment Rental units are typically commercial-grade, more powerful, and efficient than consumer models. This means better cleaning results without having to commit to a purchase. Convenient and Flexible Renting is ideal for one-time deep cleans or occasional maintenance. You don’t have to worry about storage, maintenance, or repairs—just rent, use, and return. How Much Does It Cost to Rent a Tile and Grout Cleaner? Rental prices vary based on the machine type, rental duration, and location. On average: Additional costs to consider include cleaning solutions, protective gloves, and possible deposits. Tips for Renting and Using a Tile and Grout Cleaner 1. Choose the Right Machine for Your Needs: If you have small areas or countertops, a handheld cleaner is sufficient. For floors covering hundreds of square feet, opt for a walk-behind model. 2. Inspect the Equipment Before Renting: Make sure the cleaner is in good working condition, with all attachments included. Ask about instructions and safety guidelines if unfamiliar with the machine. 3. Use the Recommended Cleaning Solutions: Avoid damaging your tiles or grout by using cleaners specified for the machine. Harsh chemicals can discolor grout or erode tile finishes. 4. Test a Small Area First: Before tackling large areas, test the cleaner on a hidden spot to check for colorfastness and ensure no damage occurs. 5. Follow the Manufacturer’s Instructions: Proper operation ensures effective cleaning and extends the equipment’s life. Pay attention to water temperature limits, cleaning times, and suction usage. Frequently Asked Questions: Q 1.Can You Rent a Tile and Grout Cleaner for Home Use? Yes, many home improvement and equipment rental stores offer tile and grout cleaners designed for residential use. These machines are user-friendly and suitable for DIY cleaning projects. Q 2.How Long Should You Rent a Tile and Grout Cleaner? Rental duration depends on your project size. For small jobs, a day or weekend rental may suffice. Larger spaces might require a week. Renting longer can reduce the daily cost. Q 3.Are Rental Tile and Grout Cleaners Effective? Absolutely. Rental machines are often commercial-grade, providing powerful cleaning that removes deep stains and dirt better than regular mops or handheld scrubbers. Final Thoughts: Renting a tile and grout cleaner is a smart and affordable way to restore the shine and cleanliness of your tiled surfaces. It offers access to professional-grade equipment without the commitment of buying one, perfect for seasonal or occasional cleaning needs. By choosing the right machine, following usage tips, and properly maintaining the equipment during your rental period, you can achieve impressive results that make your floors look refreshed and well cared for. Next time you face stubborn tile and grout stains, consider renting a cleaner to save money and get your floors sparkling clean with minimal effort. ‍
Read more
Is OdoBan Safe to Use in Carpet Cleaning Machines 2

Is OdoBan Safe to Use in Carpet Cleaning Machines

OdoBan is a popular disinfectant and deodorizer, but using it in a carpet cleaner requires caution. While OdoBan is effective at neutralizing odors and killing bacteria on many surfaces, it is not specifically formulated as a carpet shampoo. Using it incorrectly in a carpet cleaning machine may cause residue buildup, excessive foam, or fiber irritation. Understanding proper dilution, carpet compatibility, and machine limitations helps ensure safe and effective use without damaging carpets or equipment. What Is OdoBan and How Does It Work OdoBan is primarily designed as a disinfectant, sanitizer, and odor neutralizer. Its formulation targets bacteria, fungi, and odor-causing organisms rather than soil removal. OdoBan’s Primary Purpose and Ingredients OdoBan contains antimicrobial agents and fragrance additives designed to eliminate odors at their source. It works by breaking down odor-causing bacteria rather than masking smells. While effective on hard surfaces, sealed floors, and certain fabrics, it does not include surfactants needed for deep carpet soil suspension. This means it may not remove embedded dirt, oils, or debris when used alone in a carpet cleaner, limiting its overall cleaning performance. How OdoBan Interacts With Carpet Fibers Carpet fibers are porous and absorb liquids easily. When OdoBan is applied through a carpet cleaner, it penetrates fibers and padding quickly. Without proper rinsing, residues may remain behind, attracting dirt over time. Some synthetic fibers tolerate diluted OdoBan well, while natural fibers like wool may react poorly, leading to discoloration or stiffness. Spot testing is always essential. Is It Safe to Put OdoBan in a Carpet Cleaner Safety depends on dilution, machine type, and carpet material. OdoBan should never be poured into a carpet cleaner at full strength. Proper Dilution and Manufacturer Guidelines OdoBan must be diluted according to label instructions, typically one to two ounces per gallon of water for carpet applications. Using higher concentrations increases the risk of residue and foam buildup. Many carpet cleaner manufacturers recommend only approved cleaning solutions to protect pumps and seals. Ignoring these guidelines may void warranties or damage internal components. Potential Risks of Incorrect Use Using OdoBan improperly can result in sticky carpets, prolonged drying times, and lingering chemical odors. Excess moisture combined with residue may also encourage re-soiling. In extreme cases, overuse can weaken carpet backing or padding, especially when repeated frequently. When Using OdoBan in a Carpet Cleaner Makes Sense There are limited situations where OdoBan can be beneficial when used carefully and sparingly. OdoBan should complement, not replace, proper carpet cleaning solutions. Best Practices for Odor Treatment Always clean carpets first with a dedicated carpet shampoo. After soil removal, lightly apply diluted OdoBan to odor-prone areas and extract thoroughly. Follow with a clear water rinse to minimize residue. Adequate ventilation helps reduce lingering scent and speeds drying. Why OdoBan Should Not Replace Carpet Shampoo OdoBan is not designed to lift or suspend soil particles. Carpet shampoos contain surfactants that break down oils and trap dirt for extraction. Cleaning vs Deodorizing Functions Using OdoBan alone may leave carpets looking clean temporarily while dirt remains embedded below the surface. This can cause faster re-soiling and dull appearance. Carpet shampoos address visible and hidden dirt, while OdoBan focuses on odor-causing bacteria. Long-Term Impact on Carpet Appearance Repeated use of non-carpet solutions may stiffen fibers or alter texture. Over time, carpets may feel crunchy or appear flat. Using the correct products preserves softness, color, and longevity. Synthetic vs Natural Carpet Fibers Synthetic carpets like nylon or polyester generally tolerate diluted OdoBan better. Natural fibers such as wool, silk, or cotton are more sensitive and may discolor or degrade. Always confirm fiber type before application and avoid machine use on delicate carpets. FAQ’s: Q 1.Can OdoBan damage my carpet cleaner Yes, if used improperly. Excess foam or residue can clog pumps and hoses. Always follow dilution guidelines and manufacturer recommendations. Q 2.Will OdoBan remove pet stains OdoBan neutralizes odors but does not remove stains. Stains require carpet-specific cleaners before deodorizing treatment. Q 3.Does OdoBan leave residue on carpets Residue is possible if not fully extracted or rinsed. Using minimal solution and performing extra suction passes reduces this risk. Q 4.Is OdoBan safe for homes with pets When diluted correctly and fully dried, OdoBan is generally safe. Keep pets off treated areas until carpets are completely dry. Final Thoughts: OdoBan can be used in a carpet cleaner with careful dilution and proper technique, but it should never replace dedicated carpet cleaning solutions. Its strength lies in odor control and sanitization, not deep soil removal. For best results, clean carpets thoroughly first, then use OdoBan sparingly as a follow-up treatment. This approach protects carpets, equipment, and indoor air quality while effectively managing persistent odors. ‍
Read more