Do You Keep Cleaning Carpets Until Water Is Clear 2

Do You Keep Cleaning Carpets Until Water Is Clear

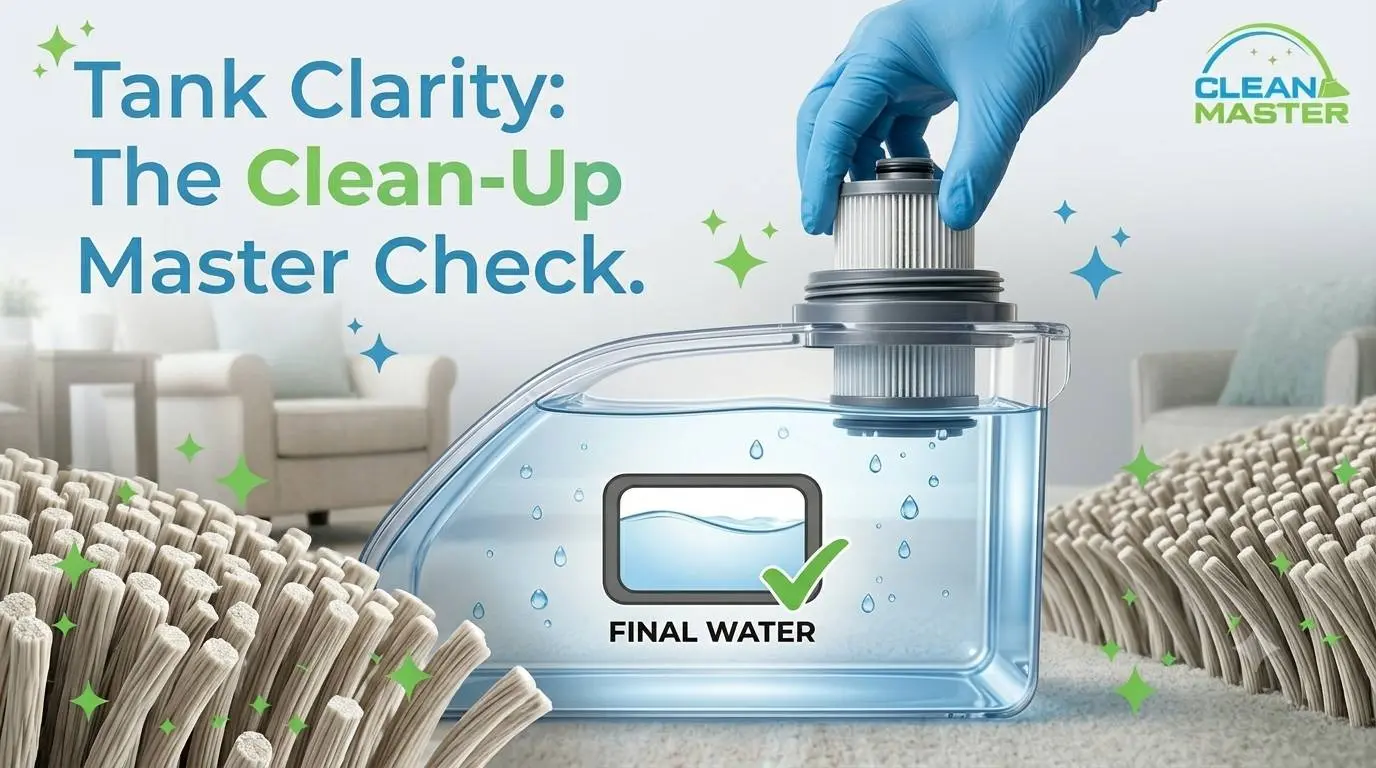
If you’ve ever cleaned your carpet with a machine and watched dark, murky water fill the recovery tank, the instinct is clear: keep going until that water runs clean. It seems logical. Dirty water means dirty carpet, clean water means clean carpet, right? Not exactly. This is one of the most persistent myths in DIY carpet cleaning, and it leads homeowners to over-clean their carpets in ways that cause real damage while chasing a standard that heavily soiled carpet may never actually reach. At Clean Master Carpet Cleaning, we serve the entire DFW area and we’ve seen the consequences of this misunderstanding play out regularly, clients who stopped too early convinced something was wrong, and clients who kept going far too long and left their carpet worse than they found it. Here’s the truth about what your carpet cleaning water is actually telling you, and when the right time to stop really is. Where This Myth Comes From The clear-water standard makes intuitive sense because it works as a mental model for some cleaning tasks. Rinsing dishes, washing hands, cleaning a paintbrush, in these contexts, clear rinse water does signal that the job is done. The logic transfers naturally to carpet cleaning. The problem is that carpet isn’t a smooth, non-porous surface. It’s a dense fiber system that holds years of accumulated soil, skin cells, dust, pet dander, and environmental debris at varying depths, some near the surface, some embedded deep in the pile, and some worked into the backing and padding beneath. Even a carpet that looks clean to the eye and has been professionally maintained can produce noticeably discolored water during cleaning because the cleaning process is reaching material that surface appearance never reflected. Clear water, in carpet cleaning, would mean the carpet held nothing below the surface. For any carpet that’s been lived on, that’s rarely achievable, and pursuing it is where the damage begins. What the Water Color Actually Tells You The color of your recovery water tells you what’s being extracted from the carpet at that moment, which is useful information, but not the complete picture most people think it is. Very dark brown or black water in the first pass typically indicates heavy surface soil, accumulated dust, and loosened cleaning solution from the initial application. This is normal and expected, particularly on high-traffic areas or carpets that haven’t been cleaned recently. Grey or tan water in subsequent passes indicates that surface-level extraction is largely complete and the machine is now reaching deeper-embedded material. This is the range where most DIY passes settle, and it’s also where most homeowners make the mistake of continuing unnecessarily. Lightly tinted water, faintly grey or barely discolored, in later passes is often not soil at all. It’s frequently residual cleaning solution, minerals from the water supply, or material disturbed from the carpet backing that the machine’s suction is pulling through. Continuing past this point adds moisture without meaningfully improving cleanliness. Read our guide on getting rid of carpet cleaner residue if you suspect solution buildup is affecting your results. Clear water on a lived-in carpet with any history of regular use is rarely achievable through consumer-grade cleaning. Professional hot water extraction with commercial equipment gets closer, but even professional equipment extracts lightly discolored water from carpets that look and are genuinely clean. How Many Passes Is Typically Enough? There’s no universal number, but there is a practical framework based on what the machine is actually accomplishing with each pass. For a standard residential carpet with moderate soiling, a regularly used living room or hallway that gets cleaned every 6 to 12 months, two to three cleaning passes followed by one to two rinse passes is typically sufficient. This is the range where meaningful extraction is happening and additional passes produce sharply diminishing returns. For heavily soiled carpet, high-traffic areas, homes with pets, or carpet that hasn’t been professionally cleaned in several years, the effective cleaning range extends to three to four cleaning passes, but the water will likely still show color at that point. That’s not a failure. That’s the limit of what the available equipment can extract in a single session, and continuing beyond it risks the carpet rather than improving it. A useful practical test: after each extraction pass, check whether the water in the recovery tank is meaningfully darker than the previous pass. If the color difference between pass three and pass four is negligible, if you’re extracting roughly the same lightly tinted water with each additional run, you’ve hit the point of diminishing returns. Additional passes are adding moisture without adding meaningful cleaning value. The Risks of Chasing Clear Water Over-Wetting the Carpet Every additional pass introduces more water into the carpet. Consumer-grade machines have limited extraction power compared to professional equipment, which means a meaningful percentage of the water introduced with each pass stays in the carpet. By the time a homeowner has made six, eight, or ten passes chasing clear water, the carpet is significantly wetter than it needs to be, and drying time has multiplied accordingly. Over-wet carpet is slow to dry, prone to mildew growth in the backing and padding, and at risk of the musty smell that returns after cleaning when moisture is trapped too long. Read our guide on whether carpet cleaning can cause mold to understand how quickly this becomes a serious problem. The irony is that clients who’ve over-cleaned chasing clear water often end up with a carpet that smells worse after the clean than a carpet that was cleaned to the right stopping point. Fiber Damage from Aggressive Repeated Cleaning Carpet fibers are more vulnerable when wet than when dry. Repeated mechanical passes over wet fibers, particularly with machines that have rotating brushes, create friction and stress on the fiber structure that accumulates with each additional pass. Over time, this manifests as a matted, dull appearance in the cleaned area, reduced pile height, and a texture that feels rougher underfoot than the surrounding carpet. High-pile
Read more
Can Steam Cleaning Carpet Eliminate Odors or Just Mask Them_ 2

Does Steam Cleaning Carpet Remove Stains

Steam cleaning has a strong reputation as a deep cleaning method, and for general dirt, odor, and surface grime, that reputation is well-earned. But when it comes to stains specifically, the answer is more nuanced than most people expect. Yes, steam cleaning removes many carpet stains. No, it doesn’t remove all of them. And for a specific category of stains, applying steam without pre-treatment can make the problem significantly worse, permanently. As professional carpet cleaners serving the DFW area, we’ve seen steam deliver impressive stain results and we’ve been called in to deal with stains that steam made harder to fix. The difference almost always comes down to stain type, timing, and technique. Here’s the complete breakdown. How Steam Cleaning Affects Stains Steam cleaning works by applying high-temperature vapor to carpet fibers. That heat does two things relevant to stain removal: it breaks down the bonds between stain molecules and carpet fibers, and it loosens the material so it can be lifted or wiped away. For many stain types, particularly water-soluble, surface-level, or recently set stains, this process is genuinely effective. For others, particularly oil-based, dye-based, or protein stains, steam either has limited effect or actively works against removal by driving the stain deeper or heat-setting it into the fiber. Understanding which category your stain falls into before you reach for the steam cleaner is the difference between a clean carpet and a stain that’s now permanent. Stain-by-Stain: What Steam Cleaning Can and Can’t Remove Food and Drink Spills: Coffee, Wine, Juice Water-soluble food and drink stains respond reasonably well to steam, particularly when the spill is recent. The heat loosens the stain from the fiber and the vapor helps lift it to the surface where it can be blotted away. Coffee, juice, and light wine stains treated promptly with steam, especially after a quick blot to remove surface liquid first, often come out well. The caveat is time. As these stains dry and oxidize, they bond more firmly to carpet fibers and become progressively harder to remove with steam alone. A coffee stain treated within an hour of the spill responds very differently to steam than the same stain left overnight. For older food and drink stains, pre-treatment with a stain remover before steaming significantly improves results. Tannin-heavy stains like red wine and dark fruit juice can also leave a residual discoloration even after steam treatment, particularly on light-colored carpet, that requires a targeted tannin remover rather than steam alone. Pet Urine and Odor This is one of the most important distinctions we share with clients, and one that consistently surprises people. Steam does improve the surface appearance of pet urine stains, the heat lifts some of the discoloration and the vapor freshens the immediate smell temporarily. But it doesn’t address the underlying problem. Pet urine contains uric acid crystals that bond to carpet fibers and the backing beneath. These crystals are what cause the persistent pet odor that returns after cleaning, and steam heat doesn’t break them down. Worse, the heat from steam can intensify the smell temporarily by activating the crystals, and repeated steam treatment without enzyme pre-treatment can drive the crystals deeper into the backing where they become even harder to reach. The correct approach for pet urine is enzyme cleaner first, applied generously, allowed to dwell, and blotted out, before any heat is applied. Read our full guide on how to use enzyme cleaner on carpet for the right technique. Steam can follow as a finishing step, but it cannot replace the enzyme treatment. We’ve had DFW clients steam-clean pet urine spots repeatedly, frustrated that the odor kept returning. In every case, the issue was treating the symptom with steam rather than the cause with enzymes. Switching the sequence, enzyme first, steam second, resolved what repeated steam alone couldn’t. Grease and Oil-Based Stains Grease and oil stains are among the most resistant to steam cleaning. Oil is hydrophobic, it repels water, which means steam vapor, being moisture-based, has limited ability to break down oil bonds in carpet fibers. Applying steam to a grease stain without pre-treatment typically moves the stain around rather than lifting it, and can spread it further into surrounding fibers. The right approach is a degreasing pre-treatment, a solvent-based spotter or dish soap solution applied to the stain, worked gently into the fibers, and allowed to dwell before any moisture or steam is introduced. The degreaser breaks the oil bond first; steam can then help flush and lift the loosened material. Skipping the degreaser and going straight to steam produces minimal results on any oil-based stain. Mud and Dirt Mud and dirt are among the stains steam cleaning handles best, with one important sequencing rule. Never steam a wet mud stain. Applying steam to wet mud drives it deeper into the carpet pile and spreads it into a larger affected area. The correct approach is to let mud dry completely first, vacuum thoroughly to remove as much dry material as possible, and then steam the remaining residue. Once that sequence is followed, steam is highly effective on mud and dirt stains. The heat loosens residual soil particles from the fibers and the vapor lifts them to the surface. This is one of the cleaner success stories in our client experience, mud stains treated correctly with steam typically come out very well. Ink and Dye Stains Ink and dye stains are in a category of their own when it comes to steam cleaning, and the news isn’t good. Many inks and synthetic dyes are heat-sensitive, applying steam can cause them to spread rapidly through carpet fibers as the heat liquefies the ink and the vapor carries it outward. What starts as a contained stain can become a significantly larger one after aggressive steam treatment. For ink stains, isopropyl alcohol applied to a cloth and carefully blotted, never rubbed, onto the stain is a more appropriate first approach. For dye-based stains from things like colored drinks, fabric dye transfer, or marker, a professional
Read more
Carpet Cleaning Dry Times

Carpet Cleaning Dry Times: Furniture Placement Guide

It’s one of the most common questions we get after a carpet clean, and one of the most commonly rushed. You’ve had the carpets cleaned, everything looks great, and now your furniture is piled in the hallway or stacked in another room. The urge to get the house back to normal is completely understandable. But put furniture back too soon and you risk two outcomes that are genuinely frustrating to deal with: rust stains transferred from metal furniture legs onto your freshly cleaned carpet, and permanent indentations pressed into wet fibers that don’t fully recover as the carpet dries. Neither is catastrophic, but both are avoidable, and knowing the right timeline makes the difference. As professional carpet cleaners serving the DFW area, here’s the straightforward guidance we give every client after a clean. The Short Answer: Wait Until the Carpet Is Fully Dry The single rule that covers every scenario is this: furniture goes back when the carpet is completely dry, not mostly dry, not dry at the surface, but fully dry through the pile to the backing beneath. Carpet that feels dry when you walk across it in socks may still hold meaningful moisture deeper in the fibers, particularly in thicker or higher-pile carpet. That residual moisture is enough to cause rust transfer from metal legs and enough to allow wet-fiber compression under heavy furniture weight to set as a permanent indentation. The good news is that “fully dry” doesn’t have to mean waiting indefinitely. With the right approach, most carpets reach that point well within 24 hours, and often significantly sooner. Read our full guide on how to dry carpet after cleaning for the fastest approach. Drying Timelines by Cleaning Method How long you’re waiting depends primarily on how the carpet was cleaned. Different methods introduce different volumes of moisture, which sets the baseline drying window before furniture can safely go back. Cleaning Method Typical Dry Time Furniture-Safe Window Professional hot water extraction 6 to 12 hours After 12 to 24 hours to be safe DIY carpet shampooer 12 to 24 hours After 24 hours minimum Steam cleaning 1 to 3 hours After 4 to 6 hours to be safe These are baseline estimates under normal conditions. Humidity, carpet thickness, room ventilation, and whether active drying measures are in place all affect where you land within or beyond these ranges. In DFW summers with high humidity, add several hours to any of the above. In cooler, drier conditions with windows open and fans running, you may reach the safe window faster than the baseline suggests. How to Tell If Your Carpet Is Actually Dry Don’t rely on how the carpet looks, rely on how it feels. Press the back of your hand firmly into the carpet pile in multiple spots across the room, including along edges near walls where drying tends to be slowest. If the carpet feels cool and slightly damp against your hand, it’s not ready. Fully dry carpet feels room-temperature and leaves no moisture sensation on your skin. Check several areas rather than one spot. Carpet can dry unevenly depending on airflow patterns in the room, pile thickness variation, and where cleaning solution was concentrated. The last damp spot is the one that matters. Furniture-Specific Guidance Not all furniture carries the same risk when placed on damp carpet, and the timeline isn’t identical across every piece you need to move back. Medium Furniture: Dining Chairs, Coffee Tables, Side Tables Medium-weight furniture with relatively small foot contact points, dining chairs, coffee tables, side tables, desk chairs, compresses carpet fibers in a concentrated area. On damp carpet, that compression can leave noticeable marks that persist even after the carpet dries, particularly in plush or high-pile carpet where the fibers are longer and more vulnerable to directional flattening. Metal-legged pieces in this category carry the additional rust transfer risk. Chair legs, coffee table frames, and side table bases are commonly made from steel or iron with protective coatings that hold up fine under normal use but can transfer rust to wet carpet when sustained contact occurs on a damp surface. For medium furniture, waiting until the carpet passes the hand-test above is the right call. If you need pieces back sooner, use protective barriers under each leg, more on those below. Heavy Furniture: Sofas, Beds, Wardrobes Heavy furniture is where the indentation risk becomes most significant. A sofa or bed frame sitting on damp carpet fibers presses them flat under substantial weight, and wet fibers compressed under load are far more likely to set in a flattened position as they dry than fibers compressed after the carpet is already dry. This doesn’t mean the indentations are necessarily permanent. Carpet fibers have some recovery capacity, and techniques like using a coin or spoon to gently work compressed fibers back upright can help. But prevention is far easier than recovery, and the heavier the piece, the less likely the fibers are to fully rebound from early placement. For heavy furniture, particularly large sofas, bed frames, and any piece that will remain in place long-term, we recommend waiting the full drying window plus a comfortable buffer. If a professional clean was done in the morning with air movers set up, evening placement of heavy pieces is usually safe. If a DIY clean was done without active drying measures, the following day is the safer target. What Happens When You Place Furniture Too Early Rust Transfer from Metal Legs This is the damage we see most often, and it surprises clients every time because it isn’t immediately visible. Metal furniture legs, even those with a painted or powder-coated finish, can transfer rust to damp carpet within hours of contact. The moisture activates oxidation at any point where the coating is worn, chipped, or thin, and that rust transfers directly into the carpet fibers beneath the leg. The resulting stain is an orange-brown discoloration at each contact point, typically circular and matching the shape of the furniture foot. Rust stains on carpet
Read more
Can You Use An Upholstery Cleaner On A Mattress 2

Can You Use An Upholstery Cleaner On A Mattress

When a mattress gets stained, the instinct to reach for an upholstery cleaner makes sense. It’s designed for fabric surfaces, it’s already in the house, and a mattress is essentially a large upholstered item. So yes, in principle, an upholstery cleaner can be used on a mattress. The problem is that most people apply it the same way they’d clean a sofa, and a mattress is a fundamentally different cleaning challenge. As professional cleaners serving the DFW area, we’ve worked with clients on both ends of this. When upholstery cleaner is used correctly on a mattress, results can be solid. When it’s used wrong, too much product, too much moisture, not enough drying time, the consequences are invisible at first and serious later. Here’s what you need to know before you start. Why a Mattress Is Different from a Sofa Upholstered furniture and mattresses share a surface material, but that’s where the similarity ends. A sofa cushion is typically a few inches of foam with airflow on multiple sides. A mattress is 8 to 14 inches of dense material, foam, springs, latex, or a combination, that you sleep directly on top of for 7 to 8 hours a night. That difference has two critical implications for cleaning. First, moisture introduced to a mattress surface has very limited escape routes. Unlike a sofa cushion you can stand upright to dry, a mattress sits flat with its underside against a base or box spring, trapping any moisture that migrates below the surface. That trapped moisture doesn’t evaporate, it creates the warm, dark, damp conditions that mold needs to establish itself. Second, whatever goes into a mattress surface stays close to your body every night. Chemical residue from upholstery cleaners, surfactants, fragrances, solvents, doesn’t just sit on a mattress the way it might on a chair you sit in briefly. It’s in direct contact with your skin, your face, and your airways for hours at a time. These two factors, mold risk from moisture and residue risk from chemicals, are what make mattress cleaning genuinely different from upholstery cleaning, even when the same product is involved. How Each Mattress Type Responds to Upholstery Cleaner Not all mattresses handle moisture the same way. Here’s what to know before you apply anything: Mattress Type Moisture Tolerance Key Risk Memory foam Very low Absorbs moisture deeply; slow to dry; high mold risk Latex Low Dense material traps moisture; latex can degrade with harsh chemicals Hybrid Moderate Foam layers vulnerable; springs can rust if moisture reaches core Innerspring Moderate Surface fabric handles moisture better; spring rust risk if over-wet Memory Foam Memory foam is the most vulnerable mattress type when it comes to moisture. The open-cell structure that makes it comfortable to sleep on also makes it highly absorbent, liquid introduced at the surface wicks rapidly into the foam beneath. Once moisture is inside memory foam, it dries extremely slowly and in the meantime creates ideal mold conditions. With memory foam, less moisture is always better, and any cleaning approach needs to prioritize minimal liquid application. Latex Mattresses Latex shares memory foam’s sensitivity to over-wetting, with an added complication: harsh surfactants and solvents in some upholstery cleaners can degrade latex over time, affecting both the material’s integrity and its feel. If you have a latex mattress, check the upholstery cleaner’s ingredient list carefully and avoid any product containing bleach, ammonia, or petroleum-based solvents. Hybrid Mattresses Hybrid mattresses combine foam comfort layers with an innerspring support core. The foam layers carry the same over-wetting risks as memory foam, while the spring core introduces the additional risk of rust if moisture penetrates deep enough to reach the metal. Surface-level, carefully applied cleaning is generally safe; anything that saturates the mattress is not. Innerspring Mattresses Traditional innerspring mattresses are somewhat more forgiving, the surface fabric and thin padding layers dry faster than dense foam materials. The primary risk is still over-wetting, which can reach the spring core and cause rust that transfers as orange staining to your mattress cover and bedding. Keep moisture at the surface and you reduce that risk significantly. The Right Way to Use Upholstery Cleaner on a Mattress If you’re going to use an upholstery cleaner on a mattress, technique is everything. The difference between a good outcome and a mold problem is almost entirely about how much moisture you introduce and how thoroughly you remove it. Spot-Clean Only, Never Full-Surface Clean This is the most important rule. Upholstery cleaners should be applied only to the specific stained or soiled area, not sprayed across the entire mattress surface as a general refresh. Full-surface application introduces far more moisture than a mattress can safely handle and dramatically increases drying time and mold risk. Identify the stain, treat only that area, and leave the surrounding mattress untouched. Apply Product to a Cloth, Not Directly to the Mattress Spray your upholstery cleaner onto a clean microfiber cloth rather than directly onto the mattress surface. This gives you immediate control over how much moisture contacts the mattress and prevents the product from soaking in faster than you can work with it. Use the dampened cloth to gently blot, not rub, the stained area, working from the outside of the stain inward. Extract as Much Moisture as Possible After treating the stain, immediately press clean dry towels firmly into the area to absorb as much moisture as possible before it can migrate deeper. Replace towels as they become damp and repeat until minimal moisture transfers. The goal is to remove as much liquid from the mattress as quickly as possible, not to let it sit and air dry on its own. Dry Actively and Thoroughly Point a fan directly at the treated area and run it continuously until the spot is completely dry, typically 4 to 6 hours for a small spot-treated area under normal conditions. In DFW summers with high humidity, this can take longer. Do not put bedding back on the mattress until the area is fully dry
Read more
How to Dry Carpet After Cleaning 2

How to Dry Carpet After Cleaning

Getting your carpet cleaned is the easy part. What happens in the hours after, how quickly and thoroughly the carpet dries, determines whether you end up with fresh, clean floors or a damp, musty problem that’s worse than what you started with. Improper drying is one of the most common post-cleaning mistakes homeowners make, and the consequences range from re-soiling and residue to mildew growth in the carpet backing and subfloor beneath. As professional carpet cleaners serving the DFW area, drying is something we take as seriously as the clean itself. Here’s everything you need to know to do it right. Why Drying Carpet Properly After Cleaning Matters A freshly cleaned carpet holds more moisture than it looks like it does, particularly after DIY carpet cleaner use, where extraction power is lower than professional equipment. That moisture needs to move up and out of the fibers through evaporation. If it doesn’t, because airflow is poor, humidity is high, or foot traffic is pressing moisture back down into the pile, it migrates downward instead, into the carpet backing and the padding beneath. Once moisture is trapped in the backing and padding, it doesn’t dry on its own. It creates warm, dark, damp conditions that are ideal for mildew and mold growth, neither of which announces itself immediately. By the time a musty smell becomes noticeable, the growth is already established and requires professional remediation to address properly. Read our guide on whether carpet cleaning can cause mold to understand how this happens and how to avoid it. The good news: with the right approach, most carpets dry well within 6 to 24 hours, and the steps involved are straightforward. Step 1: Remove Excess Surface Moisture First Before you set up fans or open windows, address any excess moisture sitting at the carpet surface, especially if the carpet feels saturated or if you used a DIY machine that may have over-wetted the fibers. Blot with Clean Dry Towels For areas that feel particularly wet, press clean, dry towels firmly into the carpet and hold them in place for 30 to 60 seconds. The towels absorb surface moisture directly from the fibers before it has a chance to migrate deeper. Work from the outside of any wet area toward the center to avoid spreading moisture further. Don’t rub, pressing and lifting is the technique. Rubbing pushes moisture deeper into the pile and can disturb carpet fibers that are more vulnerable when wet. Replace towels as they become saturated and repeat until no more moisture transfers. This step is particularly valuable on thick or plush carpets where the pile holds more water close to the surface. Step 2: Set Up Active Airflow Airflow is the engine of carpet drying. Without it, moisture evaporating from the carpet surface has nowhere to go, it hovers in the air just above the fibers and slows evaporation dramatically. Active airflow moves that moisture-laden air out of the space and replaces it with drier air, keeping evaporation running at full speed. Fans and Air Movers Point fans directly at the carpet surface, not at the walls or ceiling, and run them continuously until the carpet is fully dry. Oscillating fans are useful for covering larger areas, but stationary fans aimed at the carpet surface move more air across the fibers where it matters most. If you have access to a professional air mover, a low-profile, high-velocity blower fan, use it. Air movers move significantly more air volume than household fans and can cut drying time in half or better. Our DFW team sets these up as standard practice after every professional carpet clean, not as an optional extra, but as a core part of the service. For large rooms or whole-home cleans, use multiple fans placed at intervals across the room rather than a single fan at one end. Open Windows and Cross-Ventilation When outdoor humidity is low, below 60%, opening windows is one of the most effective drying tools available. The goal is cross-ventilation: open windows on opposite sides of the room so air enters from one side and exits from the other, creating a continuous flow through the space. Check outdoor humidity before opening up. In DFW summers, outdoor humidity regularly exceeds 70 to 80%, particularly in the morning and evening. Bringing that humid air inside slows drying rather than accelerating it. On high-humidity days, keep windows closed and rely on fans and your HVAC system instead. In cooler, drier months, fall and winter in North Texas, open windows combined with fans is often the fastest drying combination available. Step 3: Control Indoor Humidity Moving air is essential, but the moisture content of that air matters just as much. In humid conditions, even a well-ventilated room can struggle to dry carpet quickly if the air itself is already carrying significant moisture. Dehumidifiers A dehumidifier removes moisture from the air, which lowers the humidity level in the room and accelerates evaporation from the carpet below. Place it in the same room as the damp carpet, keep the door closed to concentrate its effect, and empty the reservoir regularly, it will fill quickly in a room with wet carpet. Run the dehumidifier in combination with fans for the most effective results. The fans move moisture away from the carpet surface; the dehumidifier removes it from the air before it can re-settle. In DFW summers, this combination is often the difference between carpet that dries in 8 hours and carpet that stays damp for 24. How Long Should Carpet Take to Dry? Drying time varies by cleaning method, carpet type, and conditions. Here are reliable benchmarks: Cleaning Method Typical Drying Time Notes Professional hot water extraction 6 to 12 hours Faster with air movers set up post-clean DIY carpet shampooer 12 to 24 hours Lower extraction = more moisture left behind Steam cleaning 1 to 3 hours Least moisture introduced; fastest drying Thick or high-pile carpet adds 2 to 4 hours to any of the above. High humidity adds
Read more
Using Carpet Cleaners on Hardwood Floors 2

Using Carpet Cleaners on Hardwood Floors: What You Should Consider

It seems like a reasonable idea. You already own a carpet cleaner, the wood floors need a deep clean, and it’s all just cleaning, right? Unfortunately, no. Using a carpet cleaner on wood floors, any type of wood floor, is one of the fastest ways to cause serious, expensive damage to your home. As professional cleaners serving the DFW area, we’ve seen the aftermath of this mistake more times than we’d like. Here’s a clear breakdown of why carpet cleaners and wood floors are fundamentally incompatible, what happens to each floor type when exposed to one, and what you should be using instead. Why Carpet Cleaners Are Wrong for Wood Floors Carpet cleaners, whether consumer machines or professional extractors, are designed to force water and cleaning solution deep into fibers and then extract it back out. That process works because carpet is engineered to handle significant moisture exposure. Wood is not. Wood is hygroscopic, meaning it absorbs moisture from its environment and expands when it does. Even sealed wood floors have microscopic gaps, seams, and edges where water can penetrate. A carpet cleaner introduces far more water than any wood floor can safely handle, and the damage that follows is often irreversible without professional refinishing or full replacement. This isn’t a question of technique or product choice. It’s a fundamental mismatch between what the machine does and what the surface can tolerate. How a Carpet Cleaner Damages Each Type of Wood Floor Not all wood floors are identical, but none of them are safe from carpet cleaner damage. Here’s what happens to each type. Floor Type Primary Risk Outcome Solid hardwood Moisture absorption through grain and edges Warping, cupping, buckling Engineered hardwood Delamination of veneer layers Peeling, swelling, finish loss Laminate Water infiltration through seams Swelling, bubbling, irreversible damage Vinyl plank (LVP) Moisture under planks Adhesive failure, edge lifting Solid Hardwood Solid hardwood is the most vulnerable of all wood floor types. The wood grain runs the full depth of each plank, which means moisture absorbed at the surface travels through the entire board. When a carpet cleaner saturates a hardwood floor, the planks swell, cup with edges rising higher than the center, and in severe cases buckle away from the subfloor entirely. Finish damage is also immediate. The polyurethane or oil finish that protects hardwood is not designed to withstand the volume of water and chemical solution a carpet cleaner introduces. Once the finish is compromised, the bare wood beneath is exposed to every subsequent moisture source, accelerating long-term damage significantly. Engineered Hardwood Engineered hardwood has a thin real wood veneer bonded over multiple layers of plywood or fiberboard. It handles humidity better than solid hardwood, but it is not waterproof. Carpet cleaner moisture penetrates the seams between planks and works its way into the layered core, causing the adhesive bonds between layers to fail. The result is delamination, where the veneer peels or separates from the core, combined with visible swelling along plank edges. Laminate Flooring Laminate is perhaps the most deceptively fragile floor type when it comes to water. The surface looks and feels hard and durable, but the core is made of high-density fiberboard, a material that absorbs water rapidly and swells dramatically when it does. Carpet cleaner moisture finds its way through the click-lock seams between planks almost immediately, and once the core swells, the planks cannot return to their original shape. Laminate water damage is almost always permanent and requires full replacement of affected sections. Vinyl Plank (LVP) Luxury vinyl plank is the most water-resistant of the four floor types, and in some cases fully waterproof at the surface. However, carpet cleaner use still poses risks. The volume of water involved can work beneath the planks, particularly at edges, transitions, and seams, compromising the adhesive on glue-down installations or creating conditions for mold growth beneath floating installations. The subfloor beneath LVP is typically not waterproof, and moisture trapped under vinyl with nowhere to dry is a direct path to mold. The Damage Risks in Detail Finish Damage and Dullness Cleaning solutions formulated for carpet are alkaline and often contain surfactants that strip or cloud wood floor finishes on contact. Even a single pass can leave a dull, hazy appearance on hardwood or engineered wood that requires professional buffing or refinishing to correct. Warping and Buckling Excess moisture causes wood fibers to expand unevenly. When some parts of a plank absorb more water than others, or when the top face absorbs water the bottom cannot, the board warps. In severe cases, the entire plank buckles away from the subfloor, creating raised ridges and trip hazards that are both a safety issue and a costly repair. Swelling Between Planks Even before visible warping occurs, moisture causes planks to swell laterally, pushing against each other at the seams. This creates raised edges, visible gaps when the wood later dries and contracts, or permanent crowning along plank edges that changes the look and feel of the floor surface. Mold Risk in the Subfloor This is the damage most homeowners don’t see until it’s serious. Moisture that penetrates through flooring seams into the subfloor creates ideal conditions for mold growth, dark, enclosed, and consistently damp. Subfloor mold is expensive to remediate, can affect indoor air quality, and isn’t always obvious until significant growth has already occurred. In the DFW climate, where summer humidity is already high, trapped subfloor moisture compounds the risk. What to Use on Wood Floors Instead The right cleaning approach for wood floors is low-moisture, pH-neutral, and surface-appropriate. Here’s what actually works. Microfiber Mop with a Wood-Safe Cleaner A microfiber mop, either flat or spray-style, is the everyday gold standard for wood floor maintenance. Microfiber picks up dust, debris, and surface grime without introducing meaningful moisture to the floor. Pair it with a pH-neutral, wood-safe cleaner applied sparingly, sprayed onto the mop pad not the floor directly, and you have an effective, safe cleaning method for all four floor types covered above. Avoid soaking the
Read more
How Long Does It Take Carpet To Dry After Cleaning 2

How Long Does It Take Carpet To Dry After Cleaning

You’ve just had your carpets cleaned, or done it yourself, and now you’re tip-toeing around the house wondering when it’s safe to walk normally again. It’s one of the most common questions we hear from homeowners in the DFW area, and the answer isn’t one-size-fits-all. Drying time depends on how your carpet was cleaned, what your carpet is made of, and the conditions in your home. The good news: in most cases, a damp carpet is completely normal and temporary. Here’s exactly what to expect and how to get things back to normal faster. Drying Times by Cleaning Method The single biggest factor in how long your carpet takes to dry is the cleaning method used. Different methods introduce very different amounts of moisture into your carpet, which is the starting point for everything else. Steam Cleaning: 1 to 2 Hours Steam cleaners use heat and vapor rather than large volumes of liquid water, which means they introduce significantly less moisture into carpet fibers than other methods. Under normal conditions with good ventilation, steam-cleaned carpet is typically dry within one to two hours, sometimes less. This is one of the reasons steam cleaning has become popular for regular maintenance. The fast drying time means minimal disruption to your day, and the low moisture reduces the risk of mildew or over-wetting issues. Professional Hot Water Extraction: 6 to 12 Hours Professional carpet cleaning uses hot water extraction, a process that injects hot water and cleaning solution deep into the carpet fibers and then immediately extracts it along with the loosened dirt and debris. It’s the most effective method for deep cleaning, but it introduces more moisture than steam cleaning, even with powerful extraction equipment. For most professionally cleaned carpets, 6 to 12 hours is a reliable drying window under normal conditions. Many of our DFW clients schedule morning appointments and find their carpets are ready for normal use by evening. In some cases, particularly with plush or thick carpets or in humid weather, drying can extend to 24 hours. DIY Carpet Cleaner and Shampooer: 12 to 24 Hours Consumer-grade carpet cleaning machines are effective for surface-level cleaning, but their extraction power is significantly lower than professional equipment. That means more moisture is left behind in the carpet after cleaning, which directly translates to longer drying times. For DIY carpet shampooer jobs, 12 to 24 hours is a realistic expectation. In less-than-ideal conditions, high humidity, thick carpet, poor ventilation, drying can stretch beyond that. This isn’t a cause for alarm, but it does mean planning your cleaning day carefully, especially if the room needs to be back in use quickly. Factors That Affect How Long Your Carpet Takes to Dry Knowing the method gives you a baseline. These three factors will push that timeline shorter or longer depending on your specific situation. Humidity and Weather Conditions This one is particularly relevant for homeowners in the DFW area. North Texas summers bring heat and humidity that can significantly slow carpet drying, not because of temperature, but because humid air is already moisture-saturated and less able to absorb evaporation from your carpet. On a dry winter day with low humidity, carpets can dry noticeably faster than the baseline estimates above. On a muggy July afternoon in Dallas with humidity above 70%, that same carpet might take several hours longer. This is one of the reasons we often recommend scheduling professional carpet cleaning in cooler, drier months when possible, though it’s not always practical, and the right equipment and ventilation can compensate significantly. Carpet Thickness and Fiber Type A thin, low-pile synthetic carpet dries much faster than a thick, plush carpet or a high-pile rug. Thicker carpets absorb and hold more moisture, and that moisture has to travel further to evaporate from the surface. Fiber type also plays a role. Synthetic fibers like nylon and polyester are less absorbent than natural fibers like wool and cotton, which means they release moisture more readily and dry faster. If you have a thick wool or natural fiber carpet, add a few hours to whatever baseline estimate applies to your cleaning method. Ventilation and Airflow in the Room A closed, still room is the worst possible environment for drying carpet. Without airflow, the moisture evaporating from your carpet has nowhere to go, it just hangs in the air above the carpet and slows evaporation to a crawl. Good ventilation is the single most controllable factor in drying time. A well-ventilated room with fans running can cut drying time almost in half compared to a sealed room with no airflow. This is why professional cleaners, including our DFW team, set up air movers before leaving a job. The equipment does the cleaning, but airflow finishes the job. How to Speed Up Carpet Drying You don’t have to wait passively. These steps make a measurable difference. Run Fans and Air Movers Point fans directly at the carpet surface and run them continuously until the carpet is dry. Box fans, tower fans, and oscillating fans all work, the goal is to keep air moving across the carpet surface to carry moisture away. If you have access to a professional air mover, sometimes called a blower fan, even better. They move a much higher volume of air than household fans and can cut drying time dramatically. Open Windows and Create Cross-Ventilation If outdoor humidity isn’t high, open windows on opposite sides of the room to create a cross-breeze. Moving air in from one side and out the other accelerates evaporation significantly. Even a modest breeze through an open window does more than a still, closed room with a fan running. On humid days, however, opening windows can work against you by bringing in more moisture from outside. Check the outdoor humidity before opening up. If it’s above 60 to 65%, keep windows closed and rely on fans and your AC instead. Use a Dehumidifier A dehumidifier pulls moisture from the air, which accelerates evaporation from the carpet below. This is especially
Read more
How To Use A Steam Cleaner On Carpet 2

How To Use A Steam Cleaner On Carpet

Steam cleaners have become one of the most popular home cleaning tools on the market, and it’s easy to see why. They use heat and water vapor to lift dirt, kill bacteria, and refresh surfaces without relying heavily on chemical cleaners. For carpets and upholstery especially, a steam cleaner used correctly can do a genuinely impressive job. The problem is that “used correctly” is doing a lot of heavy lifting in that sentence. Steam cleaners are powerful tools, and like most powerful tools, they’re easy to misuse. As professional carpet cleaners serving the DFW area, we’ve seen the results of steam cleaning done right and steam cleaning done wrong. This guide covers everything a first-time user needs to know: how steam cleaners work, how to prepare your surfaces, step-by-step instructions for carpet and upholstery, the mistakes that cause the most damage, and the honest limits of what a steam cleaner can accomplish on its own. How Does a Steam Cleaner Work? Before you start, it helps to understand what you’re actually doing. A steam cleaner heats water to a high temperature, typically between 200°F and 250°F, and releases it as pressurized vapor through an attachment head. That vapor penetrates surface fibers, loosening dirt, dissolving grease, and killing dust mites, bacteria, and other microorganisms on contact. Unlike a carpet cleaner or shampooer, a steam cleaner uses significantly less water, which means faster drying times when used correctly. It also relies on heat rather than chemicals to do most of the cleaning work, making it a genuinely good option for households that prefer to minimize chemical use. What it is not is a deep extractor. A steam cleaner agitates and loosens, it doesn’t pull. That distinction matters, and we’ll come back to it. What You’ll Need Before You Start Your steam cleaner fully assembled and filled with distilled water, appropriate attachments including a floor head for carpet and an upholstery brush for furniture, a vacuum cleaner, clean microfiber cloths, and distilled or demineralized water since tap water causes mineral buildup in steam cleaners over time. Step-by-Step: How to Use a Steam Cleaner on Carpet Step 1: Vacuum Thoroughly First This is the step most first-time users skip, and it’s the one that makes the biggest difference to your results. Steam cleaning is not a substitute for vacuuming. It’s what comes after. Vacuuming removes loose surface debris, hair, dust, crumbs, and dry dirt, that would otherwise turn into muddy residue when hit with steam. If you steam first, you’re essentially pressing dry debris deeper into the fibers with heat and moisture. Always vacuum before you steam, and be thorough about it. Go over the area at least twice, in different directions. Read our guide on whether you should vacuum before carpet cleaning for more on why this step matters. Step 2: Check Your Carpet Type Not all carpets are steam cleaner-friendly. Before you begin, identify what your carpet is made of. Steam cleaning is safe for most synthetic carpets. Nylon, polyester, and olefin handle heat well. However, natural fiber carpets including wool, sisal, jute, and cotton are sensitive to both heat and moisture. High-temperature steam can shrink wool fibers, cause natural materials to warp, or strip protective coatings from delicate rugs. If your carpet is natural fiber, check the manufacturer’s care instructions before proceeding. When in doubt, don’t. Step 3: Fill the Tank with Distilled Water Fill your steam cleaner’s water tank with distilled or demineralized water, not tap water. Tap water contains minerals that accumulate inside the machine over time, reducing performance and shortening the cleaner’s lifespan. Most machines indicate the maximum fill line clearly, don’t exceed it. Step 4: Allow the Machine to Heat Up Fully Plug in your steam cleaner and allow it to reach full operating temperature before you begin. Most machines take 30 seconds to a few minutes to heat up. Starting before the machine is fully ready produces inconsistent steam output and less effective cleaning. Wait for the indicator light or the steady steam flow that signals it’s ready. Step 5: Attach the Floor Head and Begin Cleaning Attach the carpet or floor head to your steam cleaner. Starting at the far corner of the room, away from the door, work in slow, overlapping passes across the carpet. Move in the direction of the carpet pile, not against it. The most important technique note here is to go slowly, far more slowly than feels natural. Each pass should take approximately 3 to 5 seconds per foot of carpet. The goal is to allow the steam to fully penetrate the fiber and do its work before you move on. Moving too fast means the steam barely touches the surface. You’ll cover more ground but clean less effectively. Overlap each pass by about half the width of your cleaning head to ensure even coverage and avoid streaking. Step 6: Allow the Carpet to Dry Completely Once you’ve finished steaming, keep foot traffic off the carpet until it’s fully dry. Steam cleaning uses far less moisture than traditional carpet shampooing, so drying times are significantly shorter, typically 1 to 3 hours under normal conditions. In humid DFW summers, or in rooms with poor ventilation, drying can take longer. Open windows, run fans, and if humidity is high, use a dehumidifier to speed up the process. For a full breakdown of drying times, see our guide on how long carpet takes to dry after steam cleaning. Don’t walk on the carpet in shoes or bare feet while it’s still damp, you’ll re-soil the fibers you just cleaned. Step-by-Step: How to Use a Steam Cleaner on Upholstery Step 1: Check the Upholstery Care Label Every upholstered piece of furniture has a care label, usually found underneath a cushion or on the frame beneath the fabric. These labels use a simple code. W means safe to clean with water-based methods and steam is generally fine. S means solvent-based cleaning only and you should not steam. W/S means either method is acceptable. X
Read more
How Long Should Carpet Smell After Cleaning_ What’s Normal vs. Concerning 2

How Long Should Carpet Smell After Cleaning? What’s Normal vs. Concerning

You just had your carpets cleaned, or cleaned them yourself, and now there’s a smell in the room you weren’t expecting. Before you panic, take a breath. In most cases, a mild odor after carpet cleaning is completely normal, temporary, and nothing to worry about. As professional carpet cleaners serving the DFW area, we field this question regularly. Here’s a clear, honest breakdown of what to expect, how long it should last, and the specific smells that might signal something needs attention. Is It Normal for Carpet to Smell After Cleaning? Yes, and it’s more common than most people realize. When water, cleaning solution, and agitation penetrate deep into carpet fibers and the backing beneath, they disturb dust, debris, and organic material that has settled over months or years. As the carpet dries, that disturbed material releases odor. Think of it like stirring sediment at the bottom of a glass of water. The water looked clear before, but it wasn’t. Cleaning brings what was trapped below to the surface, and the smell is part of that process resolving itself. The key question isn’t whether there’s a smell, it’s how long it lasts and what kind of smell it is. How Long Should Carpet Smell After Cleaning? 6 to 12 Hours: Light Cleans in Well-Ventilated Rooms For a single room or a light maintenance clean in a home with good airflow, most odor should clear within six to twelve hours. If you open windows, run a fan, and keep foot traffic off the carpet while it dries, you’ll often find the smell is gone by the time you wake up the next morning. 12 to 24 Hours: The General Rule for Most Homes For the majority of carpet cleaning jobs, standard whole-room or multi-room cleans under normal conditions, 12 to 24 hours is a reasonable expectation. This is the window we give most of our DFW clients when they ask. By the following evening after a morning clean, the carpet should be fully dry and odor-free. 24 to 48 Hours: Heavy Cleans or Humid Conditions Heavily soiled carpets require more water and solution to clean properly, which means longer drying time and a longer odor window. The same applies when humidity is high, and anyone living in North Texas knows how punishing DFW summers can be on drying time. In humid conditions, moisture lingers in carpet fibers longer, extending both the damp feel and the associated smell. See our full guide on how long carpet takes to dry after cleaning for more on what affects drying time. Up to 72 Hours: Worst-Case Scenarios In cases involving very thick carpet, poor ventilation, high outdoor humidity, or a combination of all three, smell can persist for up to 72 hours. This isn’t necessarily a sign that something went wrong, it’s a reflection of conditions that slow the drying process significantly. As long as the smell is mild and gradually fading, patience and airflow are usually all that’s needed. Smells That Are Normal vs. Smells That Are a Problem Not all post-cleaning odors are created equal. Here’s how to tell the difference. Normal: A Faint Damp or Earthy Smell This is the most common post-clean odor, a mild, slightly musty smell that comes from wet fibers and the material they’ve been holding onto. It fades steadily as the carpet dries. If it’s getting lighter with each passing hour, you’re in good shape. Normal But Temporary: Chemical or Cleaning Solution Smell Some carpet cleaning solutions have a noticeable scent, herbal, citrus, or mildly chemical, that lingers while the carpet is still wet. This is nothing to be concerned about. Once the carpet dries fully, the smell dissipates. If it’s still strong after 48 hours, run a fan and increase ventilation. Worth Watching: Sour Smell from Vinegar-Based Cleaners If you or your cleaner used a vinegar solution, a sour smell is expected, but it should fade completely once the carpet is dry. The mistake most people make is using too strong a concentration or not rinsing thoroughly enough. If the sour smell is still present after 24 hours and the carpet feels dry to the touch, it’s likely that residue wasn’t fully extracted. A rinse pass with clean warm water run through your carpet cleaner can help clear it. A Warning Sign: Musty or Mildew Smell A musty smell that intensifies rather than fades, or that appears a day or two after cleaning, is a sign that the carpet was over-wetted and hasn’t dried properly. Moisture trapped in the carpet backing or the padding beneath creates the conditions for mildew growth, and that smell won’t resolve on its own without intervention. If you notice this, increase airflow immediately and consider running a dehumidifier. If the smell persists beyond 72 hours or worsens, call a professional. The padding beneath the carpet may need to be addressed. Read our guide on whether carpet cleaning can cause mold to understand the risks and how to avoid them. A Red Flag: Pet Urine Odor Returning After Cleaning This is one of the most frustrating post-cleaning experiences homeowners encounter. The carpet smells fine immediately after cleaning, but once it dries, the pet urine odor comes back, sometimes stronger than before. Here’s why: urine penetrates past the carpet fibers into the backing and the padding beneath. Standard cleaning lifts surface contamination but doesn’t reach the uric acid crystals bonded deeper in the material. When heat and moisture from cleaning activate those crystals, the odor resurfaces. This isn’t a cleaning failure, it’s a limitation of surface-level treatment. Resolving deep pet urine odor requires an enzyme-based treatment designed to break down uric acid at the source. Read our guide on how to use enzyme cleaner on carpet for the right approach. If you’re dealing with returning pet odor after a clean, that’s the next step, and it’s something our DFW team handles regularly. How to Speed Up the Process You don’t have to just wait it out. These steps make a meaningful difference
Read more
How Much Can You Tip A Carpet Cleaner 2

How Much Can You Tip A Carpet Cleaner

Tipping culture has gotten complicated. From coffee shops to grocery delivery, it feels like every transaction now comes with a tip prompt, and it’s genuinely hard to know where carpet cleaning falls on that spectrum. So let’s make this simple. As a professional carpet cleaning company serving the DFW area, here’s our honest take: tips are never expected, always appreciated, and absolutely a kind gesture when a technician has done great work. Here’s how to think about it. Is Tipping a Carpet Cleaner Expected? No. Unlike dining out, where tipping is a cultural norm tied to how servers are compensated, carpet cleaning is a skilled trade service with set pricing. Your technician is paid for the job, a tip is a bonus, not an obligation. That said, if your technician showed up on time, worked hard, treated your home with care, and left your carpets looking genuinely great, a tip is a meaningful way to acknowledge that. It goes directly to the person who did the work, and in a physically demanding job like carpet cleaning, it doesn’t go unnoticed. How Much Should You Tip a Carpet Cleaner? For Smaller Jobs: A Flat Amount Works Best If you’re having one or two rooms cleaned and the total bill is on the lower end, a flat tip is the most straightforward approach. A good general range is $5 to $10 for a quick, standard single-room job, and $10 to $20 for a two to three room clean that went smoothly and efficiently. You don’t need to overthink it. If the technician did solid work and you want to say thank you, even $10 handed over sincerely lands well. For Larger Jobs: A Percentage Makes More Sense For whole-home cleans, multi-room jobs, or services that took several hours, a percentage of the total bill is a more proportionate way to tip. 10 to 15% of the total job cost is a fair benchmark, similar to what you might tip for other in-home service professionals. So on a $200 whole-home clean, that’s $20 to $30. On a $350 job, $35 to $50. You don’t have to hit the top of that range, anywhere in it is generous and appropriate. If you’re curious about what a typical job costs, see our guide on how much carpet cleaning costs per room. When to Tip More Than Usual Exceptional Service or Going Above and Beyond If your technician spotted a stain they weren’t originally asked to treat and handled it anyway, moved furniture without being asked, stayed later than expected to finish properly, or just brought an exceptional level of care and attention to your home, that’s worth recognizing. Bump your tip toward the higher end of whatever range applies, or add a flat bonus on top. Good service in a skilled trade is worth rewarding. It also signals to that technician and the company that the extra effort matters to customers. Large or Physically Demanding Jobs Carpet cleaning is hard physical work. Lugging heavy equipment up multiple flights of stairs, spending hours extracting deep grime from high-traffic areas, or working through a particularly large home in summer heat in Texas, these are not easy jobs. If your technician took on a demanding clean without complaint and delivered great results, recognizing that effort with a stronger tip is entirely appropriate. How to Tip a Carpet Cleaner Cash is king here. It’s immediate, goes directly to the technician, and doesn’t get filtered through any payment processing system. Have it ready at the end of the job rather than the beginning, wait until you’ve seen the finished work. If you don’t have cash on hand, it’s perfectly fine to ask whether the technician can accept a tip through a payment app like Venmo or Zelle. Most can. What matters is the gesture, not the method. When You Can’t Tip or Choose Not To Tipping isn’t always in the budget, and that’s completely okay. There are other ways to show genuine appreciation that mean a lot to small carpet cleaning businesses and independent technicians, sometimes just as much as cash. Leave a Google Review A detailed, honest Google review is genuinely valuable, not just to the business, but to the specific technician who did your job. If you mention them by name and describe what they did well, that review builds their reputation and can directly impact their career. For small local businesses in DFW, a strong review carries real weight. Refer a Friend or Family Member Word-of-mouth referrals are the lifeblood of local service businesses. If you were happy with your clean, telling a neighbor, friend, or family member about it and having them mention your name when they book is a meaningful contribution that costs you nothing. Rebook With the Same Company Loyalty is one of the most powerful forms of appreciation in a service business. Coming back, requesting the same technician when possible, and becoming a repeat customer signals trust, and that matters to both the business and the individual who served you. You can learn more about how often you should get your carpet cleaned to stay on a good schedule. Frequently Asked Questions Should I tip if the job was just okay? Tipping is reserved for work that genuinely impressed you. If the job was average, nothing went wrong but nothing stood out, it’s completely fine not to tip. A tip is a recognition of exceptional effort, not a participation award. Do I tip per technician or total? If multiple technicians worked on your home, tip per person if you can. If you only have one lump sum, hand it to the lead technician and let them know it’s meant to be shared, most crews handle that honestly. Is it awkward to tip a carpet cleaner? Not at all. A simple “great job today, this is for you” as you hand over the cash is all it takes. Technicians in service trades are accustomed to receiving tips graciously. There’s nothing uncomfortable about it
Read more