clean a mattress 2

Can You Use A Carpet Cleaner On A Mattress

Most mattresses go years without a thorough cleaning, despite spending every night in direct contact with skin, sweat, and everything that comes with regular use. Unlike a sofa or carpet, a mattress isn’t something you can easily see getting dirty, which is exactly why it accumulates more than most people realize. At Clean Master Carpet Cleaning, mattress cleaning is part of our upholstery service across the entire DFW area. Here’s the complete, step-by-step guide to cleaning your mattress properly, covering routine maintenance, stain treatment, sanitizing, and the differences between mattress types that affect how much moisture is safe to use. Why Mattress Cleaning Matters More Than It Seems A mattress absorbs sweat, skin cells, and body oils every night, material that accumulates in the surface fabric and, over time, works into the upper layers of foam or padding beneath. This buildup feeds dust mites, contributes to odor, and can affect both the mattress’s feel and its hygiene over years of use. Unlike most home surfaces, a mattress can’t be fully laundered or replaced easily, which makes routine maintenance and periodic deeper cleaning the realistic path to keeping it in good condition. Step 1: Strip and Vacuum Thoroughly Remove all bedding, sheets, mattress protector, pillows, and wash them according to their care labels. With the mattress bare, vacuum the entire surface using your vacuum’s upholstery attachment. How to vacuum a mattress effectively: This step alone removes a significant amount of dust, dead skin cells, and debris sitting on the surface, material that contributes to dust mite populations and surface odor if left in place. Vacuum your mattress every time you change your sheets, or at minimum monthly. Step 2: Spot Treat Stains Address visible stains before any general cleaning or deodorizing, treating stains first prevents them from being driven deeper into the mattress by subsequent cleaning steps. Sweat Stains Sweat stains, typically yellowish discoloration, often most visible on lighter mattress covers, respond well to a hydrogen peroxide and dish soap solution. Blood Stains Blood is a protein stain that reacts to heat by setting permanently, always use cold water, never warm or hot. Urine Stains (Adult or Pet) For urine, whether from a pet, a child, or an adult accident, an enzyme-based cleaner is the most effective treatment, addressing both the stain and the underlying odor source. Read our full guide on how to use enzyme cleaner on carpet for the same dwell-time principles applied to fabric. For all spot treatments: never saturate the mattress beyond what’s needed to treat the visible stain. Excess moisture is the single biggest risk in mattress cleaning, covered in detail below. Step 3: Deodorize With Baking Soda Once stains are treated and the mattress is dry, a baking soda treatment addresses general odor and freshens the surface without introducing any moisture. This step is safe for every mattress type and a good routine practice every few months, independent of any other cleaning need. Step 4: Steam Clean for Sanitizing For a deeper sanitizing pass, particularly useful for dust mite reduction and general hygiene, steam cleaning is an effective, low-moisture option appropriate for most mattress types. How to steam clean a mattress safely: Steam temperatures above 130°F kill dust mites on contact, making this an effective hygiene step. It does not replace deep extraction cleaning for ground-in stains or heavy soiling, it’s a sanitizing and freshening method. Mattress Type Considerations: Why Moisture Tolerance Varies This is the most important safety consideration in mattress cleaning, and it varies significantly by mattress construction. Memory Foam: Highly Moisture Sensitive Memory foam has an open-cell structure that absorbs moisture readily and dries very slowly. Excess moisture introduced during cleaning, whether from over-wetting a stain treatment or aggressive steam application, can penetrate deep into the foam where it has very limited ability to evaporate. Trapped moisture in memory foam creates ideal conditions for mold growth that may not become apparent until weeks later as a persistent musty smell. For memory foam mattresses: use the absolute minimum moisture necessary for any spot treatment, always blot rather than soak, and keep steam cleaning passes brief with the steamer moving continuously rather than dwelling on any section. When in doubt, less moisture is always the right call. Hybrid Mattresses: Mixed Considerations Hybrid mattresses combine a foam or latex comfort layer over an innerspring support core. The foam layers carry the same moisture sensitivity as memory foam, over-wetting risks the same slow-drying, mold-prone outcome. The spring core adds an additional consideration: if moisture penetrates deep enough to reach the metal coils, it can cause rust that transfers as staining to the mattress cover and bedding over time. For hybrid mattresses: treat the surface with the same moisture caution as memory foam. Spot treatments should be blotted and dried thoroughly before moving to the next step, and steam cleaning should remain a surface-level pass rather than prolonged exposure in any one area. Step 5: Allow Full Drying Before Re-Bedding This step is easy to rush and important not to. Before putting sheets and a mattress protector back on, confirm the mattress is completely dry, not just dry to a quick touch, but dry through any treated areas when pressed firmly. If you have a fan, point it at the mattress and let it run for the final hour of drying time. Open windows if humidity allows. For DFW’s humid summer conditions, this extra drying time matters more than it would in a drier climate, moisture trapped under bedding in a humid room takes longer to fully clear. Step 6: Use a Mattress Protector Going Forward This is the single most effective prevention step available, and it changes the entire maintenance equation going forward. A quality waterproof mattress protector creates a barrier between the mattress surface and everything that would otherwise reach it directly, sweat, spills, pet accidents, dust. The protector itself is machine washable, which means the protective layer can be laundered regularly while the mattress beneath stays clean and dry. What to look for
Read more
cost of air duct 2 (1)

How Much Does Airduct Cleaning Cost

Air duct cleaning pricing in DFW is one of the most confusing service categories a homeowner can research, because the range between the lowest advertised price and what a thorough service actually costs is wider than almost any other home service. A $49 whole-home quote and a $500 whole-home quote can both appear in the same Google search, and without knowing what drives the difference, it’s nearly impossible to evaluate either one accurately. At Clean Master Carpet Cleaning, air duct cleaning is one of our core DFW services. Here’s the transparent pricing guide, real numbers, what drives them, what’s included in legitimate pricing versus what’s hidden in low-cost quotes, and what Clean Master charges. The DFW Market Range: What You’ll Actually Encounter Professional air duct cleaning in the DFW market falls into three broad pricing categories, and understanding what each represents is more useful than any single number: Price Range What It Typically Represents $49 to $150 for whole home Bait-and-switch or surface-level service, almost never a complete clean $200 to $350 for whole home Entry-level legitimate service, may exclude coil cleaning or have vent count limits $350 to $600 for whole home Comprehensive professional service including all components $600 to $1,000+ Large homes, multi-system properties, or heavily contaminated systems The critical context: a legitimate, thorough air duct cleaning for a standard DFW home, covering all supply and return branches, trunk lines, air handler and coil cleaning, and register removal and cleaning, requires 2 to 4 hours of professional labor with commercial equipment. Any quote that doesn’t economically support that scope of work is either cutting the scope or the quality, or both. What Drives the Cost of Air Duct Cleaning Home Size and Number of Vents This is the primary driver of legitimate air duct cleaning pricing. Each supply and return vent represents a duct branch that requires individual cleaning, register removal, rotating brush agitation through the full branch length, extraction, and register reinstallation. More vents means more time and more work. A rough working framework for the DFW market: Home Size Typical Vent Count Legitimate Price Range Small home (under 1,500 sq ft) 8 to 12 vents $300 to $450 Standard home (1,500 to 2,500 sq ft) 12 to 20 vents $350 to $550 Large home (2,500 to 4,000 sq ft) 20 to 30 vents $500 to $750 Very large and multi-system home 30+ vents and 2 air handlers $700 to $1,200+ Some companies price per vent rather than by home size, typically $25 to $45 per vent for a comprehensive service. Per-vent pricing is transparent and makes quotes easy to compare: a 16-vent home at $35 per vent is $560, which is within the legitimate range for a complete service on a standard DFW home. What’s Included and What Often Isn’t The single most important question to ask any air duct cleaning company is what specifically is included in the quoted price. The components that determine whether you’re getting a complete service: Should be included in any legitimate quote: Commonly excluded from lower-price quotes, and significantly affecting results: When comparing quotes, confirm whether these are included or available as add-ons, the most relevant being air handler and coil cleaning, which should be part of any comprehensive service. The Bait-and-Switch Problem in DFW Duct Cleaning This is the pricing reality that makes air duct cleaning uniquely confusing, and it’s prevalent enough in the DFW market that every homeowner booking duct cleaning should know how it works. The pattern: a company advertises whole-home duct cleaning for $49 to $99, sometimes through door hangers, direct mail, or online coupon sites. A technician arrives and performs a minimal cleaning, typically vacuuming at register openings rather than cleaning the full branch duct network. The technician claims to have found serious contamination, mold, biological growth, or significant debris requiring treatment, and presents additional charges ranging from hundreds to thousands of dollars. The homeowner, now committed to the appointment and concerned about the claimed contamination, agrees to charges that may be for unnecessary, ineffective, or fabricated services. The claimed contamination is the mechanism that makes this work. Homeowners faced with “we found mold in your ducts” feel pressure to agree to treatment rather than refuse and risk leaving a real problem unaddressed. The contamination may be real, exaggerated, or entirely fabricated, and without independent verification there’s no way to know. How to identify bait-and-switch pricing before booking: A specific red flag in DFW: companies that advertise aggressively low prices through Groupon, door hangers, or unsolicited calls are disproportionately represented in bait-and-switch complaints. This doesn’t mean all discounted services are fraudulent, but it’s a pattern worth being aware of when evaluating quotes. Questions to Ask Before Booking Any Air Duct Cleaning Service These questions, asked before booking, tell you whether a service is legitimate: What Clean Master Charges for Air Duct Cleaning in DFW Clean Master Carpet Cleaning prices air duct cleaning transparently within the DFW market ranges above. Our standard residential service includes: Our pricing for standard DFW residential homes: Home Size Clean Master Rate Standard single-system home Starting at $550 Multi-system and large homes Quoted after assessment Add-on services available at booking: antimicrobial sanitizing treatment at $75 to $150 depending on system size, and dryer vent cleaning quoted at booking when combined with a duct cleaning appointment. We quote based on home size and vent count confirmed at booking, not a teaser rate that changes at the door. If our assessment reveals something that warrants additional scope, we communicate it and provide a revised quote before proceeding. Frequently Asked Questions Why do some companies charge $49 for what others charge $500 for? Because they’re offering different services, or the low-price service is the beginning of a bait-and-switch rather than a complete clean. A $49 service typically covers register-opening vacuum passes. A $500 service covers the full system including branch ducts, trunk lines, and air handler. The gap isn’t profit margin, it’s scope. Is air duct cleaning covered by homeowner’s insurance? Standard duct
Read more
grout between tiles

What Cleans Grout Off Of Tile?

After a tile installation, new bathroom floor, kitchen backsplash, shower renovation, it’s common to find a dull, cloudy film left on the tile surface once the grout has dried. This is grout haze: a thin layer of grout residue smeared across the tile face during the grouting process that wasn’t fully removed during installation cleanup. Grout haze is almost universal after DIY tile work and common even after professional installation. The good news is it’s removable. The less good news is that the longer it’s left, the harder it gets, and the wrong product on the wrong tile type can cause damage that’s harder to fix than the haze itself. At Clean Master Carpet Cleaning, tile and grout cleaning is one of our core DFW services. Here’s the practical guide to removing grout haze at every stage, including the important distinction between what’s safe on ceramic and porcelain versus what’s never appropriate on natural stone. First: Understand What You’re Removing Grout haze is different from grout that’s in the joints between tiles. It’s a thin smear of grout particles and cement residue on the tile face, typically visible as a cloudy, dull film that reduces the tile’s natural sheen and doesn’t respond to regular mopping or wiping. The challenge is that grout is cement-based. As it cures, it hardens progressively, which is why removal gets significantly harder the longer haze is left on the tile surface. The three stages: This guide focuses on the fully cured stage, the most common situation DFW homeowners actually face, because grout haze is often not noticed until the tile has been in use for some time. What You’ll Need Removing Fully Cured Grout Haze From Ceramic and Porcelain Tile Fully cured grout haze on ceramic or porcelain requires acid-based chemistry to dissolve the hardened cement. Sulfamic acid is the standard professional choice, effective on cement-based haze, safer than muriatic acid, and less likely to damage the tile surface or grout joints when used correctly. Step 1: Remove Any Thick Deposits First Before applying any chemical, use a plastic scraper or the edge of a grout float to gently remove any areas of thicker grout accumulation, deposits that sit above the tile surface rather than as a thin film on it. Work at a low angle against the tile face to avoid scratching. Don’t use metal scrapers on glazed tile, they scratch the glaze permanently. Plastic only. Step 2: Mix the Sulfamic Acid Solution Follow the product label, typically 1 part sulfamic acid crystals dissolved in 6 to 8 parts warm water for standard haze, or slightly stronger for stubborn cured deposits. Mix in a plastic bucket, not metal, which reacts with acid. Wear gloves and eye protection from this point forward. Test the solution in a small inconspicuous area before treating the full surface. Even on ceramic and porcelain, testing confirms the tile’s glaze responds as expected. Step 3: Apply to a Section and Allow Dwell Time Work in small sections, 2 to 3 square feet. Apply the sulfamic acid solution with a sponge or cloth and allow 3 to 5 minutes of dwell time. The acid is actively dissolving the cement during this period, don’t start scrubbing immediately. Watch for visible effervescence (light bubbling) which indicates the chemistry is working on the cement residue. Don’t allow the solution to dry on the tile, reapply if the surface begins to dry before the dwell time is complete. Step 4: Scrub and Remove After dwell time, scrub the section with a stiff nylon brush using circular motions. The loosened cement haze should wipe away onto the brush and sponge. Wipe the section with a clean damp sponge to collect the loosened material. Step 5: Rinse Thoroughly, Twice This is the most critical step when using acid-based cleaners. Rinse the entire treated section with clean water, wipe dry, then rinse again. Residual acid left on the tile surface or in the grout joints continues to work, on the grout itself, after the haze removal task is complete. Thorough rinsing neutralizes the remaining chemistry. Change rinse water frequently, rinsing with water that’s already carrying dissolved cement just redeposits it. Step 6: Assess and Repeat if Needed Allow the section to dry fully before assessing. Thick or very long-cured haze may require a second treatment. Multiple lighter applications are safer than one heavy application at high concentration. Using Purpose-Made Grout Haze Remover Products For haze that’s been on the tile for weeks rather than months, not fully hardened but beyond what warm water removes, purpose-made grout haze remover products are a good middle ground between water cleaning and acid treatment. Products like Aqua Mix Cement and Grout Residue Remover or Miracle Sealants 511 Spray-On Grout Sealer contain mild acid compounds buffered to be safer for a broader range of tile types while still dissolving cement-based haze effectively. Application follows the same sequence: apply to section, allow dwell time per label, scrub, wipe, rinse thoroughly twice. These products are appropriate for ceramic, porcelain, and most glazed tile. Always check the label for specific tile compatibility. What NOT to Use on Natural Stone Tile This is the most important caution in this guide, and the one that causes the most expensive damage when ignored. Never use sulfamic acid, muriatic acid, vinegar, or any acid-based cleaner on natural stone tile, marble, travertine, limestone, or any calcium carbonate-based stone. Acid dissolves calcium carbonate, etching the stone surface permanently, creating dull, rough patches that cannot be polished out without professional stone restoration. For grout haze on natural stone tile: If you have natural stone tile with grout haze, contact a professional stone cleaning or restoration service before applying any product. Clean Master’s tile and grout service across DFW handles stone tile with appropriate chemistry, contact us to discuss your specific situation. At a Glance: Grout Haze Removal by Stage and Tile Type Haze Stage Ceramic and Porcelain Natural Stone Fresh (within 24 hrs) Warm water and damp sponge Warm water and damp
Read more
grout between tiles

How To Cleaning Grout Between Tiles (Complete Step-By-Step Guide)

Grout cleaning is one of those tasks that looks straightforward until you’re an hour into scrubbing and the result isn’t quite what you expected. The reason is almost always the same: the method didn’t match the soil level, the product didn’t have enough dwell time, or the technique missed the key steps that separate an adequate result from a genuinely clean one. At Clean Master Carpet Cleaning, tile and grout cleaning is one of our core DFW services. We know what professional results look like, and we know what DIY methods can realistically achieve at different grout conditions. This complete guide covers every method from basic maintenance to heavy stain treatment, organized by soil level so you start with the right approach for your specific situation. Before You Start: Know Your Grout and Tile Type Every method in this guide is safe for standard cement-based grout on ceramic or porcelain tile, by far the most common combination in DFW homes. Before starting, identify if your situation is different: If you’re unsure what tile or grout type you have, test any cleaning product in a small, inconspicuous area before treating the full surface. The Tools You’ll Need Having the right tools ready before starting saves significant time and effort: Method 1: Baking Soda Paste for Light Grout Cleaning Best for lightly soiled grout, recent discoloration, and maintenance cleaning on grout that’s otherwise in good condition. What it does: baking soda provides mild abrasive action that lifts surface-level soil from the grout without harsh chemistry. It’s safe for all tile types including natural stone, and safe for colored grout. What it doesn’t do: penetrate deeply embedded staining, kill mold or mildew effectively, or match the cleaning power of commercial tile cleaner on anything beyond recent, light soiling. Step-by-Step Tip: for a slight boost on light staining, spray diluted white vinegar (1:1 with water) over the baking soda paste after application, the fizzing reaction adds a small amount of additional cleaning action. Do not use this on natural stone or colored grout. Method 2: Hydrogen Peroxide for Targeted Spot Treatment Best for isolated stains, localized discoloration, and light mildew spots on specific grout lines. What it does: hydrogen peroxide (standard 3% pharmacy grade) has mild bleaching properties that lift certain stain types and inhibit mild surface mold growth. It’s gentler than oxygen bleach and appropriate for spot treatment where a broader chemical application isn’t needed. Important caveat: test on a hidden grout section first, hydrogen peroxide can lighten some grout colors, particularly darker pigmented grout. Step-by-Step For broader coverage, hydrogen peroxide can be mixed with baking soda to create a paste with slightly more stain-lifting capability than baking soda alone. Apply the same way, paste into the grout line, dwell, scrub, rinse. Method 3: Commercial Grout Cleaner for Moderate Soil Best for regularly used tile with several months to a year of accumulation, and moderate grout discoloration that doesn’t respond to baking soda. What it does: purpose-made tile and grout cleaners contain surfactant systems calibrated for grout pore penetration, more effective than home remedies on moderate embedded contamination, and formulated to rinse cleanly from the grout surface. Product selection: look for tile and grout cleaners in the pH 8 to 11 range for ceramic and porcelain. Avoid highly acidic products (pH below 5) on cement grout, repeated acid exposure degrades the grout material over time. For natural stone, use only pH-neutral products labeled stone-safe. Step-by-Step For floors: a wet/dry vac to extract the dirty rinse water after scrubbing is more effective than mopping, it pulls up the suspended soil rather than redistributing it across the floor surface. Method 4: Steam Cleaning for Ongoing Maintenance Best for regular maintenance between deeper cleans, sanitizing without chemical application, and keeping clean grout clean. Read our full guide on pro tips for steam cleaning tile and grout for advanced technique. What it does: steam at temperatures above 212°F kills bacteria and mold spores on contact and loosens surface deposits without chemical residue. It’s particularly effective as a maintenance tool on grout that’s been recently deep-cleaned or professionally treated. What it doesn’t do: extract what it loosens (steam cleaners have no suction mechanism) or restore heavily discolored grout. The wipe step after steaming is essential, without it, loosened soil redeposits as the steam evaporates. Step-by-Step Frequency recommendation: every 2 to 4 weeks for bathroom tile, monthly for kitchen tile, as a maintenance tool between annual or biannual deep cleaning sessions. The Correct Scrubbing Technique Regardless of Method This applies to every method above and is worth covering explicitly because technique is what separates good results from mediocre ones: After Cleaning: Seal the Grout This is the step that makes the cleaning investment last significantly longer, and the one most commonly skipped. Clean, freshly cleaned grout is in its most porous state, which also makes it the most receptive to sealant. Applying grout sealer after a thorough cleaning creates a protective barrier in the grout pore that repels liquid spills before they absorb into the grout, slows resoiling so mopping becomes more effective because soil sits on the sealant surface rather than embedding in the pore, and extends the interval before the next deep clean. Sealed grout in a bathroom typically goes 18 to 24 months before needing significant cleaning; unsealed grout in the same conditions may need attention every 6 to 9 months. How to seal grout after cleaning: Reseal grout annually in high-use wet areas (showers, kitchen floors near the sink) and every 2 years in lower-use areas. How to Know When Grout Needs Replacing Rather Than Cleaning Not every grout problem is a cleaning problem. If any of the following are present, cleaning won’t resolve the issue and grout replacement or regrouting is the appropriate next step: Condition What It Means Solution Cracked or crumbling grout Structural failure, grout has lost integrity Regrouting affected sections Missing grout sections Grout has separated from tile or worn away Fill and regrout Persistent dark staining that doesn’t respond
Read more
vaccum air duct 2

Can I Vacuum My Air Ducts?

Vacuuming air ducts is one of those home maintenance tasks that sounds either completely obvious or not particularly useful depending on who you ask. The honest answer is somewhere in the middle: vacuuming the accessible parts of your duct system is genuinely worthwhile maintenance, it removes real contamination from the surfaces that matter most to air quality, but it addresses a small fraction of the full duct system and shouldn’t be confused with professional duct cleaning. At Clean Master Carpet Cleaning, air duct cleaning is one of our core DFW services. Here’s exactly what household vacuuming accomplishes on your duct system, how to do it effectively, where its limits are, and how it fits into a broader duct maintenance routine. What You Can Actually Vacuum and What It Achieves Registers and Grilles This is the highest-impact thing a household vacuum can do for your duct system, and the most consistently neglected. Registers are the grilles covering your supply vents (where conditioned air comes out) and return vents (where air is pulled back to the system). They accumulate dust, pet hair, and debris on both the grille surface and the fins behind it. A vacuum brush attachment run across the register face removes surface accumulation effectively. For more thorough cleaning, which is worthwhile every 3 to 6 months, unscrew and remove the register entirely, take it to a utility sink, wash with warm soapy water, and allow to dry fully before reinstalling. The reason this matters: every cubic foot of air your HVAC circulates passes through or past a register. A register coated in dust deposits that dust into the airstream with every cycle and reduces the airflow through that vent. Clean registers deliver cleaner air and better flow, a direct, meaningful benefit from this simple maintenance step. Accessible Duct Openings Behind Registers With the register removed, the duct opening is exposed, and the first several inches of duct interior are accessible to a vacuum hose and brush attachment. Insert the vacuum hose into the duct opening and work it as far as the hose and attachment allow, typically 12 to 18 inches in from the register. Vacuum all four interior surfaces (top, bottom, and both sides of the duct) with slow, overlapping passes. The brush attachment is more effective than the bare hose for dislodging material that has adhered to the duct surface rather than sitting loosely. This is real, useful cleaning. The section immediately behind each register is where the most recently settled debris accumulates, it’s the transition point between the living space and the duct system, and it collects material from both directions. Removing it regularly prevents it from building up to the point where airflow begins to be affected. Work through every supply and return register in the home systematically, and seal the opening temporarily with a cloth or foam plug if you need to take a break. The negative pressure of the HVAC system can pull loose debris further into the duct if the system runs with registers removed. What Household Vacuuming Cannot Do Understanding the ceiling of household vacuum effectiveness on duct systems is as important as knowing what it achieves. The Reach Problem A household vacuum hose, even with an extension, reaches 12 to 24 inches into a duct opening at most. Branch ducts from the register to the main trunk line typically run 6 to 15 feet or more. The debris accumulation in the middle and far sections of the branch duct, and throughout the main trunk lines, is completely out of reach of any household vacuum. This isn’t a vacuum power issue, it’s a physical access issue. The sections of the duct system that carry the highest air volume and accumulate the most significant contamination over time simply aren’t reachable from the register end with a household tool. The Negative Pressure Difference Professional duct cleaning uses a truck-mounted or commercial-grade vacuum system that creates negative pressure throughout the entire duct network simultaneously. When a rotating brush agitates debris loose from the duct interior, that debris is immediately drawn toward the extraction vacuum rather than settling back into the duct. A household vacuum at a register opening creates localized suction at that one point. Any agitation of debris further in the duct moves debris in unpredictable directions, some of which is toward the register and household vacuum, but much of which settles back into the duct or distributes toward other parts of the system. The Risk of Disturbing Without Extracting This is the important caution for homeowners who try to extend their vacuum reach with long flexible attachments or who attempt to use leaf blowers or compressed air in ducts: agitating debris without sufficient extraction to capture it redistributes the contamination rather than removing it. Debris disturbed in the middle of a branch duct and not captured by the household vacuum at the register end either settles back in the duct or gets blown into the living space through adjacent registers when the HVAC next runs. The result can temporarily worsen air quality rather than improving it. The practical rule: vacuum only what your household vacuum can directly reach and extract. Don’t attempt to agitate debris further in the duct than you can simultaneously capture. How Vacuuming Fits Into a Broader Duct Maintenance Routine Household vacuuming of registers and accessible openings is one component of a multi-layer duct maintenance approach, not a standalone solution. The complete maintenance picture: Think of the relationship this way: regular vacuuming keeps the accessible surfaces clean and reduces the accumulation rate in the deeper system. Professional cleaning periodically resets the deeper system that regular maintenance can’t reach. Neither replaces the other, they work in combination. At a Glance: What Household Vacuuming Does and Doesn’t Address Duct System Component Household Vacuum Professional Cleaning Register and grille surfaces Fully effective Included First 12 to 18 inches of duct opening Effective Included Branch duct interiors (full length) Out of reach Rotating brush and extraction Main trunk lines Not accessible Commercial
Read more
Insulate Air Ducts (1)

How To Insulate Air Ducts

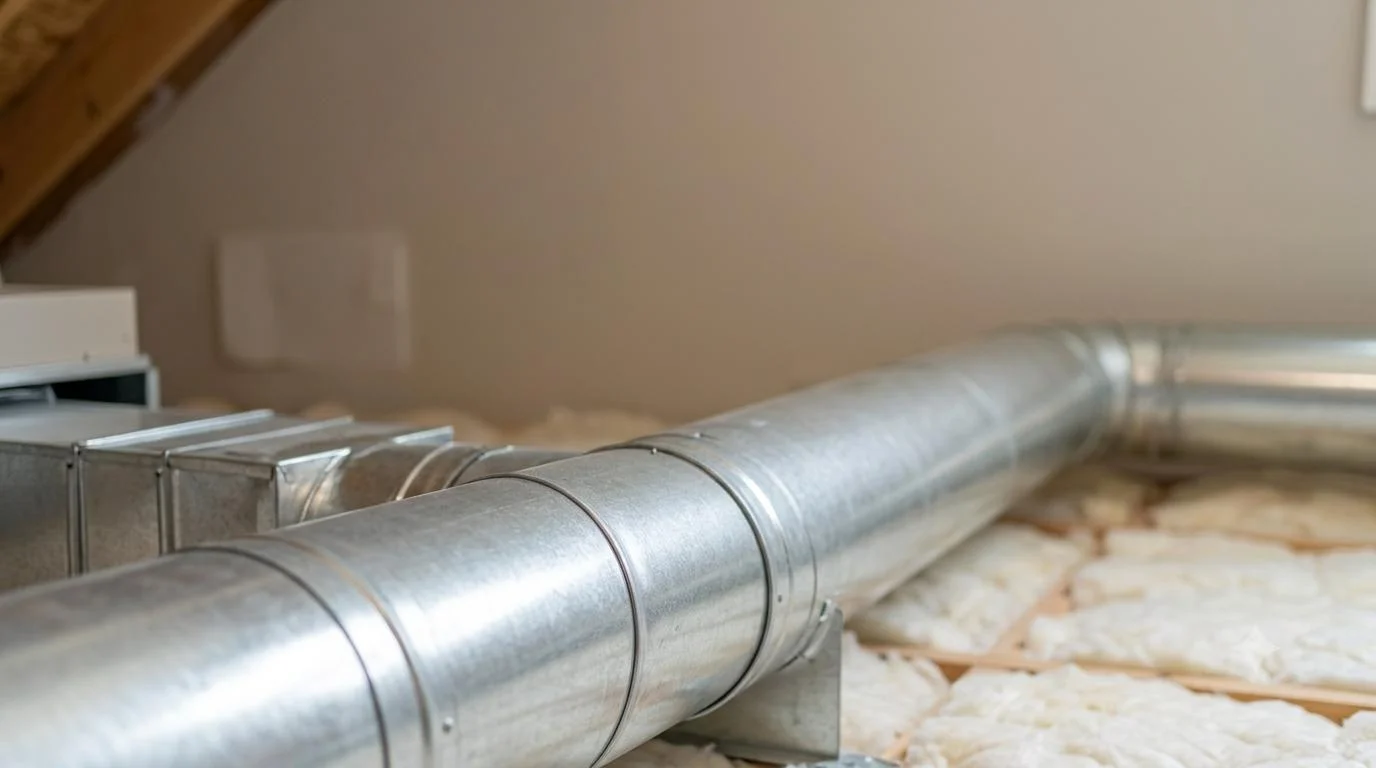
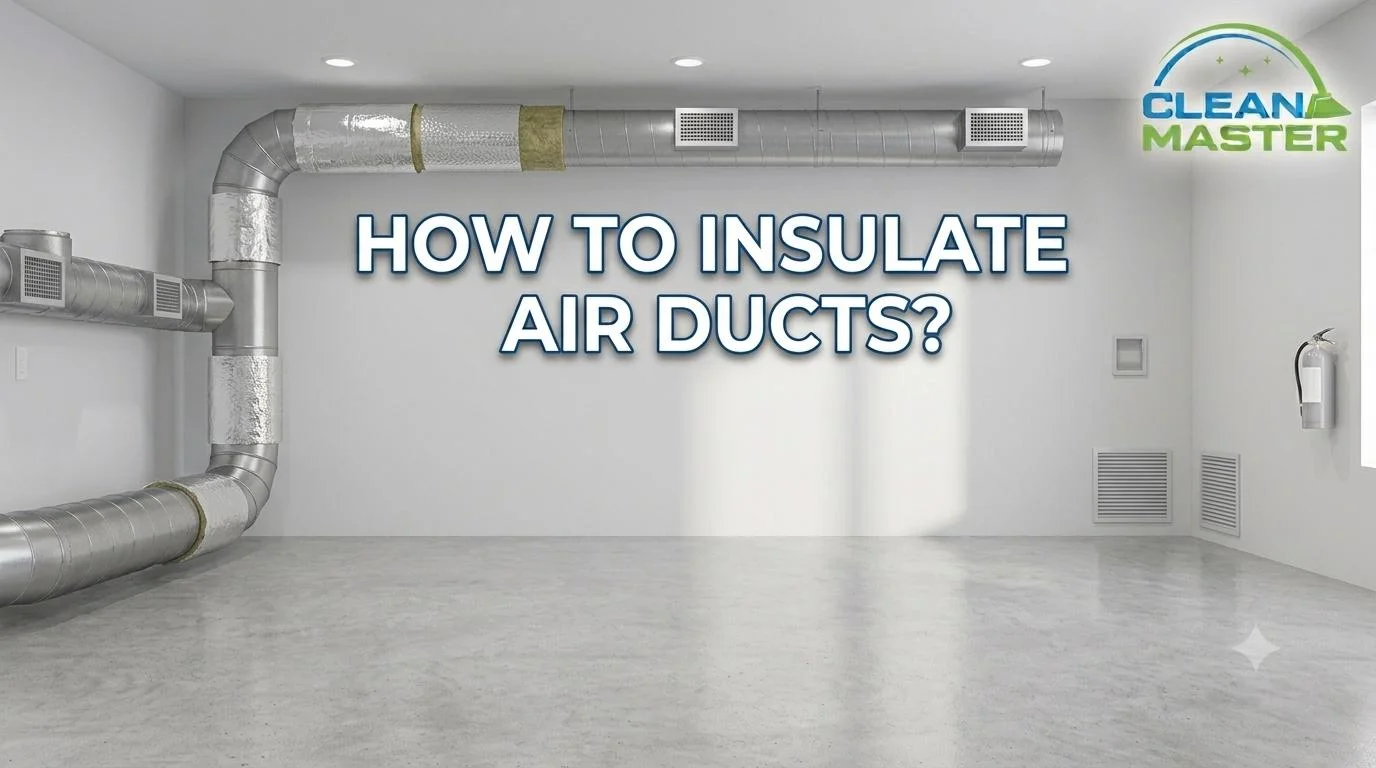
In most parts of the country, air duct insulation is a moderate efficiency concern. In DFW, it’s significantly more urgent, because North Texas attics regularly reach temperatures of 130°F to 150°F during summer, and uninsulated or under-insulated ducts running through that environment lose a substantial portion of the cooling they’re carrying before it reaches the living space. At Clean Master Carpet Cleaning, air duct cleaning is one of our core DFW services. While we’re not HVAC insulation contractors, duct insulation is something we observe and discuss with clients regularly, and understanding what to check and what to do about inadequate insulation is genuinely useful for any DFW homeowner managing their home’s HVAC performance. Here’s the complete step-by-step guide. Why Duct Insulation Matters More in DFW Than Almost Anywhere Else The physics are straightforward: when a duct carrying 55°F cooled air runs through a 140°F attic, heat transfers from the attic into the duct. The less insulation between the duct and the attic environment, the more heat transfer occurs, and the warmer the air arriving at the supply register. Energy efficiency loss is the most direct consequence. Every degree of heat gain in the supply air means the HVAC system has to run longer to achieve the thermostat setpoint. The Department of Energy estimates that duct heat gain and air leakage can account for 20 to 30% of total cooling energy in homes with poorly insulated duct systems. In DFW, where cooling runs for 7 to 8 months annually, this represents a meaningful and continuous energy cost. Comfort impact is the consequence homeowners feel most directly. Rooms far from the air handler, where supply air has traveled the longest distance through poorly insulated attic ducts, receive air that’s meaningfully warmer than what left the air handler. This shows up as rooms that are consistently harder to cool, uneven temperature distribution between floors or sections of the home, and a system that runs almost continuously during peak summer heat without achieving the setpoint in distant rooms. Condensation problems occur when under-insulated ducts in humid conditions sweat, the duct surface temperature drops below the dew point and moisture condenses on the exterior. In DFW’s humid summer mornings, this can produce visible moisture on accessible ducts and, in severe cases, dripping that affects surrounding insulation, framing, or ceiling materials. How to Check If Your Existing Duct Insulation Is Adequate Before adding insulation, it’s worth assessing what you currently have, because in some cases existing insulation is present but damaged, compressed, or incomplete rather than absent. Visual Inspection of Accessible Ductwork Most DFW homes have attic-mounted duct systems accessible through the attic hatch. Inspect with a flashlight during cooler morning hours, attic temperatures can reach dangerous levels by midday in summer. What to look for: Common problem patterns in DFW homes: Types of Duct Insulation: Which One for Your Situation Different duct configurations require different insulation approaches. Duct Wrap (Blanket Insulation) Best for rigid metal ductwork and exposed rectangular or round metal duct sections. Duct wrap, typically fiberglass batts with a foil or kraft paper facing, is the standard solution for insulating bare rigid metal ductwork. It comes in rolls and is cut to length, wrapped around the duct exterior, and secured with HVAC tape or wire. Available in R-4, R-6, and R-8 ratings. For DFW attic applications, R-6 minimum is appropriate; R-8 is preferred for trunk lines and long duct runs where heat gain has the most impact. Duct Sleeve (Pre-Insulated Flex Duct) Best for replacing degraded flex duct sections. When flex duct insulation is significantly compromised, tears in the outer jacket, heavily compressed batting, or sections where the inner liner has been exposed, replacing the section with new pre-insulated flex duct sleeve is typically more effective and more durable than attempting to repair or wrap around damaged existing insulation. Pre-insulated flex duct is available at DFW hardware stores in R-6 and R-8 ratings and 25-foot rolls. Mastic Sealant and HVAC Tape for Sealing Before Insulating Best for sealing duct joints and connections before adding or replacing insulation. This isn’t insulation itself, it’s the step that should always precede insulation on metal ductwork. Insulating an unsealed leaky duct wraps the leak in insulation without fixing it. Sealing first, then insulating, addresses both the leakage and the heat gain. Mastic sealant, a thick paste-like compound applied with a brush to duct joints, seams, and connections, is the most durable sealing method and is appropriate for any accessible metal duct joint. UL 181-rated foil tape (not standard grey duct tape, which fails with heat cycling) is appropriate for sealing flex duct connections and for securing insulation wrap edges after application. Step-by-Step: How to Insulate Accessible Rigid Metal Ductwork For homeowners with accessible bare or under-insulated rigid metal ductwork in the attic, here’s the complete process. What You’ll Need Step 1: Seal All Duct Joints Before Insulating Work through all accessible rigid metal duct joints, seams, and connections and apply mastic sealant to any gaps. Use the brush to work mastic into joints fully and extend it 1 to 2 inches onto each connecting surface. Allow mastic to cure, typically 4 to 8 hours, before proceeding to insulation. For connections between flex duct and rigid sections or at register boots, apply mastic and reinforce with foil tape. Step 2: Measure and Cut Duct Wrap Measure the circumference of the duct section plus 1 to 2 inches of overlap, and cut the duct wrap to length using a utility knife on a flat surface. Cut the insulation from the facing side for a cleaner cut. For rectangular duct, wrap each face separately where the duct geometry makes continuous wrapping impractical, ensuring all faces are covered with no gaps at corners. Step 3: Wrap the Duct With Foil Facing Out Apply the duct wrap with the foil or kraft paper facing outward toward the attic environment, and the fiberglass insulation against the duct surface. The foil facing provides radiant barrier protection in addition to the conductive insulation value
Read more
How Long Does Air Duct Cleaning Take

How Long Does Air Duct Cleaning Take

One of the most practical questions before booking an air duct cleaning appointment is simply: how long will this take? The answer affects whether you need to take a half day off work, arrange childcare, or plan around a pet. And it also turns out to be one of the more informative questions you can ask a cleaning company, because the answer tells you a lot about whether the service is thorough or not. At Clean Master Carpet Cleaning, we provide professional air duct cleaning across the entire DFW area. Here’s the honest time guide: what a thorough cleaning takes, what drives the timeline, and what a suspiciously short appointment time usually means. The Baseline: 2 to 4 Hours for a Standard DFW Home For a standard residential home in the DFW area, typically 1,500 to 3,000 square feet with one HVAC system, 10 to 20 supply and return registers, and average contamination levels, a thorough professional air duct cleaning takes 2 to 4 hours from arrival to departure. This range covers the full professional process: inspection, negative pressure vacuum setup, rotating brush cleaning of all supply and return branches, trunk line cleaning, air handler and coil cleaning, register removal and cleaning, reinstallation, system test, and homeowner walkthrough. That’s a meaningful time investment, and it’s the right amount of time for a job done correctly. What Drives the Timeline Within the 2-to-4-hour range, three factors move your specific appointment toward the shorter or longer end. Number of Vents and Registers This is the most direct driver of cleaning time. Each supply and return register represents a duct branch that requires: The time per register varies slightly by duct length and accessibility, but a rough working figure is 8 to 15 minutes per register for thorough branch cleaning. A home with 12 registers lands toward the shorter end of the overall range; a home with 24 registers toward the longer end. When you book with Clean Master, knowing the approximate number of registers in your home helps us give you a more accurate appointment time estimate upfront. Home Size and Duct System Complexity Larger homes have more total duct footage, more trunk line footage to clean, more branch runs to work through, and often more complex layouts with multiple air handlers or zone systems. Single-system homes (one air handler serving the whole home) are the most straightforward. Multi-zone or multi-system homes, common in larger DFW properties where upstairs and downstairs are served by separate HVAC systems, effectively require two complete cleaning sequences and should be planned for closer to 4 to 6 hours rather than the standard 2-to-4-hour range. Duct system layout matters too. A home where all ductwork runs through an accessible attic allows technicians to work efficiently. A home where duct sections run through finished walls, crawl spaces, or tight utility areas requires more time to access and work around. Contamination Level The amount and type of contamination in the duct system affects how long the cleaning phase takes, specifically the agitation step, where rotating brushes work through compacted debris. Light to moderate accumulation, consistent with a home that’s had regular filter maintenance and hasn’t had a previous duct cleaning within 5 or so years, works through the brush agitation process at a normal pace. Heavy accumulation, significant debris build-up from extended periods without filter maintenance, construction dust from recent renovation, pest activity, or mold, requires slower brush passes, potentially multiple agitation passes, and additional extraction time per branch. Systems with heavy contamination should be planned for the upper end of the time range or beyond. DFW homes that have never had professional duct cleaning, had a recent renovation, or have multiple pets with inconsistent filter maintenance frequently fall into the heavier contamination category, and it’s worth communicating this at booking so the appointment is planned with appropriate time. What Happens During Those Hours For homeowners wondering what’s actually happening during a 3-hour appointment, here’s how the time typically breaks down for a standard DFW home: Phase Approximate Time Arrival, system inspection, and setup 15 to 30 minutes Negative pressure vacuum connection 10 to 15 minutes Register removal and labeling 15 to 20 minutes Branch duct brush agitation (all registers) 60 to 90 minutes Trunk line cleaning 20 to 30 minutes Air handler and coil cleaning 20 to 30 minutes Register cleaning and reinstallation 20 to 30 minutes System test, filter installation, walkthrough 15 to 20 minutes The branch duct agitation phase takes the most time, it’s the core cleaning work, and it scales directly with the number of registers and the contamination level. Everything else in the process is relatively consistent regardless of home size. The Red Flag: Under 2 Hours This is the most important time-related guidance in this guide. If an air duct cleaning company quotes you a whole-home service in under 2 hours, or if a technician arrives and is done in 90 minutes or less, something was omitted. A 90-minute service on a standard home cannot include: What a very fast service typically includes is vacuum passes at register openings, surface-level cleaning of the first foot or two of each duct, and perhaps a wipe of the register grilles. This has minimal impact on the main trunk lines and branch interiors where contamination actually lives. The ultra-low-price, very-fast duct cleaning services that appear regularly in DFW are almost uniformly this type of incomplete service. The 2 to 4-hour range is what a thorough cleaning requires, not because the process is slow, but because there’s a genuine volume of work involved in a complete service. Read our guide on expert tips for air duct cleaning for more on how to evaluate whether a service is thorough. How to Plan Your Day Around a Clean Master Appointment Knowing the 2-to-4-hour window, here’s practical planning guidance for DFW homeowners: Frequently Asked Questions Can I speed up the appointment by having a smaller crew? A two-person crew works faster than a single technician on larger homes, one
Read more
legally chrge after two years

Can a Landlord Legally Charge for Carpet Cleaning After Two Years?

Normal wear and tear refers to the gradual, unavoidable deterioration of a rental property caused by everyday use over time. Carpets naturally fade, flatten, and lose fibers as tenants walk on them daily. After two years, some level of carpet aging is expected and legally protected in many regions.  Landlords cannot usually hold tenants responsible for these natural changes. The distinction between damage and wear is critical when assessing carpet cleaning charges after two years. Understanding this difference helps tenants protect their security deposits and avoid unfair deductions. How Wear and Tear Is Defined for Carpets Wear and tear for carpets typically includes minor stains, light discoloration, and compressed fibers resulting from normal foot traffic. These changes occur even when tenants maintain the carpet responsibly. Courts and housing authorities often recognize that carpets have a limited lifespan, commonly ranging between five to ten years.  After two years, landlords must account for depreciation before charging tenants. Only excessive damage beyond ordinary use, such as large permanent stains or burns, may justify carpet-related deductions. Landlord Rights Versus Tenant Responsibilities Landlords have the right to maintain their property, but those rights are balanced against tenant protections. Tenants are responsible for keeping carpets reasonably clean during occupancy, while landlords handle long-term maintenance.  After two years, charging tenants for routine carpet cleaning becomes legally questionable in many jurisdictions. Lease agreements may outline expectations, but they cannot override local tenant laws. Understanding this balance helps clarify whether carpet cleaning costs can be deducted from a security deposit. What Tenants Are Legally Required to Do Tenants are usually required to return the property in a clean and habitable condition, not in brand-new condition. Reasonable vacuuming and spot cleaning typically fulfill this obligation. Professional carpet cleaning is not always mandatory unless explicitly stated in a lawful lease clause.  Even then, the clause must align with tenant protection laws. After two years, tenants are rarely obligated to restore carpets beyond normal cleanliness standards unless they caused measurable damage. When a Landlord Can Charge for Carpet Cleaning A landlord can charge for carpet cleaning after two years only under specific conditions. The charge must relate to damage rather than expected aging. If carpets show neglect, strong odors, or severe staining beyond normal use, deductions may be allowed.  The burden of proof lies with the landlord to show that cleaning was necessary due to tenant actions. Without documented evidence, such charges can be challenged successfully. Valid Reasons for Carpet Cleaning Deductions Landlords may justify carpet cleaning charges if there is clear evidence of tenant-caused issues. Common valid reasons include: These deductions must be reasonable, itemized, and proportional to the carpet’s age and condition. How Carpet Depreciation Affects Charges Carpet depreciation plays a major role in determining whether charges are fair after two years. Carpets lose value over time, and landlords cannot charge tenants for the full replacement or cleaning cost if the carpet has already depreciated significantly.  Many housing authorities use depreciation schedules to calculate allowable deductions. After two years, landlords must reduce charges to reflect the carpet’s remaining value, not its original cost. Why Depreciation Protects Tenants Depreciation ensures tenants are not unfairly charged for an item that has already provided years of use. For example, if a carpet has a seven-year lifespan, two years of use means a significant portion of its value is already consumed.  Landlords can only recover costs linked to premature damage. This prevents landlords from passing routine maintenance expenses onto tenants through carpet cleaning fees. Lease Agreements and Carpet Cleaning Clauses Lease agreements often include carpet cleaning clauses, but not all are enforceable. A clause requiring professional carpet cleaning after move-out must comply with local laws. Some jurisdictions consider mandatory cleaning clauses invalid if they conflict with wear and tear protections.  Tenants should review lease language carefully and understand that legality depends on regional housing regulations, not just what is written in the contract. How to Interpret Your Lease Correctly Tenants should look for clear, specific language rather than vague requirements. Clauses that demand professional cleaning regardless of carpet condition may be unenforceable. If the lease states cleaning is required only if necessary, landlords must prove necessity. \ Understanding lease terms empowers tenants to dispute improper charges related to carpet cleaning after two years. How to Dispute Unfair Carpet Cleaning Charges If a landlord charges for carpet cleaning unfairly, tenants have several options. Documenting the carpet’s condition at move-in and move-out is essential. Photos, videos, and cleaning receipts strengthen disputes.  Tenants can request itemized deductions and challenge unsupported charges. Many disputes are resolved through written communication or small claims court when necessary. Steps Tenants Should Take Immediately Tenants should act promptly if they believe a charge is unjustified. Important steps include: These actions improve the chances of recovering wrongfully deducted funds. FAQ’s: Q 1.Can a landlord always charge for carpet cleaning after two years? No, landlords cannot automatically charge for carpet cleaning after two years. Most laws protect tenants from paying for normal wear and tear. Charges are only valid if the carpet shows damage beyond ordinary use and the landlord provides proper documentation to support the deduction. Q 2.Does professional carpet cleaning have to be done at move-out? Professional carpet cleaning is not always required. It depends on lease terms and local laws. If the carpet is reasonably clean and shows only normal wear, landlords usually cannot require professional cleaning or deduct its cost after two years. Q 3.How long is a carpet considered usable in rental properties? Carpet lifespan typically ranges from five to ten years depending on quality and use. After two years, the carpet has already depreciated. This depreciation limits how much a landlord can legally charge a tenant for cleaning or damage-related costs. Q 4.Can a landlord deduct carpet cleaning from a security deposit? A landlord may deduct carpet cleaning costs only if the cleaning addresses tenant-caused damage. Routine cleaning after normal use is considered a landlord’s responsibility. Any deduction must be itemized, reasonable, and supported by evidence. Final
Read more
clean air duct 2

How To Clean Air Ducts

Most homeowners who book air duct cleaning have a general sense that something goes through the vents and comes out cleaner, but a surprisingly unclear picture of what actually happens between those two points. Understanding the professional process matters for two reasons: it helps you evaluate whether a quoted service is legitimate and thorough, and it explains why professional cleaning produces results that DIY approaches can’t replicate. At Clean Master Carpet Cleaning, air duct cleaning is one of our core services across the entire DFW area. Here’s the complete, transparent explanation of how professional air duct cleaning works, what each step does, why it’s part of the process, and what would be missing without it. What DIY Duct Cleaning Can Do First Before explaining the professional process, it’s worth being clear about what homeowners can meaningfully address themselves, because this context makes the professional process more understandable by contrast. The air handler and return air area is one of the most accessible and highest-impact DIY maintenance areas. The air handler, the indoor HVAC unit typically located in a utility closet, attic, or garage, has a return air section where the filter sits. This is where all return air passes through before being conditioned and recirculated. With the system off: Changing the HVAC filter is the single highest-impact maintenance action available and the one most consistently underperformed. A clogged filter doesn’t just reduce air quality, it reduces airflow through the entire duct system, causing the HVAC to work harder and accumulate contamination faster. Replacing the filter immediately before a professional cleaning also ensures the system has a fresh filter to capture the fine particulates disturbed during the cleaning process. Read our full guide on how to do household air duct cleaning for a complete DIY maintenance walkthrough. What DIY can’t do is what makes professional cleaning necessary: the interior of the main trunk lines, branch ducts running through walls and ceilings, and the duct surfaces accessible only with commercial-grade vacuum equipment and rotary brush systems. This is where the professional process begins where DIY ends. The Professional Air Duct Cleaning Process: Step by Step Professional duct cleaning is a multi-phase process, not a single pass with a vacuum. Each phase addresses a different component of the system and contributes to the overall result. Here’s what a legitimate, thorough professional duct cleaning involves. Phase 1: Pre-Cleaning Inspection and Assessment Before any equipment enters the system, a professional technician inspects the duct system to understand what they’re working with: This inspection step is what separates a professional clean from a low-quality service. Companies that don’t inspect before cleaning can’t tailor the process to the specific system, and may miss sections or use inappropriate technique on damaged ductwork. Phase 2: System Preparation and Negative Pressure Setup Professional duct cleaning uses negative pressure, a powerful vacuum connected to the duct system that creates suction throughout the network during the cleaning process. This is the element that makes professional cleaning categorically different from any DIY approach. The negative pressure vacuum, typically truck-mounted or a high-powered portable commercial unit, is connected to the main trunk line or a supply register near the air handler. When activated, it creates suction throughout the entire connected duct system. This suction serves two critical functions: Registers throughout the home are covered with foam plugs or tape during this phase to concentrate the negative pressure and prevent air from bypassing the cleaning process through open vents. Phase 3: Rotating Brush Agitation of Branch Ducts With negative pressure established throughout the system, technicians work systematically through each supply and return duct branch using a rotating brush system inserted through the register openings. The rotating brush, driven by a flexible cable that can navigate duct bends and transitions, physically agitates the accumulated debris on the interior duct surface. This agitation serves a purpose that suction alone can’t achieve: debris that has compacted and adhered to duct walls over years of accumulation needs mechanical disturbance to become mobile enough for the vacuum to extract. Different brush types for different situations: Technicians work each branch duct from the register end toward the trunk line, ensuring agitation debris moves in the direction of the negative pressure vacuum rather than toward the living space. Phase 4: Trunk Line Cleaning The main supply and return trunk lines, the largest duct sections that connect the air handler to the branch duct network, carry the highest volume of air and accumulate significant debris over time. They’re also the sections that require the most powerful agitation and extraction equipment to clean effectively. Trunk line cleaning uses the same rotating brush principle as branch cleaning but with larger brush heads appropriate for the wider duct dimensions. The negative pressure vacuum is positioned for maximum extraction efficiency during this phase. On older or damaged flex duct sections in the trunk line, technicians assess whether aggressive brush agitation could worsen existing damage and adjust technique accordingly, sometimes using air whip agitation tools that loosen debris with compressed air bursts rather than mechanical contact on fragile sections. Phase 5: Air Handler and Coil Cleaning This is the component most commonly skipped by lower-quality duct cleaning services, and one of the most important for both air quality and HVAC efficiency. Air handler interior cleaning addresses the blower compartment and associated surfaces inside the air handler cabinet. The blower wheel, the fan that moves air through the entire system, accumulates a coating of fine debris over time that reduces its efficiency and becomes a source of particles entering the clean airstream. Cleaning the blower wheel and interior cabinet surfaces removes this accumulation. Evaporator coil cleaning is the highest-impact component for air quality and system efficiency. The evaporator coil, where refrigerant absorbs heat from the return air, has a fin surface that collects debris, dust, and in humid DFW conditions, mold growth. A dirty coil reduces heat transfer efficiency making the system work harder to cool the home, provides a surface for mold spore growth that then distributes
Read more
Parents Should Know About Carpet Cleaning Safety

What Parents Should Know About Carpet Cleaning Safety

For parents of young children, particularly babies and toddlers who spend significant time on the floor, carpet cleaning raises legitimate safety questions. What’s in the cleaning solution? When is it safe for children to be back on the carpet? Is the professional product actually safer than what I’d buy at the store? At Clean Master Carpet Cleaning, we serve a lot of DFW families with young children and these questions come up regularly. The consistent answer from our experience: professional carpet cleaning with proper products and adequate drying is safe for children, often more so than DIY alternatives. Here’s the practical guide organized by what parents most commonly want to know. Before the Clean: What Goes Into Your Carpet The most common concern we hear from DFW parents is about cleaning solution chemistry, specifically whether professional carpet cleaning products leave behind residue that could harm a crawling baby or a toddler who puts their hands on the floor. Professional carpet cleaning solutions used by reputable companies, including the products Clean Master uses, are formulated to be extracted from the carpet during the cleaning process, not to remain in the fiber. The hot water extraction method injects solution into the carpet and immediately pulls it back out along with the loosened soil. What stays in the carpet after the machine’s extraction pass is primarily water, the solution itself is largely removed. This is meaningfully different from consumer spray cleaners applied to carpet and left in place. Spray-and-leave products are designed to sit in the fiber, which means their chemistry remains in direct contact with the carpet surface indefinitely, including during every subsequent crawl, sit, and roll a child takes on that floor. The counterintuitive reality: professionally cleaned carpet with properly extracted solution is often chemically cleaner for children than carpet treated with consumer spot cleaners, deodorizer sprays, and household products that aren’t designed to be rinsed out. What Makes a Carpet Cleaning Product Kid-Safe Not all carpet cleaning solutions are identical, and the question of what’s in the product is worth asking directly when you book any cleaning service. What to look for in a kid-safe carpet cleaning product: Clean Master uses professional-grade solutions appropriate for family homes. If you have specific sensitivities or preferences, a child with skin conditions, a crawling infant, or a household preference for minimal chemical products, let us know when booking and we can discuss the specific products we’ll use. Eco-Friendly and Natural Cleaning Options For parents who prefer the most minimal chemical approach, there are legitimate options, with honest expectations about what they achieve. What genuinely works with minimal chemistry: Hot water extraction with minimal solution: The mechanical action and heat of professional extraction removes significant soil even at reduced solution concentrations. For lightly soiled carpet in family rooms, this is a viable low-chemistry approach. Enzyme-based cleaners: For pet accidents and organic stains, enzyme cleaners use biological chemistry rather than synthetic surfactants. They break down organic compounds effectively and leave minimal non-organic residue. Read our guide on how to use enzyme cleaner on carpet for the right technique. They’re a particularly good fit for family homes where pet accidents and food spills are the primary cleaning challenge. Steam cleaning between professional visits: For maintenance between annual professional cleans, steam cleaning uses heat and water vapor with no added chemistry, producing a genuinely chemical-free surface clean. What natural DIY alternatives like vinegar and baking soda achieve is more limited than most internet resources suggest. They work on light surface odor and very mild soiling, but they’re not a substitute for professional extraction on a carpet that children use daily and that accumulates real soil load. A carpet that looks clean but hasn’t been professionally extracted in years may contain dust mite debris, pet dander, and embedded allergens that genuinely affect children’s respiratory health. Read our guide on how carpet cleaning reduces allergies in your home for the full picture on why extraction matters for family health. During the Clean: What to Do With Kids The safest approach during a professional carpet clean is to keep children out of the rooms being cleaned and away from the equipment and hoses running through the home. This is primarily a practical safety consideration, cleaning equipment is heavy, hoses create trip hazards, and the cleaning areas are wet. Clean Master’s standard appointment for a DFW family home takes 1.5 to 2.5 hours. Planning the appointment around a park trip, school hours, or a visit to family provides the most comfortable experience for both children and our technicians. If keeping children entirely out of the home isn’t practical, coordinate with our technician at the start of the appointment to identify which rooms are being cleaned in which order, so you can move children through the home as sections are completed and drying begins. After the Clean: When Is It Safe for Kids? This is the most important practical question, and the answer is simpler than most parents expect. The rule: carpet is safe for children when it’s fully dry. Fully dry means the carpet passes the hand-test, press the back of your hand firmly into the pile and confirm it feels room-temperature and dry, not cool or damp. For a professional Clean Master clean with air movers running, most DFW homes reach this point within 6 to 12 hours of the appointment. Read our guide on how long it takes carpet to dry after cleaning for a full breakdown by cleaning method. While the carpet is still damp: Once the carpet is fully dry, there’s no waiting period, the carpet is ready for normal use including unrestricted crawling, playing, and bare feet. Active drying tips to get children back on the carpet sooner: Frequently Asked Questions Is it safe to be in the house during carpet cleaning? For most adults, yes. For very young infants or children with significant respiratory sensitivities, being in a separate part of the home from the active cleaning, or out of the house entirely, is
Read more